A – PCIe Cards Installation Steps (continued)
16.
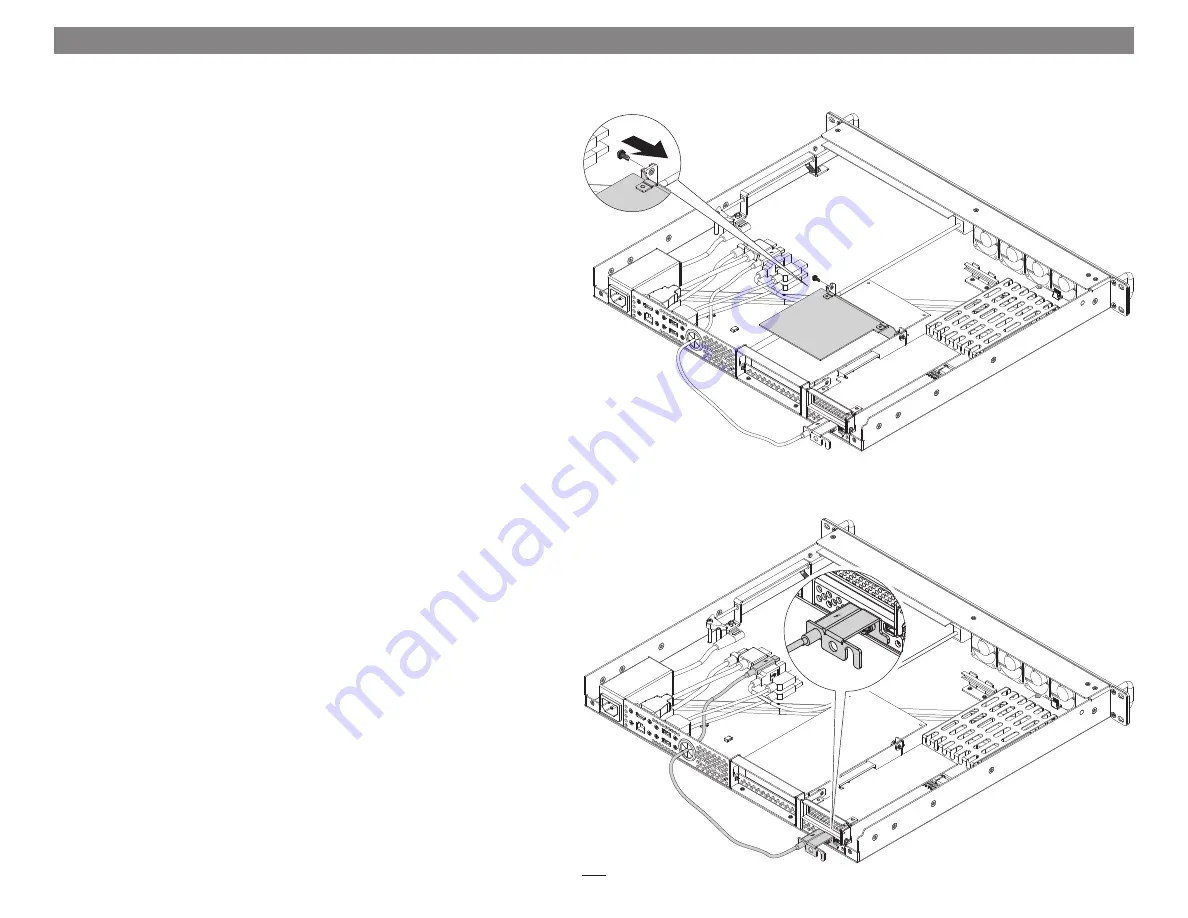
If you are installed a card with a daughter card into PCIe Slot 1,
remove the daughter card from its packaging, handling the card by its
edges and without touching any components. Otherwise skip to step
19.
17.
Turn the card components (or connector) side down, and then insert
the bottom tip of the PCIe bracket into the PCIe slots’ bracket, with
the top of the PCIe bracket wrapped around the daughter card bracket
as shown
(Figure 9)
.
18.
Secure the card to the daughter card bracket using the screw included
with it
(Figure 9)
.
19.
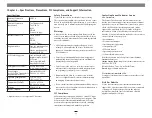
Connect one end of the supplied Thunderbolt cable to either one of
the xMac mini Server’s Thunderbolt ports, and then route the other
end of the cable through the external cable passthrough
(Figure 10)
.
If you are daisy chaining other Thunderbolt devices, plug in the other
Thunderbolt cable into the open Thunderbolt port on the xMac mini
Server.
20.
Route any external cables that need to be connected to the computer
(or PCIe cards) through the cable passthrough.
21.
Using a Phillips screwdriver, secure the Thunderbolt cable(s) to
the xMac mini Server with the supplied Thunderbolt cable lock
(Figure 10)
.
22.
If desired
,
secure the cables to the bottom of the xMac mini Server with
cable ties.
Chapter 3 – PCIe Cards, Computer, and xMac mini Server Installation Steps
Figure 9
Figure 10
8


