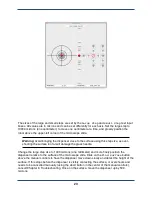
If it does not, the glass tip may be clogged with a small dust particle. To clear this, open the
dispenser control window again by selecting the menu item
Dispenser | Show dispenser
controls
. Click first on the
Dispense
button to drive the dispenser at its more gentle settings.
Wait for a few seconds. If that has not caused fluid to rise up within the dispenser, click on
Spray
. This will cause severe agitation within the fluid well and should dislodge any material
stuck in the dispenser. Once fluid starts to flow, click on the
Cancel
button to turn off the
ultrasonics. It should take 30 seconds to one minute to load a few microliters of solution into the
dispenser.
While solution is being loaded into the dispenser, there is time to set up the DXF pattern to be
dispensed on the surface. A DXF pattern is a representation of the fluid features (spots, lines,
etc.) that will be drawn onto the surface by the Microplotter system. DXF patterns can be
created and edited in a separate drawing programs.
Now that drawing of the new DXF pattern is finished, click on the SonoGuide window to switch
back to that application.
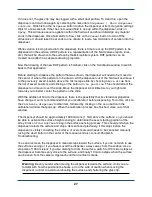
Before starting to dispense the pattern that was drawn, the dispenser will need to be moved to
the center of where this pattern is to be drawn. Lift the dispenser out of the fluid well and move it
to the previously saved location above the microscope slide by choosing
Above slide
from
the list of saved positions and clicking on the button
Go to position
. This should retract the
dispenser and move it over the slide. Move the dispenser 2-4 millimeters to your right and
towards you to better center the pattern on the slide.
With the addition of fluid to the dispenser, there is the possibility that its vibrational properties
have changed, so it’s recommended that you recalibrate it before dispensing. To do this, click on
the
Calibrate dispenser
toolbar item, followed by clicking on the
Scan
button in the
calibration window that pops up. When the calibration process has finished, close out of that
window.
The dispenser should be approximately 1000 microns (1 mm) above the surface, so you should
be able to activate the surface height sensing to determine the exact starting position of the
array. Click on
Find Surface
to begin the surface sensing process. This should end when the
dispenser detects the surface and stops. As mentioned previously, if this stops before the
dispenser is visibly contacting the surface, or overshoots and needs to be cancelled manually
(using the abort button in the center of the manual controls), consult Chapter 6,
Troubleshooting.
You can also move the dispenser in manual steps toward the surface, if you do not wish to use
the surface sensing or if you have moved the dispenser a ways away from the surface. Use a
step size of 1000 microns if you are starting far from the surface, switch to 100 micron steps as
the dispenser becomes very close to the surface, and finally 10 micron steps when the surface
can be seen from the camera. Approach until fluid contact is made.
Warning
: Be very careful when moving the dispenser towards the surface. Until you are
familiar with how the positioner behaves, err on the side of caution when moving the
dispenser in order to avoid overshooting the surface and shattering the glass tip.
27
Summary of Contents for MICROPLOTTER II
Page 1: ...MICROPLOTTER II MANUAL REVISION 2 2 ...
Page 2: ...SONOPLOT INC 3030 LAURA LANE SUITE 120 MIDDLETON WI 53562 608 824 9311 CONTACT SONOPLOT COM 2 ...
Page 4: ...Dispenser refurbishing 59 Revision History 61 4 ...
Page 6: ......
Page 10: ......
Page 21: ...Fully installed Microplotter II system 19 ...
Page 22: ......
Page 58: ......
Page 62: ......
Page 64: ......
Page 66: ...60 ...


