Chapter 9: The Sonos® Controller 100
9-27
Line-In
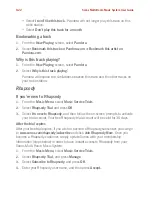
From the
Music
menu, select
Line-In Sources
and press
OK
.
• To play music from this source, highlight it and press
OK
.
• To change the name of the component, highlight it and select
Edit Name
.
Choose a new name from the list, and press
OK
.
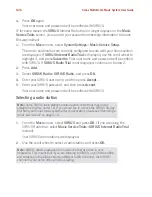
• To change the line-in level for this component, highlight it and select
Edit Line
Level
. Choose the line-in level appropriate for this device, and press
OK
.
A default (typical) line-in level is automatically assigned when you select a
source name. If the volume sounds too low, you can select a higher line level for
this device. You may experience clipping at higher volume levels if you set the
level too high.
To change the line-in encoding for these components, see "Line-In encoding" on
page 9-34.
Clock and Alarms
This section discusses how to use the clock and alarms features on a Sonos
Controller 100. For help using the Sonos Controller for Mac or PC, go to "Clock and
Alarms" on page 5-4. For help using the Sonos Controller 200, go to "Clock and
Alarms" on page 7-7.
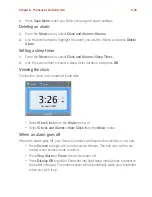
Setting date and time
1.
From the
Music
menu, select
Clocks and Alarms
.
2.
Select
Date and Time Settings
.
3.
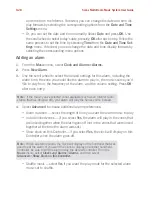
Choose one of the following options:
• Select
Time Zone.
Use the scroll wheel to select your time zone from the list,
and then press
OK.
Next, select
Date
and use the scroll wheel to set today’s
date, pressing
OK
after each entry. If desired, you can change the date and
time display formats by selecting the corresponding options from the
Date and
Time Settings
menu.
• Or, select
Select Date and Time from the Internet,
and then press
OK
. Select
On
or
Off
. When this is
on
, your Sonos system will periodically update the date

