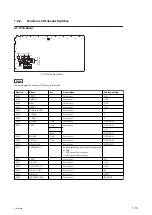
1-11-3. Front Side (HKCU1001/1003)
1.
Loosen the two coin screws, and open the front panel. (Refer to
“4-3-1. Removal and Installation of Front
2.
Insert the EN-159A board or EN-159B board into slot 3.
Notes
• Put the board on the groove at the bottom of the slot and then push it straight.
• Check that the board is securely connected to the MB-1181 board.
1 2 3
Slot
EN-159A board (HKCU1001)
EN-159B board (HKCU1003)
3.
Close the front panel and secure it with two coin screws.
HDCU2500
1-26
Summary of Contents for 10001
Page 6: ......
Page 12: ......
Page 14: ......
Page 25: ...1 5 Outside Dimensions HD CAMERA CONTROL UNIT 1 5 200 1 3 7 1 4 7 2 1 9 Unit mm HDCU2500 1 11 ...
Page 118: ......
Page 148: ......
Page 162: ......
Page 264: ......
Page 369: ... B SIDE SUFFIX 11 EN 159B EN 159A HDCU2500 9 13 ...
Page 374: ...PS 778D00 B SIDE SUFFIX 11 HDCU2500 9 18 ...
Page 392: ...HDCU2500 SY HDCU2500 CE J E 9 968 889 01 Sony Corporation Printed in Japan 2012 1 08 2012 ...


