background image

92

US

To control an LD player

To control a video CD player

To control a VCR

* If an AIWA VCR does not work even though you 

enter the code for AIWA, enter the code for Sony 
instead.

To control a DVD player

To control a DVD recorder

Maker

Code(s)

SONY

601, 602, 603

PIONEER

606

Maker

Code(s)

SONY

605

Maker

Code(s)

SONY

701, 702, 703, 704, 
705, 706

AIWA*

710, 750, 757, 758

AKAI

707, 708, 709, 759

BLAUPUNKT

740

EMERSON

711, 712, 713, 714, 
715, 716, 750

FISHER

717, 718, 719, 720

GENERAL ELECTRIC 
(GE)

721, 722, 730

GOLDSTAR/LG

723, 753

GRUNDIG

724

HITACHI

722, 725, 729, 741

ITT/NOKIA

717

JVC

726, 727, 728, 736

MAGNAVOX

730, 731, 738

MITSUBISHI/MGA

732, 733, 734, 735

NEC

736

PANASONIC

729, 730, 737, 738, 
739, 740

PHILIPS

729, 730, 731

PIONEER

729

RCA/PROSCAN

722, 729, 730, 731, 
741, 747

SAMSUNG

742, 743, 744, 745

SANYO

717, 720, 746

SHARP

748, 749

TELEFUNKEN

751, 752

TOSHIBA

747, 756

ZENITH

754

Maker

Code(s)

SONY

401, 402, 403

BROKSONIC

424

DENON

405

HITACHI

416

JVC

415, 423

MITSUBISHI

419

ORITRON

417

PANASONIC

406, 408, 425

PHILIPS

407

PIONEER

409, 410

RCA

414

SAMSUNG

416, 422

TOSHIBA

404, 421

ZENITH

418, 420

Maker

Code(s)

SONY

401, 402, 403

Summary of Contents for 3-289-450-45(1)

Page 1: ... 2008 Sony Corporation 3 289 450 12 1 Multi Channel AV Receiver Operating Instructions STR DG820 ...

Page 2: ...uipment has been tested and found to comply with the limits for a Class B digital device pursuant to Part 15 of the FCC Rules These limits are designed to provide reasonable protection against harmful interference in a residential installation This equipment generates uses and can radiate radio frequency energy and if not installed and used in accordance with the instructions may cause harmful int...

Page 3: ...I logo and High Definition Multimedia Interface are trademarks or registered trademarks of HDMI Licensing LLC XM Ready is a registered trademark of XM Satellite Radio Inc All rights reserved This product is manufactured under license from Neural Audio Corporation and THX Ltd Sony Corporation hereby grants the user a non exclusive non transferable limited right of use to this product under USA and ...

Page 4: ...DMI HDMI menu 53 Settings for the system SYSTEM menu 54 Enjoying Surround Sound Enjoying a pre programmed sound field 55 Enjoying the surround effect at low volume levels NIGHT MODE 61 Using only the front speakers 2CH STEREO 62 Listening to the sound without any adjustment ANALOG DIRECT 62 Resetting sound fields to the initial settings 63 Tuner Operations Listening to FM AM radio 63 Presetting ra...

Page 5: ...5US Using the Remote Programming the remote 90 Additional Information Glossary 95 Precautions 98 Troubleshooting 99 Specifications 104 Index 106 ...

Page 6: ... Press PUSH When you remove the cover keep it out of reach from children Status of the POWER button Off The receiver is turned off initial setting The ON STANDBY lamp lights off Press POWER to turn the receiver on You cannot turn the receiver on using the remote On Standby Press 1 on the remote to turn the receiver on or set it to the standby mode When you press POWER on the receiver the receiver ...

Page 7: ...MODE Press to select the input mode when the same components are connected to both digital and analog jacks page 82 I MASTER VOLUME Turn to adjust the volume level of all speakers at the same time page 37 38 40 41 J INPUT SELECTOR Turn to select the input source to playback page 38 64 67 71 82 87 89 K 2CH A DIRECT Press to select a sound field page 29 56 59 62 A F D MOVIE MUSIC L DIMMER Press repe...

Page 8: ... TrueHD signals Note When playing a Dolby Digital format disc be sure that you have made digital connections and that INPUT MODE is set to AUTO page 82 F Neural THX Lights up when the receiver applies Neural THX processing to input signals G DTS DTS ES DTS 96 24 DTS lights up when the receiver is decoding DTS signals DTS ES lights up when the receiver is decoding DTS ES signals DTS 96 24 lights up...

Page 9: ... DTS HD Master Audio signals DTS HD HI RES lights up when the receiver is decoding DTS HD High Resolution signals T LPCM Lights up when Linear PCM signals are detected U ANALOG Lights up when INPUT MODE is set to ANALOG or no digital signals are detected when INPUT MODE is set to AUTO page 82 V DMPORT Lights up when DIGITAL MEDIA PORT adapter is connected and DMPORT is selected Name Function W HDM...

Page 10: ...ICAL IN jacks Connectsto aDVD player etc The COAXIAL jack provides a better sound quality page 19 25 26 27 COAXIAL IN jack HDMI IN OUT jacks Connectsto aDVD player satellite tuner or a Blu ray disc player etc The image is output to a TV or a projector while the sound can be output from a TV or and speakers connected to this receiver page 23 B ANTENNA section FM ANTENNA jack Connects to the supplie...

Page 11: ...ts to a subwoofer page 17 F VIDEO AUDIO INPUT OUTPUT section AUDIO IN OUT jacks Connects to a VCR DVD player etc page 25 27 VIDEO IN OUT jacks G DMPORT section DMPORT jack Connects to a DIGITAL MEDIA PORT adapter page 86 White L Red R Black White L Red R Yellow Remote commander 1 2 3 4 5 6 7 8 9 0 10 ENT MEM 2CH A DIRECT A F D MOVIE MUSIC THEATER SYSTEM STANDBY 1 CLEAR 10 SHIFT CATEGORY TUNING TUN...

Page 12: ...e Sleep Timer function and the duration which the receiver turns off automatically H AMP MENU Press to display the menu to operate the receiver Name Function I V v B b After pressing AMP D press MENU HOME K for receiver operation then press V v B b to select the settings After pressing DVD BD TOP MENU O or DVD BD MENU O press V v B b to select the settings and then press to enter the selection Pre...

Page 13: ...ss to select the category mode for XM Radio page 71 Name Function M TV CH b Press TV C and then press TV CH to select preset TV channels PRESET b Press to select preset stations select preset channels of the VCR satellite tuner Blu ray disc recorder DVD player DVD VHS COMBO or DVD HDD COMBO N F1 F2 Press F1 or F2 to select a component DVD HDD COMBO F1 HDD mode F2 DVD mode DVD VHS COMBO F1 DVD mode...

Page 14: ...ECT Press to select sound field page 62 or to switch the audio of the selected input to analog signal without any adjustment page 62 Name Function X Input buttons Press one of the buttons to select the component you want to use When you press any of the input buttons the receiver turns on The buttons are factory assigned to control Sony components as follows You can program the remote to control n...

Page 15: ...ress TV C and then press ENT MEM Press SHIFT wg and then press ENT MEM to store a station during tuner operation CLEAR 10 Press SHIFT wg and then press CLEAR 10 to clear a mistake when you press the incorrect numeric button of the DVD player Blu ray disc recorder PSX satellite tuner DVD VHS COMBO or DVD HDD COMBO Press SHIFT wg and then press CLEAR 10 to select track numbers over 10 of the CD play...

Page 16: ... high fidelity reproduction of DVD software recorded sound in the Surround EX format if you connect one additional surround back speaker 6 1 channel or two surround back speakers 7 1 channel Example of a 7 1 channel speaker system configuration AFront speaker Left BFront speaker Right CCenter speaker DSurround speaker Left ESurround speaker Right FSurround back speaker Left GSurround back speaker ...

Page 17: ... b HSubwooferc AM M XM ANTENNA SAT IN DVD IN BD IN VIDEO 1 IN OUT HDMI CENTER FRONT A FRONT B L R L R L L R R COMPONENT VIDEO SAT IN DVD IN VIDEO 1 IN MONITOR OUT Y PB CB PR CR AUDIO OUT VIDEO OUT VIDEO 1 AUDIO IN VIDEO IN VIDEO OUT AUDIO IN VIDEO IN SAT AUDIO IN VIDEO IN DVD MONITOR IN TV IN CD CD R SPEAKERS AUDIO OUT 10 mm SURROUND BACK SUBWOOFER SPEAKERS SURROUND H F A B B E G AMonaural audio c...

Page 18: ...ound may not be output Note Before connecting the AC power cord mains lead make sure that metallic wires of the speaker cords are not touching each other between the SPEAKERS terminals After you have install and connect your speaker be sure to select the speaker pattern from SPEAKER menu page 44 Select the speaker pattern according to your speaker setting For details of each parameter see the tabl...

Page 19: ...NNA SAT IN DVD IN BD IN VIDEO 1 IN HDMI AUDIO OUT SUBWOOFER SPEAKERS SPEAKERS SURROUND BACK FRONT A FRONT B L R SURROUND L R L L R R COMPONENT VIDEO SAT IN DVD IN VIDEO 1 IN MONITOR OUT Y AUDIO OUT VIDEO OUT VIDEO 1 AUDIO IN VIDEO IN AUDIO IN VIDEO IN SAT AUDIO IN VIDEO IN DVD OUT IN SA CD CD CD R TV OPTICAL IN TV OUT CENTER PB CB PR CR MONITOR VIDEO OUT IN TV B A AOptical digital cord not supplie...

Page 20: ...us of the connection between the TV and the antenna aerial the image on the TV screen may be distorted In this case place the antenna aerial farther away from the receiver When connecting optical digital cords insert the plugs straight in until they click into place Do not bend or tie optical digital cords Tips To output the sound of the TV from the speakers connected to the receiver be sure to co...

Page 21: ...er or CD recorder L R DIGITAL DMPORT ASSIGNABLE OPTICAL OPTICAL IN VIDEO 1 IN COAXIAL DVD IN TV SAT IN DC5V 0 7A MAX AM FM XM ANTENNA SAT IN DVD IN BD IN VIDEO 1 IN OUT HDMI AUDIO OUT SUBWOOFER SPEAKERS SPEAKERS CENTER SURROUND BACK FRONT A FRONT B L R SURROUND L R L L R R COMPONENT VIDEO SAT IN DVD IN VIDEO 1 IN MONITOR OUT Y PB CB PR CR AUDIO OUT VIDEO OUT VIDEO 1 AUDIO IN VIDEO IN VIDEO OUT AUD...

Page 22: ...L ASSIGN page 83 The image quality depends on the connecting jack See the illustration that follows Select the connection according to the jacks on your components Notes Before connecting cords be sure to disconnect the AC power cord Be sure to turn on the receiver when the video and audio signals of a playback component are being output to a TV via the receiver Unless the power is turned on neith...

Page 23: ...or This receiver supports the Control for HDMI function For details see Control for HDMI page 77 Connecting components with HDMI jacks L R DIGITAL DMPORT ASSIGNABLE OPTICAL OPTICAL IN VIDEO 1 IN COAXIAL DVD IN TV SAT IN DC5V 0 7A MAX AM FM XM ANTENNA AUDIO OUT SUBWOOFER SPEAKERS SPEAKERS CENTER SURROUND BACK FRONT A FRONT B L R SURROUND L R L L R R COMPONENT VIDEO SAT IN DVD IN VIDEO 1 IN MONITOR ...

Page 24: ...er Audio CD are not input and output The multi stereo area audio signals of a Super Audio CD are not output Audio signals sampling frequency bit length etc transmitted from an HDMI jack may be suppressed by the connected component Check the setup of the connected component if the image is poor or the sound does not come out of a component connected via the HDMI cable Sound may be interrupted when ...

Page 25: ...sampling frequencies Connecting a DVD player L R DMPORT OPTICAL OPTICAL IN VIDEO 1 IN COAXIAL DVD IN TV SAT IN DC5V 0 7A MAX AM FM XM ANTENNA SAT IN DVD IN BD IN VIDEO 1 IN OUT HDMI AUDIO OUT SUBWOOFER SPEAKERS SPEAKERS CENTER SURROUND BACK FRONT A FRONT B L R SURROUND L R L L R R COMPONENT VIDEO SAT IN Y PB CB PR CR AUDIO OUT VIDEO OUT VIDEO 1 AUDIO IN VIDEO IN VIDEO OUT AUDIO IN SAT AUDIO IN VID...

Page 26: ...atellite tuner set top box L R DIGITAL DMPORT ASSIGNABLE OPTICAL IN VIDEO 1 IN COAXIAL DVD IN TV DC5V 0 7A MAX AM FM XM ANTENNA SAT IN DVD IN BD IN VIDEO 1 IN OUT HDMI AUDIO OUT SUBWOOFER SPEAKERS SPEAKERS CENTER SURROUND BACK FRONT A FRONT B L R SURROUND L R L L R R COMPONENT VIDEO SAT IN DVD IN VIDEO 1 IN MONITOR OUT Y PB CB PR CR AUDIO OUT VIDEO OUT VIDEO 1 AUDIO IN VIDEO IN VIDEO OUT AUDIO IN ...

Page 27: ...to place Do not bend or tie optical digital cords Connecting components with analog video and audio jack VIDEO 2 IN PORTABLE AV IN AUTO CAL MIC L R DIGITAL DMPORT ASSIGNABLE OPTICAL OPTICAL IN COAXIAL DVD IN TV SAT IN DC5V 0 7A MAX AM FM XM ANTENNA SAT IN DVD IN BD IN VIDEO 1 IN OUT HDMI AUDIO OUT SUBWOOFER SPEAKERS SPEAKERS CENTER SURROUND BACK FRONT A FRONT B L R SURROUND L R L L R R COMPONENT V...

Page 28: ...antenna aerial keep it as horizontal as possible L R DIGITAL DMPORT ASSIGNABLE OPTICAL OPTICAL IN VIDEO 1 IN COAXIAL DVD IN TV SAT IN DC5V 0 7A MAX XM ANTENNA SAT IN DVD IN BD IN VIDEO 1 IN OUT HDMI AUDIO OUT SUBWOOFER SPEAKERS SPEAKERS CENTER SURROUND BACK FRONT A FRONT B L R SURROUND L R L L R R COMPONENT VIDEO SAT IN DVD IN VIDEO 1 IN MONITOR OUT Y PB CB PR CR AUDIO OUT VIDEO OUT VIDEO 1 AUDIO ...

Page 29: ...OWER to turn on the receiver 3 Release the TONE MODE and 2CH A DIRECT after a few seconds After CLEARING appears on the display for a while CLEARED appears All the settings you have changed or adjusted are reset to the initial settings Connecting the AC power cord mains lead EAKERS SPEAKERS SURROUND BACK FRONT A FRONT B L R SURROUND L R L L R R AC power cord mains lead To the wall outlet Performin...

Page 30: ... the speaker system You can select the front speakers you want to drive Be sure to use the buttons on the receiver for this operation Press SPEAKERS OFF A B A B repeatedly to select the front speaker system you want to drive To turn off the speaker output Press SPEAKERS OFF A B A B repeatedly until the SP A SP B and SP A B indicators on the display do not light up ALL OFF appears on the display fo...

Page 31: ...connect the speakers page 16 17 The AUTO CAL MIC jack is used for the supplied optimizer microphone only Do not connect other microphones to this jack Doing so may damage the receiver and the microphone During the calibration the sound that comes out of the speakers is very loud The volume of the sound cannot be adjusted Pay attention to the presence of children or to the effect on your neighborho...

Page 32: ...e value to the maximum If you connect a subwoofer with an auto standby function set this function to off deactivated Note Depending on the characteristics of the subwoofer you are using the setup distance value may be further away from the actual position Performing Auto Calibration 1 2 3 4 5 6 7 8 9 0 10 ENT MEM 2CH A DIRECT A F D MOVIE MUSIC THEATER SYSTEM STANDBY 1 CLEAR 10 SHIFT TV CATEGORY TU...

Page 33: ... ends a beep sounds and the measurement result appears on the display 2 Press AMP and then press V v repeatedly to select the item Then press Measurement for Display Speaker existence TONE Speaker gain distance frequency response T S P Subwoofer gain and distance WOOFER Confirming saving the measurement results Measurement result Display Explanation When the measurement process completes properly ...

Page 34: ... the settings if you want When you select PHASE INFO You can check the phase of each speaker in phase out of phase Press V v repeatedly to select a speaker then press to return to step 2 in Confirming saving the measurement results xxx represent a speaker channel F Front FL Front left FR Front right CNT Center S Surround SL Surround left SR Surround right SB Surround back SBL Surround back left SB...

Page 35: ...minals The surround back speaker is connected only to the SPEAKERS SURROUND BACK R terminals When you connect only one surround back speaker connect it to the SPEAKERS SURROUND BACK L terminals W xxx 40 The measurement has completed However the noise level is high You may be able to perform the measurement properly if you try it again even though the measurement cannot be performed in all environm...

Page 36: ...2 and Overview of the menus page 43 x A CAL START Auto Calibration x CAL TYPE Calibration type FULL FLAT Makes the measurement of frequency from each speaker flat ENGINEER Sets the frequency characteristics to a set that matches that of the Sony listening room standard FRONT REF Adjusts the characteristics of all speakers to match the characteristics of the front speaker OFF Sets the Auto Calibrat...

Page 37: ...eps 1 to 4 to select OFF You can also press any input buttons The test tone turns off When a test tone is not output from the speakers The speaker cords may not be connected securely The speaker cords may have the short circuit problem When a test tone is output from a different speaker than the speaker indicator showed in the front panel display The speaker pattern to the connected speaker is not...

Page 38: ...CD CD TUNER TV VOL MASTER VOL TV CH PRESET MENU BD DVD RETURN EXIT OPTIONS TOOLS HOME DISPLAY AMP MENU O DVD INPUT MODE SLEEP NIGHT MODE AMP 1 3 MUTING Selected input Display Components that can be played back VIDEO 1 VIDEO 1 VCR etc connected to the VIDEO 1 jack VIDEO 2 VIDEO 2 Camcorder video game etc connected to the VIDEO2 PORTABLEAV IN jack BD BD Blu ray disc player etc connected to the BD ja...

Page 39: ...ss MUTING on the remote The muting function will be canceled when you do the following Press MUTING again Increase the volume Turn off the receiver To avoid damaging your speakers Before you turn off the receiver be sure to turn down the volume level ...

Page 40: ... NIGHT MODE RM SET UP AMP 5 5 3 2 3 Notes The operation is described for a Sony Super Audio CD player Refer to the operating instructions supplied with the Super Audio CD player or CD player Tips You can select the sound field to suit the music See page 60 for details Recommended sound fields Classical HALL Jazz JAZZ Live concert CONCERT You can listen to the sound that was recorded in the 2 chann...

Page 41: ...disc player Check the following if you cannot listen to multi channel sound Be sure this receiver is connected to the DVD player Blu ray disc player via a digital connection Be sure the digital audio output of the DVD player Blu ray disc player is set up properly Tips Select the audio format of the disc to be played back if necessary You can select the sound field to suit the movie or music See pa...

Page 42: ...rameter 6 Press V v repeatedly to select the setting you want The setting is entered automatically To return to the previous display Press B or RETURN EXIT O To exit the menu Press MENU HOME or AMP MENU Note Some parameters and settings may appear dimmed on the display This means that they are either unavailable or fixed and unchangeable Amplifier Operations 2CH A DIRECT A F D MOVIE MUSIC AUTO CAL...

Page 43: ...SBL SR SBR SR SL FR SR FR SL FL FR CNT FR FL CNT OFF Front left speaker levelc FL LEVEL FL 10 dB to FL 10 dB 0 5 dB per step 0 dB Front right speaker levelc FR LEVEL FR 10 dB to FR 10 dB 0 5 dB per step 0 dB Center speaker levelc CNT LEVEL CNT 20 dB to CNT 10 dB 0 5 dB per step 0 dB Surround left speaker levelc SL LEVEL SL 20 dB to SL 10 dB 0 5 dB per step 0 dB Surround right speaker levelc SR LEV...

Page 44: ...right speaker distancea c SR DIST SR 3 3 to SR 32 9 1 inch step SR 9 10 Surround back speaker distancea c SB DIST SB 3 3 to SB 32 9 1 inch step SB 9 10 Surround back left speaker distancea c SBL DIST SBL 3 3 to SBL 32 9 1 inch step SBL 9 10 Surround back right speaker distancea c SBR DIST SBR 3 3 to SBR 32 9 1 inch step SBR 9 10 Subwoofer distancea c SW DIST SW 3 3 to SW 32 9 1 inch step SW 9 10 D...

Page 45: ...step TREBLE 0 dB TUNER TUNER page 51 FM station receiving modea FM MODE STEREO MONO STEREO Naming preset stationsa NAME IN For details see Naming preset stations page 67 XM antenna aiming modee XM ANT AIM For details see Aiming the XM antenna aerial page 69 XM Radio IDe XM ID For details see Checking the XM Radio ID page 69 AUDIO AUDIO page 52 Synchronizes audio with video outputa A V SYNC 0 ms to...

Page 46: ...L SR SL FL SBL SL SBR SBL SR SBR SR SL FR SR FR SL CNT FR FL CNT Lets you output the test tone sequentially from adjacent speakers Some items may not be displayed depending on the setting of the speaker pattern x P AUDIO Phase Audio OFF FL SR SL FL SBL SL SBR SBL SR SBR SR SL FR SR FR SL CNT FR FL CNT Lets you output front 2 channel source sound instead of the test tone sequentially from adjacent ...

Page 47: ...speakers SPEAKER menu You can use the SPEAKER menu to set the size and distance of the speakers connected to this receiver Select SPEAKER in the amplifier menus For details on adjusting the parameters see Navigating through menus page 42 and Overview of the menus page 43 SPEAKER menu parameters x SP PATTERN Speaker pattern Lets you set the number of the speakers connected to this receiver It shoul...

Page 48: ... channel bass frequencies from the subwoofer or other speaker that is set to LARGE Tip The LARGE and SMALL settings for each speaker determine whether the internal sound processor will cut the bass signal from that channel When the bass is cut from a channel the bass redirection circuitry sends the corresponding bass frequencies to the subwoofer or other LARGE speakers However since bass sounds ha...

Page 49: ...one between the listening position and the front speaker A Place the speakers so that the difference in the length of B in the following diagram is no more than 5 feet closer than the length of A Example Adjust the distance B to 15 feet or more when the distance A is 20 feet Also the distance between the surround speakers surround back speakers and the listening position C cannot be more than 15 f...

Page 50: ...u can use the SURROUND menu to select the sound field you want for your listening pleasure Select SURROUND in the amplifier menus For details on adjusting the parameters see Navigating through menus page 42 and Overview of the menus page 43 SUR menu parameters x S F SELECT Sound field selection Lets you select the sound field you want For details see Enjoying Surround Sound page 55 Note The receiv...

Page 51: ...e tuner TUNER menu You can use the TUNER menu to set the FM station receiving mode name preset stations and check XM Radio status Select TUNER in the amplifier menus For details on adjusting the parameters see Navigating through menus page 42 and Overview of the menus page 43 TUNER menu parameters x FM MODE FM station receiving mode STEREO This receiver will decode the signal as stereo signal when...

Page 52: ... during digital broadcast This feature only functions for Dolby Digital sources MAIN SUB Sound of the main language will be output through the front left speaker and sound of the sub language will be output through the front right speaker simultaneously MAIN Sound of the main language will be output SUB Sound of the sub language will be output x DEC PRIO Digital audio input decoding priority Lets ...

Page 53: ... not output from the TV s speakers when AUDIO OUT is set to AMP TV AMP The sound is output from TV s speaker and the speakers connected to the receiver Notes The sound quality of the playback component depends on the TV s sound quality such as the number of channels and the sampling frequency etc When the TV has stereo speakers the sound output from the receiver is also stereo as that of the TV ev...

Page 54: ...SYSTEM in the amplifier menus For details on adjusting the parameters see Navigating through menus page 42 and Overview of the menus page 43 SYSTEM menu parameters x NAME IN Naming inputs Lets you set the name of inputs For details see Naming inputs page 87 x DIMMER Brightness of the display Lets you adjust the brightness in 3 steps ...

Page 55: ...cy of more than 96 kHz are played back at 96 kHz or 88 2 kHz Enjoying Surround Sound When connecting Blu ray disc players and other next generation HD players Audio format Maximumnumber of channels Connection of the playback component and the receiver COAXIAL OPTICAL HDMI Dolby Digital 5 1ch a a Dolby Digital EX 6 1ch a a Dolby Digital Plus a 7 1ch a Dolby TrueHD a 7 1ch a DTS 5 1ch a a DTS ES 6 1...

Page 56: ...DE A F D A F D mode Display Multi channel audio after decoding Effect A F D Auto A F D AUTO Detecting automatically Presents the sound as it was recorded encoded without adding any surround effects However this receiver will generate a low frequency signal for output to the subwoofer when there is no LFE signals Enhanced surround mode E SURROUND Depends on selected enhanced surround mode For detai...

Page 57: ... repeatedly to select E SUR MODE then press or b 4 Press V v repeatedly to select the enhanced surround mode you want then press or b 5 Press MENU HOME or AMP MENU to exit the menu 6 Press A F D repeatedly to select E SURROUND The enhanced surround mode you have selected in E SUR MODE menu will be applied Selecting enhanced surround mode 2CH A DIRECT A F D MOVIE MUSIC AUTO CAL MENU RETURN EXIT OPT...

Page 58: ...nnel Performs Dolby Pro Logic IIx decoding Neo 6 Cinema NEO6 CIN 7 channel Performs DTS Neo 6 Cinema mode decoding Neo 6 Music NEO6 MUS 7 channel Performs DTS Neo 6 Music mode decoding This setting is ideal for normal stereo sources such as CDs Neural THX NEURAL THX 7 channel Next generation of Neural THX Surround In addition to stereo enhancement processing and pure discrete 5 1 surround sound no...

Page 59: ...ore than 48 kHz are being received Dolby TrueHD signals with a sampling frequency of more than 48 kHz are being received The beginning of the sound stream may be dropped out when Neural THX processing is turned on or off Tips You can identify the encoding format of DVD software etc by looking at the logo on the package Dolby Pro Logic IIx decoding is effective when a multi channel signal is input ...

Page 60: ...round speakers Music Hall HALL Reproduces the acoustics of a classical concert hall Jazz Club JAZZ Reproduces the acoustics of a jazz club Live concert CONCERT Reproduces the acoustics of a 300 seat live house Stadium STADIUM Reproduces the feeling of a large open air stadium Sports SPORTS Reproduces the feeling of sports broadcasting Portable Audio Enhancer PORTABLE Reproduces a clear enhanced so...

Page 61: ...s or if the front or surround speakers are set to SMALL the sound field for movie is selected or PORTABLE is selected Tip Sound fields with DCSmarks use DCS technology For details on Digital Cinema Sound DCS see Glossary page 95 To turn off the surround effect for movie music mode Press 2CH A DIRECT to select 2CH ST or press A F D repeatedly to select A F D AUTO Enjoying the surround effect at low...

Page 62: ...o enjoy high quality analog sources When using this function only the volume and front speaker balance can be adjusted 1 Press one of the input buttons to select the input you want to listen to in analog audio You can also use the INPUT SELECTOR on the receiver 2 Press 2CH A DIRECT repeatedly to select A DIRECT The analog audio is output To cancel ANALOG DIRECT Press 2CH A DIRECT again You can als...

Page 63: ...ged page 104 1 Press TUNER repeatedly to select the FM or AM band 2 Press TUNING or TUNING Press TUNING to scan from low to high press TUNING to scan from high to low The receiver stops scanning whenever a station is received SPEAKERS OFF A B A B PHONES VIDEO 2 IN PORTABLE AV IN VIDEO L AUDIO R AUTO CAL MIC MEMORY ENTER 2CH A DIRECT A F D MOVIE MUSIC DIMMER INPUT SELECTOR TONE MODE ON STANDBY TUNI...

Page 64: ...station directly by using the numeric buttons 1 Press TUNER repeatedly to select the FM or AM band You can also use INPUT SELECTOR on the receiver 2 Press D TUNING 3 Press SHIFT 4 Press the numeric buttons to enter the frequency Example 1 FM 102 50 MHz Select 1 b 0 b 2 b 5 Example 2 AM 1 350 kHz Select 1 b 3 b 5 b 0 Direct tuning 1 2 3 4 5 6 7 8 9 0 10 ENT MEM 2CH A DIRECT A F D MOVIE MUSIC SYSTEM...

Page 65: ...an preset up to 30 FM stations and 30 AM stations Then you can easily tune in the stations you often listen to 1 Press TUNER repeatedly to select the FM or AM band You can also use INPUT SELECTOR on the receiver Presetting radio stations 1 2 3 4 5 6 7 8 9 0 10 ENT MEM 2CH A DIRECT A F D MOVIE MUSIC CLEAR 10 SHIFT TV CATEGORY TUNING TUNING DISC SKIP D TUNING CATEGORY MODE AUTO CAL m M X x MUTING VI...

Page 66: ...ected preset number 7 Repeat steps 1 to 6 to preset another station 1 Press TUNER repeatedly to select the FM or AM band 2 Press PRESET or PRESET repeatedly to select the preset station you want Each time you press the button you can select a preset station as follows You can also press SHIFT and then press the numeric buttons to select the preset station you want Then press ENT MEM to enter the s...

Page 67: ...e procedure given in To create an index name below To create an index name 1 Use V v B b to create an index name Press V v to select a character then press B b to move the cursor to the next position If you made a mistake Press B b until the character you want to change flashes then press V v to select the correct character Tips You can select the character type as follows by pressing V v Alphabet...

Page 68: ...ilable for XM radio receivers by calling 1 800 XMRADIO U S residents and 1 877 GETXMSR Canadian residents Only available in the 48 contiguous United States and Canada 2008 XM Satellite Radio Inc All rights reserved XM Ready Subscriptions Once you have installed the XM Mini Tuner and Home Dock inserted the XM Mini Tuner connected the XM Mini Tuner and Home Dock to your XM Ready audio system and ins...

Page 69: ... select TUNER 4 Press or b to enter the menu 5 Press V v repeatedly to select XM ANT AIM 6 Press or b to enter the parameter 7 While checking the parameter aim your antenna to where the best reception will be received For details on the parameter Signal strength page 70 Checking the XM Radio ID L R DIGITAL DMPORT ASSIGNABLE OPTICAL OPTICAL IN VIDEO 1 IN COAXIAL DVD IN TV SAT IN DC5V 0 7A MAX AM FM...

Page 70: ...hannel You can also press TUNING MODE on the receiver to select AUTO and then turn TUNING to select a channel Signal strength Signal type Satellite Terrestrial Good S 3 T 3 Marginal S 2 T 2 Weak S 1 T 1 None S 0 T 0 Checking the XM Radio ID 2CH A DIRECT A F D MOVIE MUSIC CATEGORY TUNING TUNING DISC SKIP D TUNING CATEGORY MODE AUTO CAL m M X x MENU RETURN EXIT OPTIONS TOOLS HOME DISPLAY AMP MENU O ...

Page 71: ...lected 4 Press TUNING or TUNING to select the channel You can also press TUNING MODE on the receiver to select AUTO and then turn TUNING to select the channel Notes When you select a channel in the ONE CAT mode the channel you selected may not be the one in the category you want This is because one channel may belong to more than one category If you press CATEGORY or CATEGORY in the ALL CAT mode t...

Page 72: ...always displayed at the right end of the display Selecting channels by inputting the channel number directly DIRECT TUNING 1 2 3 4 5 6 7 8 9 0 10 ENT MEM 2CH A DIRECT A F D MOVIE MUSIC THEATER SYSTEM STANDBY 1 CLEAR 10 SHIFT TV CATEGORY TUNING TUNING DISC SKIP D TUNING CATEGORY MODE AUTO CAL m M X x VIDEO 1 VIDEO 2 BD SAT TV XM DMPORT SA CD CD TUNER MENU AV 1 RETURN EXIT OPTIONS TOOLS HOME DISPLAY...

Page 73: ... ENTER on the receiver 5 Press the numeric buttons to select a preset number You can also select the number by pressing PRESET or PRESET You can also turn TUNING on the receiver Preset number from 1 to 30 are available and channel 1 is preset for all the preset numbers when you purchase the receiver 6 Press ENT MEM You can also press MEMORY ENTER on the receiver MEM lights off 7 Repeat steps 2 to ...

Page 74: ...You can select preset channels from 1 to 30 Note The preset channel information will be updated depending on the service provided by XM Satellite Radio Inc that you have subscribed to Selecting the channel by using the preset numbers 1 2 3 4 5 6 7 8 9 0 10 ENT MEM 2CH A DIRECT A F D MOVIE MUSIC CLEAR 10 CATEGORY TUNING TUNING DISC SKIP D TUNING CATEGORY MODE AUTO CAL m M X x MUTING VIDEO 1 VIDEO 2...

Page 75: ...a installation information LOADING The XM Mini Tuner is acquiring audio or program information from the XM satellite signal This message can also appear if the signal is too weak This message should disappear when the signal is strong If you often see this message reposition the XM antenna for better signal reception To optimize the antenna position see Aiming the XM antenna aerial page 69 OFF AIR...

Page 76: ...ber Enter a number from 1 to 30 SIG GOOD The signal strength is good Adjust the antenna so that the signal is as strong as possible For details see Aiming the XM antenna aerial page 69 SIG MARG The signal strength is marginal SIG WEAK The signal strength is weak SIG NONE There is no signal ...

Page 77: ...eakers connected to the receiver System Power Off When you turn off the TV the receiver and connected components are also turned off simultaneously Control for HDMI is a mutual control function standard used by HDMI CEC Consumer Electronics Control for HDMI High Definition Multimedia Interface The Control for HDMI function does not work in the following cases When you connect the receiver to a com...

Page 78: ...AX AM FM XM ANTENNA AUDIO OUT SUBWOOFER SPEAKERS SPEAKERS CENTER SURROUND BACK FRONT A FRONT B L R SURROUND L R L L R R COMPONENT VIDEO SAT IN DVD IN VIDEO 1 IN MONITOR OUT Y PB CB PR CR AUDIO OUT VIDEO OUT VIDEO 1 AUDIO IN VIDEO IN VIDEO OUT AUDIO IN VIDEO IN SAT AUDIO IN VIDEO IN DVD MONITOR IN OUT IN SA CD CD CD R OPTICAL IN TV SAT IN DVD IN BD IN VIDEO 1 IN OUT HDMI TV Satellite tuner Set top ...

Page 79: ... and TV to on See To set Control for HDMI page 80 For details on setting the TV refer to the operating instructions of the TV 4 Select the HDMI input of the receiver and TV to match the HDMI input of the connected component so that the image from the connected component is displayed 5 Set the Control for HDMI function for the connected component to on If the Control for HDMI function for the conne...

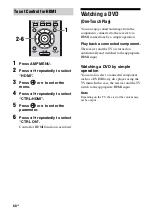
Page 80: ...a HDMI connections by a simple operation Play back a connected component The receiver and the TV are turned on automatically and switched to the appropriate HDMI input Watching a DVD by simple operation You can also select a connected component such as a DVD Blu ray disc player using the TV menu In this case the receiver and the TV switch to the appropriate HDMI input Note Depending on the TV the ...

Page 81: ... to on and the TV sound will output from the speakers connected to the receiver However if you turn off the receiver the sound will output from the TV speakers You can adjust the receiver s volume when you adjust the TV volume Notes If System Audio Control does not function according to your TV setting refer to the operating instructions of the TV When CTRL HDMI is set to CTRL ON the AUDIO OUT set...

Page 82: ...s to both digital and analog input jacks on the receiver you can fix the audio input mode to either of them or switch from one to the other depending on the type of material you intend to watch 1 Turn INPUT SELECTOR on the receiver to select the input You can also use the input buttons on the remote 2 Press INPUT MODE repeatedly on the receiver to select the audio input mode The selected audio inp...

Page 83: ... ASSIGN You can reassign digital audio input that has OPTICAL or COAXIAL VIDEO 1 IN SAT IN DVD IN signals to another input when they are not currently being used For example to output the sound source for DVD player using the OPTICAL IN jack on the receiver then Connect the optical output jack of the DVD player to the OPTICAL VIDEO 1 IN jack of the receiver Assign VD1 OPT to DVD in the D ASSIGN se...

Page 84: ...io input The initial setting is marked with an underscore Notes You cannot reassign more than one digital audio input to the same input You cannot use the digital audio input for the original input when it is reassigned to another input When you assign the digital audio input the INPUT MODE setting may change automatically page 82 Digital audio input Display Assignable inputs Display OPTICAL VIDEO...

Page 85: ...from the connected component on the receiver For details refer to the operating instructions supplied with the DIGITAL MEDIA PORT adapter Notes Do not connect an adapter other than the DIGITAL MEDIA PORT adapter Do not connect or disconnect the DIGITAL MEDIA PORT adapter while the receiver is turned on Depending on the DIGITAL MEDIA PORT adapter video output may not be possible The DIGITAL MEDIA P...

Page 86: ...e DMPORT connections firmly insert the connector straight in As the connector of the DIGITAL MEDIA PORT adapter is fragile be sure to handle with care when placing or moving the receiver Connecting the DIGITAL MEDIA PORT adapter L R DIGITAL ASSIGNABLE OPTICAL OPTICAL IN VIDEO 1 IN COAXIAL DVD IN TV SAT IN AM FM XM ANTENNA SAT IN DVD IN BD IN VIDEO 1 IN OUT HDMI AUDIO OUT SUBWOOFER COMPONENT VID SA...

Page 87: ... MP3 or other compressed music using a portable audio source you can enhance the sound Press MUSIC repeatedly to select PORTABLE page 60 Naming inputs You can enter a name of up to 8 characters for inputs and display it on the receiver s display This is convenient for labeling the jacks with the names of the connected components 1 Press one of the input buttons to select the input you want to crea...

Page 88: ...itle t Signal strength t Sound field currently applied t Volume level Index name appears only when you have assigned one to the input or preset station page 67 87 Index name does not appear when only blank spaces have been entered or it is the same as the input name Note Character or marks may not be displayed for some languages Using the Sleep Timer You can set the receiver to turn off automatica...

Page 89: ...ust the recording level 4 Start recording on the recording component then start playback on the playback component Note Sound adjustments do not affect the signal output from the SA CD CD CD R OUT jacks 1 Press one of the input buttons to select the playback component You can also use INPUT SELECTOR on the receiver 2 Prepare the playback component for playing For example insert the video tape you ...

Page 90: ...spectively 4 Press ENT MEM Once the numeric code has been verified the RM SET UP indicator slowly flashes twice and the remote automatically exits the programming mode 5 Repeat steps 1 to 4 to control other components Notes The indicator turns off while a valid button is pressed In step 2 if you want to change to other input press SHIFT and then press the new input buttons you want In step 2 if yo...

Page 91: ...nding on the model and year of the component more than one numeric code may be assigned to a component If you fail to program your remote using one of the codes try using other codes Notes The numeric codes are based on the latest information available for each brand There is a chance however that your component will not respond to some or all of the codes All of the input buttons on this remote m...

Page 92: ...718 719 720 GENERAL ELECTRIC GE 721 722 730 GOLDSTAR LG 723 753 GRUNDIG 724 HITACHI 722 725 729 741 ITT NOKIA 717 JVC 726 727 728 736 MAGNAVOX 730 731 738 MITSUBISHI MGA 732 733 734 735 NEC 736 PANASONIC 729 730 737 738 739 740 PHILIPS 729 730 731 PIONEER 729 RCA PROSCAN 722 729 730 731 741 747 SAMSUNG 742 743 744 745 SANYO 717 720 746 SHARP 748 749 TELEFUNKEN 751 752 TOSHIBA 747 756 ZENITH 754 Ma...

Page 93: ...517 520 540 544 554 566 NORDMENDE 530 558 NOKIA 521 522 573 575 PANASONIC 509 524 553 559 572 PHILIPS 515 518 557 570 571 PHILCO 503 504 514 517 518 PIONEER 509 525 526 540 551 555 PORTLAND 503 QUASAR 509 535 RADIO SHACK 503 510 527 565 567 RCA PROSCAN 503 510 523 529 544 SAMSUNG 503 515 517 531 532 534 544 556 557 562 563 566 569 SAMPO 566 SABA 530 537 547 549 558 SANYO 508 545 546 560 567 SCOTT ...

Page 94: ...58 859 860 864 874 NOKIA 851 853 854 864 RCA PROSCAN 866 871 BITA HITACHI 868 HUGHES 867 JVC Echostar Dish Network 873 MITSUBISHI 872 SAMSUNG 875 TOSHIBA 869 870 Maker Code s SONY 821 822 823 HAMLIN REGAL 836 837 838 839 840 JERROLD G I MOTOROLA 806 807 808 809 810 811 812 813 814 819 JERROLD 830 831 OAK 841 842 843 PANASONIC 816 826 832 833 834 835 PHILIPS 830 831 PIONEER 828 829 RCA 805 SCIENTIF...

Page 95: ...gnals for which the color depth of signals passing through an HDMI jack have been raised The number of colors that could be expressed by 1 pixel was 24 bits 16 777 216 colors with the current HDMI jack However the number of colors which can be expressed by 1 pixel will be 36 bits etc when the receiver corresponds to Deep Color Since the gradation of the depth of a color can be expressed more finel...

Page 96: ...al studio masters and provides supreme quality audio up to 8 channel at 96 kHz 24 bit and up to 6ch at 192 kHz 24 bit Together with high definition video it offers an unprecedented home theater experience x DTS 96 24 A high sound quality digital signal format It records audio at a sampling frequency and bit rate of 96 kHz 24bit which is the highest possible for DVD video The number of playback cha...

Page 97: ...t for gaming and movies By unmasking the audio details typically lost by other playback systems audiences will experience the deep ambience and subtle details of movies music and games And with this technology being used by sound designers during content creation as well as embedded into playback devices Neural THX Surround promises a listening experience that is true to the original mix Neural TH...

Page 98: ...re of the top side and bottom rises considerably To avoid burning yourself do not touch the cabinet On placement Place the receiver in a location with adequate ventilation to prevent heat buildup and prolong the life of the receiver Do not place the receiver near heat sources or in a place subject to direct sunlight excessive dust or mechanical shock Do not place anything on top of the cabinet tha...

Page 99: ... from one of the front speakers Connect a pair of headphones to the PHONES jack to verify that sound is output from the headphones If only one channel is output from the headphones the component may not be connected to the receiver correctly Check that all the cords are fully inserted into the jacks on both the receiver and the component If both channels are output from the headphones the front sp...

Page 100: ...ed sound field no sound output from the subwoofer When all speakers are set to LARGE and NEO6 CIN or NEO6 MUS is selected there is no sound from the subwoofer Check SP PATTERN setting page 47 The surround effect cannot be obtained Make sure the sound field function is on press MOVIE or MUSIC Sound fields do not function for signals with a sampling frequency of more than 48 kHz Dolby Digital or DTS...

Page 101: ...erial as shown below If you connect the receiver to an outdoor antenna aerial ground it against lightning To prevent a gas explosion do not connect the ground earth wire to a gas pipe Radio stations cannot be tuned in Check that the antennas aerials are connected securely Adjust the antennas aerials and connect an external antenna aerial if necessary The signal strength of the stations is too weak...

Page 102: ...et to CTRL ON in the HDMI menu Make sure the connected component is compatible with the Control for HDMI function Check the Control for HDMI settings on the connected component Refer to the operating instructions of the connected component Repeat the procedures of Preparing Control for HDMI function if you change the HDMI connection connect disconnect the AC power cord or when there is a power fai...

Page 103: ... your nearest Sony dealer PROTECTOR Irregular current is output from the speakers The receiver will automatically turn off after a few seconds Check the speaker connection and turn on the power again For other messages see Message list after Auto Calibration measurement page 35 and XM Radio messages list page 75 If you are unable to remedy the problem using the troubleshooting guide Clearing the r...

Page 104: ...l Coaxial Impedance 75 ohms S N 100 dB A 20 kHz LPF Digital Optical S N 100 dB A 20 kHz LPF Output analog AUDIO OUT Voltage 500 mV 10 kohms SUBWOOFER Voltage 2 V 1 kohm Equalizer Gain levels 10 dB 1 dB step 3 INPUT SHORT with sound field and equalizer bypassed 4 Weighted network input level FM tuner section Tuning range 87 5 MHz 108 0 MHz Antenna aerial FM wire antenna aerial Antenna aerial termin...

Page 105: ...8 inches 430 157 5 318 mm including projecting parts and controls Mass Approx 18 lb 12 oz 8 5 kg Supplied accessories Operating instructions this manual Quick Setup Guide 1 FM wire antenna aerial 1 AM loop antenna aerial 1 Remote commander RM AAP021 1 R6 size AA batteries 2 Optimizer microphone ECM AC2 1 Design and specifications are subject to change without notice Area code Power consumption U 2...

Page 106: ...UT MODE 82 M Menu AUDIO 52 EQ 51 HDMI 53 LEVEL 46 SPEAKER 47 SURROUND 50 SYSTEM 54 TUNER 51 Muting 39 N Naming 67 87 Night Mode 61 O One Touch Play 80 P Phase Audio 46 Phase Noise 46 R Recording onto a CD R 89 onto a recording media 89 Remote commander 11 S Satellite tuner Set top box connecting 26 Selecting component 38 sound field 60 speaker system 30 Sleep Timer 88 Sound fields resetting 63 sel...

Page 107: ......

Page 108: ...Sony Corporation Printed in Malaysia 1 ...

Reviews: