1-8
BKM-B30NW
14
(GB)
Setting the date and clock
The clock is displayed on the task bar of the Desktop
window. To set the date and time, follow the steps
below.
You can synchronize the time of the PFM-42B1 with
the time adjusted on the network adaptor and vice
versa.
Synchronizing the time of the PFM-42B1 with
the time adjusted on the network adaptor
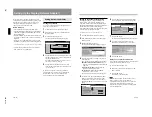
1
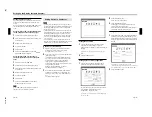
Click Desktop View in the Start up window.
2
From the Start menu of the Desktop window, click
Control Panel.
3
Double-click the Date/Time icon.
4
Set the date and time.
5
Click APPLY.
6
Click CLOCK MASTER and select NETWORK
ADAPTOR, and then click OK.
Synchronizing the time of the network
adaptor with the time adjusted on the PFM-
42B1
1
Adjust the time on the PFM-42B1.
2
Click Desktop View in the Start up window.
3
From the Start menu of the Desktop window, click
Control Panel.
4
Double-click the Date/Time icon.
5
Set the date and time.
6
Click APPLY.
7
Click CLOCK MASTER and select FLAT
DISPLAY, and then click OK.
Note
As the PFM-42B1 is not equipped with the date
function, you can synchronize only time.
Setting Up the Display (Network Adaptor)
Setting Up from a Computer
Notes
• Connect only the computer you are using for setups
to the Display (Network Adaptor) if the IP address of
the Display (Network Adaptor) is not changed from
the factory-preset one.
• If the browser of your computer is set to “Access the
Internet using a proxy server,” enter the IP address of
the Display (Network Adaptor) in the box “Access
the Internet without using a proxy server” when you
have access to the Display (Network Adaptor) from
your computer.
• The computer may not accept the password for the
Display (Network Adaptor), depending on the version
of the browser. In this case, restart the browser.
Opening the setup window
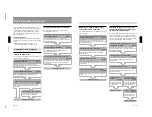
1
Start the computer’s browser software (Internet
Explorer 4.0 or later versions, or Netscape
Navigator 4.5x or 4.7x version).
2
Type “http://xxx.xxx.xxx.xxx (for the IP address of
the Display) /setup”.
If the IP address is not changed from the factory-
preset one, type “http://192.168.0.1/setup” (when
using a LAN PC card) or “http://192.168.0.2/
setup” (when using the ETHER connector).
If the number of the IP address starts from 0 (zero),
enter the number without 0.
Example: 192.168.000.001
c
192.168.0.1
The Password dialog box appears.
3
Enter the Name and Password for Administrator.
If the Password setting is not changed from the
factory-preset one, enter “root” in the Name text
box.
The Setup window appears.
15
(GB)
Setting the password
1
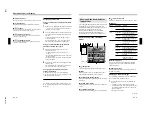
Click the Password icon in the Setup window.
The password setting dialog box appears.
Setup procedure is the same as that operated by the
Display.
For details, see “Setting the password” on page 10
(GB).
2
Click the APPLY button.
Setting up the network configuration
1
Click the Network icon in the Setup window.
The Network configuration window appears.
In this window you can set the items described in
steps
5
to
8
in “Setting up the network
configuration” on page 11 (GB).
For details, see “Setting up the network configuration”
on page 11 (GB).
2
Click the APPLY button.
The window for restart appears.
3
Click the RESTART button.
The display’s screen is turned off for about 10
seconds, then the display restarts.
The network setting does not take effect until you
restart the Display (Network Adaptor).
Setting up the wireless LAN environment
1
Click the Wireless LAN icon in the Setup window.
The dialog box for setting the Nickname, Access
Point ID, Encryption Key and Peer to Peer appears.
Setup procedure is the same as that operated by the
Display.
For details, see “Setting up a wireless LAN
environment–Using a wireless LAN access point/Peer to
Peer (Ad-hoc) mode” on pages 12 (GB) and 13 (GB).
2
Click the APPLY button.

