11(E)
Menu Settings
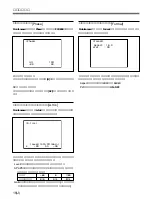
When the DISPLAY switch is set to MENU, picture
signals and character signals are output together to the
PIX connector and menu selection display appears on
the picture monitor.
You can select any of the following four menus:
•
Paint menu
For setting paint conditions according to the shooting
conditions.
•
File menu
For storing reference files, scene files, and OHB files.
•
Maintenance menu
For making basic settings on the video camera and the
CCU-550 series unit.
•
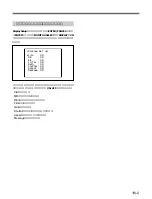
Display Set up menu
For specifying the indications to be displayed in the
picture monitor.
Note
Depending on your video camera, some items may not
be adjustable.
For details, refer to the operation manual that came with
your video camera.
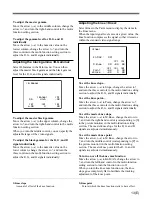
Basic menu setting procedure
1
Set the DISPLAY switch to MENU.
* MENU *
Paint
File
Maintenance
Display Setup
c
<PAINT>
White Matrix
Black MultiMatrix
Flare Detail
Gamma Skin DTL
B.Gamma Sat/Kn Sat
Knee ECS/S-EVS
V.Mod CrossColor
c
AutoKnee LowKeySat
W.Clip
<Knee>
Kn MAX : OFF
[P] [S]
M.Knee : ON -99 99
[R] [G] [B]
Point : -99 0 99
Slope : -99 0 99
c
2,4,6
1
8
3,5,7
2
Press the up/down switch towards
v
or
V
to move
the arrow (
t
) to the menu that you want.
3
Set the ENTER/CANCEL switch to ENTER.
4
Press the up/down switch towards
v
or
V
to move
the arrow (
t
) to the item that you want.
5
Set the ENTER/CANCEL switch to ENTER.
6
Press the up/down switch towards
v
or
V
to move
the arrow (
t
) to the item that you want.
7
Set the ENTER/CANCEL switch to ENTER.
The arrow (
t
) changes to ?.
8
Turn the control in the multi-function setting
section to adjust the item.
Paint menu
The Paint menu contains the items described below.
For details on the menu setting procedure, refer to “Basic
menu setting procedure” on this page.


