6
GB
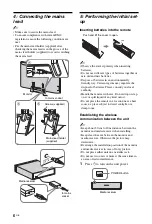
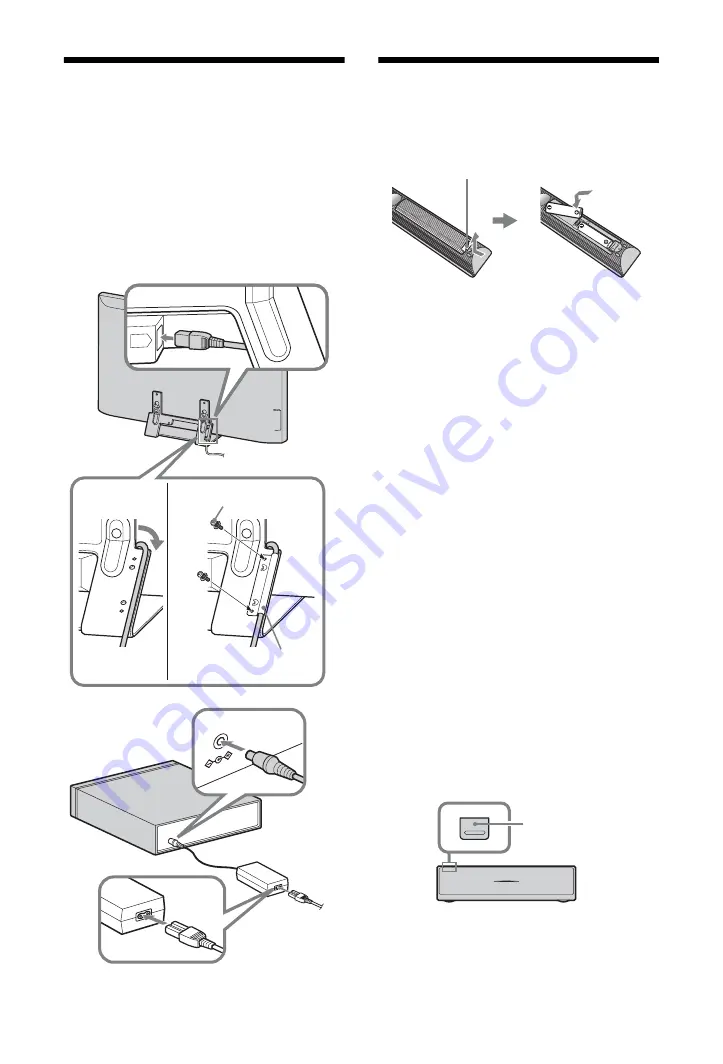
4: Connecting the mains
lead
~
• Make sure to secure the mains lead.
• To ensure compliance with current EMC
legislation, ensure the following conditions are
met.
• Fix the mains lead holder (supplied) after
checking the mains lead is in the groove of the
mains lead holder (supplied) to avoid scratching
the mains lead.
5: Performing the initial set-
up
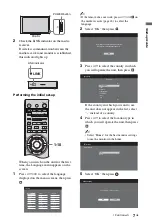
Inserting batteries into the remote
~
• Observe the correct polarity when inserting
batteries.
• Do not use different types of batteries together or
mix old and new batteries.
• Dispose of batteries in an environmentally
friendly way. Certain regions may regulate the
disposal of batteries. Please consult your local
authority.
• Handle the remote with care. Do not drop or step
on it, or spill liquid of any kind onto it.
• Do not place the remote in a location near a heat
source, a place subject to direct sunlight, or a
damp room.
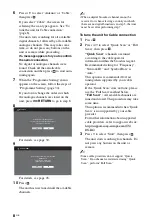
Establishing the wireless
communication between the unit
~
• Keep about 30 cm to 20 m distance between the
monitor and media receiver when installing.
• Keep clear the area between the monitor and
media receiver. Otherwise the picture may
deteriorate.
• Rearrange the installation position of the monitor
and media receiver in case of fuzzy picture.
• Do not place either unit on a metallic rack.
• Do not use two units or more at the same time in
an area of radio interference.
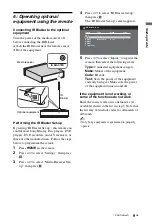
1
Press
1
to turn on the unit power.
DC
IN
18V
AC
IN
1
2
3
Monitor
to mains socket
Media receiver
to mains
socket
Screws (supplied)
Mains lead holder
(supplied)
Push and lift the cover to open.
POWER button
Media receiver
Summary of Contents for BRAVIA 4-115-568-12(1)
Page 51: ......


