11
GB
CENTER SPEAKER IN
• To use your TV speakers as the centre
speaker, connect the output of your AV
receiver to the CENTER SPEAKER IN on
your TV.
• Before connecting cables, disconnect the
AC power cord (mains lead) of both TV
and AV receiver.
• Make sure the [Speakers] is set to [Audio
system]: Press
ACTION MENU
, then select
[Speakers]
[Audio system].
To prevent hiss when not connecting the
CENTER SPEAKER IN to an AV receiver,
change the following setting. Press
HOME
,
select [Settings]
[Sound] then disable [TV
centre speaker mode].
/
VIDEO IN
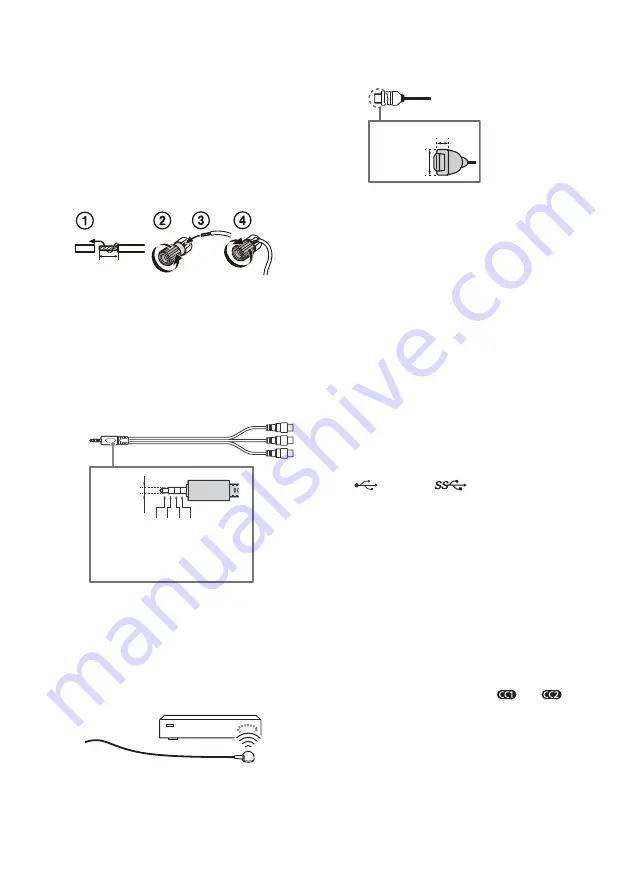
• For a composite connection, use an
Analogue Extension Cable (not supplied).
•
IR BLASTER*
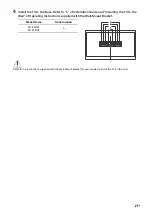
• Use your Sony remote control to control
your External Box (cable/satellite box).
Connect the IR Blaster Cable* to the IR
Blaster port on your TV. Place the other
end as shown below.
• To perform IR Blaster setup, press
HOME
and select [Settings]
[External inputs]
[IR Blaster setup].
HDMI IN 1/2/3/4
• HDMI interface can transfer the digital
video and audio on a single cable.
•
• To enjoy high quality 4K 50p/60p
contents, connect a Premium High Speed
HDMI cable and set the [HDMI signal
format] to [Enhanced format].
Do this setting individually for each
connected HDMI IN terminal. For details of
supported formats, refer to the
“Specifications“ in this manual (page 23-
25).
•
HDMI IN 3 ARC (Audio Return Channel)
Connect your audio system to the
HDMI IN 3 to route TV audio to your audio
system. An audio system that supports
HDMI ARC can send video to the TV, and
receive audio from the TV via the same
HDMI cable. If your audio system does not
support HDMI ARC, an additional
connection with DIGITAL AUDIO OUT
(OPTICAL) is necessary.
USB 1/2,
USB 3
• Connecting a large USB device may
interfere with other connected devices
beside it.
• When connecting a large USB device,
connect to the USB 1 port.
(Headphone)
• Supports 3-pole stereo mini jack only.
• You cannot output sound from both the
headphone and the TV speakers at the
same time.
* Only on limited region/country/TV model.
Note
• You cannot attach the side covers
and
while the cables are connected to side terminal.
• Be sure to store the side covers in a safe place for
future use.
10 mm
3.5 mm
1 2 3 4
1: L
2: Video
3: Ground
4: R
< 12 mm
< 21 mm
Summary of Contents for BRAVIA KD-55A9F
Page 1: ...4 736 801 11 1 Television Reference Guide KD 65A9F 55A9F ...
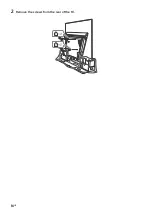
Page 14: ...14GB 2 Remove the screws from the rear of the TV ...
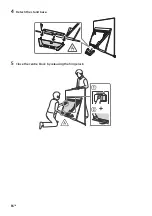
Page 16: ...16GB 4 Detach the stand base 5 Close the centre block by releasing the hinge lock ʓ ʔ ...
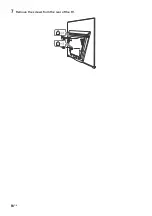
Page 18: ...18GB 7 Remove the screws from the rear of the TV ...
Page 26: ...26GB ...
Page 27: ......


