18
GB
4
“Transponder”
There is no need to set the transponder
when you select “Full Scan”.
“Scan for new services”:
–
Tunes to a single transponder.
–
This is an incremental scan, and it should
be used in cases when a new transponder
is added to a satellite.
–
Previously – tuned programmes are kept
and found ones are added to the program
list of the satellite connection you are
editing.
1
Press
HOME
, then select
>
“Digital Set-up” > “Satellite Auto
Tuning”.
2
Follow the instruction on the Satellite
Auto Tuning.
~
•
“Scan for new services” is unavailable
while performing the initial set-up.
•
When you scan for the new services,
please check if the satellite signal is
available.
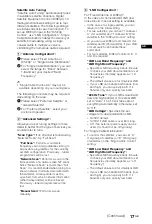
Digital Auto Tuning:
“Antenna” or “Cable”:
Select “Antenna” to receive terrestrial TV
broadcasting by an external antenna.
Select “Cable” if you are a Cable TV
subscriber not using an external Set-Top
Box. When you select “Cable”, we
recommend that you select “Quick Scan”
for quick tuning. Set “Frequency” and
“Network ID” according to the information
supplied from your cable provider. If no
channel is found using “Quick Scan”, try
“Full Scan” (though it may take some time).
~
•
In some countries, you may select
“Antenna” instead of “Cable” to receive
Cable TV programmes.
•
“Full Scan” may not be available
depending on your region/country.
Programme Sorting:
Changes the order
of analogue channels stored in the TV.
1
Press
F
/
f
to select the channel you
want to move to a new position, then
press .
2
Press
F
/
f
to select the new position for
the channel, then press
.
~
•
For satellite channels, select “Satellite
Programme Sorting” in “Digital Set-up” of
“Settings” to change the order of satellite
channels in the same procedure above
after initial set-up completed.
•
You can also tune channels manually.
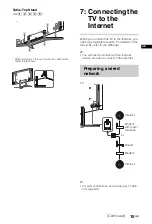
Network Set-up:
Sets up the Internet
settings. Select “Auto” to connect to the
network automatically. Select “Custom” to
connect manually.
If you do not access the Internet, or to set
up later, select “Skip”.
~
•
If you use WEP security, select “Custom”
t
“Wireless Set-up”
t
“Scan”. Then,
select the network name (SSID) you want to
connect. If you cannot find the required
network name, select “[Manual Entry]” and
press
to enter network name.
•
Use the optional USB Wireless LAN
Adapter to connect with your wireless
router (or access point) at 5GHz. Insert
USB Wireless LAN Adapter and set
“Standby for Wi-Fi Direct” to “Off”. Press
HOME
, then select “Settings”
t
“Network”
t
“Standby for Wi-Fi Direct”
t
“Off”.
•
To set “Network Set-up” later, press
HOME
,
then select “Settings”
t
“Network”
t
“Network Set-up”.
Summary of Contents for Bravia KD-84X9005
Page 19: ...19 GB ...
Page 37: ......
Page 91: ...19 ES ...
Page 109: ......
Page 127: ...19 NL ...
Page 199: ...19 PT ...
Page 217: ......
Page 255: ......
Page 273: ...19 SE ...
Page 291: ......
Page 309: ...19 DK ...
Page 327: ......
Page 345: ...19 FI ...
Page 363: ......
Page 381: ...19 NO ...
Page 399: ......
Page 417: ...19 PL ...
Page 435: ......
Page 453: ...19 CZ ...
Page 471: ......
Page 489: ...19 SK ...
Page 507: ......
Page 525: ...19 HU ...
Page 561: ...19 RO ...
Page 579: ......
Page 655: ......
Page 764: ......
Page 781: ......
Page 782: ......
Page 783: ......


