7
GB
Start-up G
u
ide
2
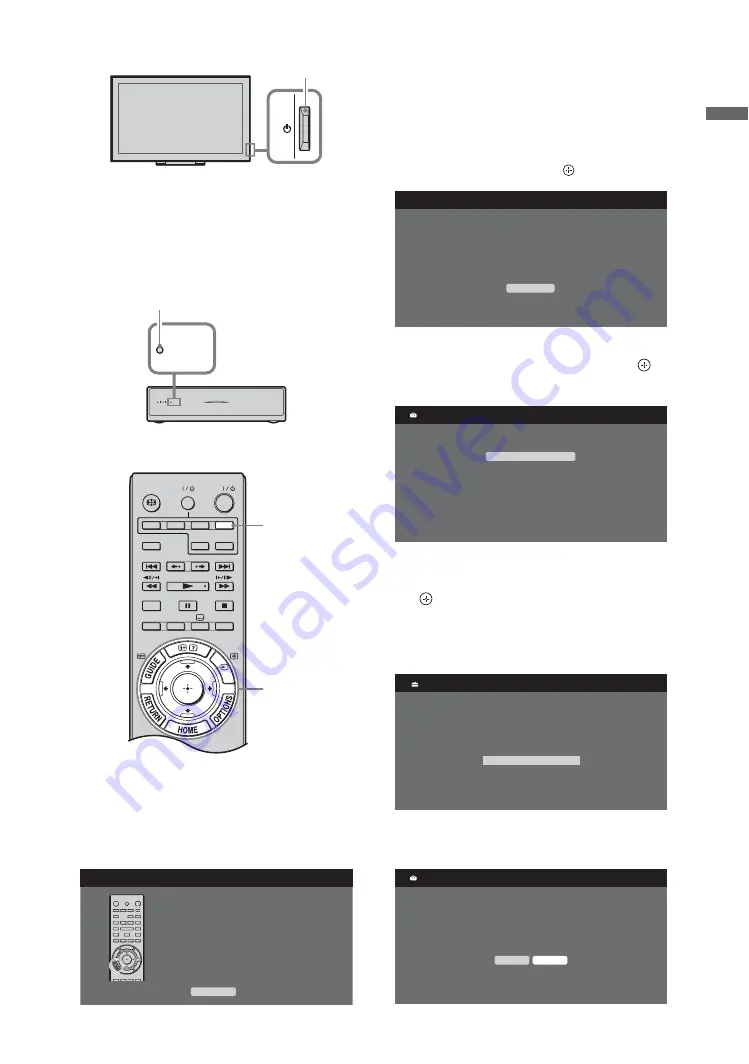
Check the LINK indicator on the media
receiver.
If wireless communication between the
media receiver and monitor is established,
this indicator lights up.
Performing the initial set-up
When you switch on the unit for the first
time, the remote registration screen
appears.
1
Press buttons according to the screen
message to register the remote.
~
• The remote can only be registered to only
one unit.
• When registering a remote, move the remote
as close as possible to the top right of the
monitor front.
2
Select “OK” then press
.
3
Press
F
/
f
to select the region in which
you will operate the unit, then press
.
(Australian model only)
4
Press
F
/
f
to select the location type in
which you will operate the unit, then press
.
~
• Select “Home” for the best monitor settings
to use the monitor in the home.
5
Press
G
/
g
to select “Yes” to enable the
system update (page 37).
Monitor
POWER button
LINK
LINK
LINK indicator
1-9
TV
MONITOR
HDMI 2
HDMI 1
HDMI
HDMI 3
DIGITAL/
ANALOG
THEATRE
SYNC MENU
AUDIO
EXT
VIDEO
HD/DVD
1
First, please press and hold the EXT key, then
while holding this key depressed, press and hold
the RETURN key. The remote control can only be
registered with one TV set.
Remote Control Set-up
Skip
EXT
OK
The Media Receiver Initial Set-up will start.
Please make sure the Media Receiver is on.
Select region
NSW/ACT
VIC
QLD
SA
WA
TAS
NT
Region
Location
Home
Shop
Please select the type of use for this TV.
"Home" optimises the picture recommended for
normal home use and is energy efficient.
"Shop" optimises the picture for store display.
Yes
No
Do you want to enable System Update?
System Update
(Continued)


