background image

C:\Users\ming\Desktop\4411920161\GB05OVR.fm

KDL-HX955/HX953/HX855/HX853/HX850

4-411-920-

16

(1)

22

GB

You can save frequently viewed pages for easy 
access anytime.

x

To save a page

In the page to bookmark, press the yellow 
button on the remote.

x

To access the bookmarked page

When displaying the i-Manual, press the green 
button on the remote to display the bookmark 
list.
Press 

F

/

f

 to select the desired item, then press 

.

~

To return to the previous page, press 

G

x

To remove a bookmark

When the bookmarked page is displayed, press 
the yellow button on the remote.

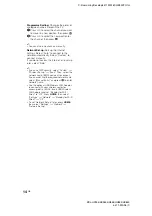
You can switch between the i-Manual screen 
and the TV screen. This feature allows you to 
refer to the instructions in the i-Manual while 
using your BRAVIA TV. Press 

i-MANUAL

 to 

switch between the i-Manual screen previously 
displayed and the TV screen.

~

To jump to the top page of i-Manual, press the 
red button on the remote. You can also press 

HOME

, then select “Settings” 

t

 “i-Manual” to 

jump to the top page of i-Manual.

Once you turn off the TV or the TV goes to 
standby mode, the i-Manual will be displayed 
from the top page when you select “i-Manual”.

Saving frequently viewed 
pages (Bookmark)

Displaying the page again 
while operating the TV

i-Manual screen previously displayed

BRAVIA TV screen

Summary of Contents for BRAVIA KDL-40HX850

Page 1: ...p 4411920161 GB01COV fm 4 411 920 16 1 KDL HX955 HX953 HX855 HX853 HX850 4 411 920 16 1 LCD TV Operating Instructions KDL 65HX955 65HX953 55HX955 55HX855 55HX853 55HX850 46HX855 46HX853 KDL 46HX850 40HX855 40HX853 40HX850 ...

Page 2: ...tandard in music recognition technology and related content delivery For more information please visit www gracenote com CD DVD Blu ray Disc and music and video related data from Gracenote Inc copyright 2000 present Gracenote Gracenote Software copyright 2000 present Gracenote One or more patents owned by Gracenote apply to this product and service See the Gracenote website for a nonexhaustive lis...

Page 3: ...niture for example cupboards or bookcases without anchoring both the furniture and the television to a suitable support Not standing the televisions on cloth or other materials placed between the television and supporting furniture Educating children about the dangers of climbing on furniture to reach the television or its controls Notice for customers in the South Africa The Euro South Africa con...

Page 4: ...tion on how to use BRAVIA TV refer to the Electronic manual Operating Instructions Electronic manual i Manual Explains how to set up your TV such as connections initial set up and basic operations For more information press the i MANUAL button Explains how to use all the features See page 21 on how to use the i Manual Images and illustrations used in this manual may differ from the actual screen ...

Page 5: ...ions 8 4 Preventing the TV from toppling over 10 5 Bundling the cables 11 6 Connecting the TV to the Internet 12 7 Performing the initial set up 13 Using Your BRAVIA TV Watching TV B qh Selecting various functions and settings Home Menu 18 Watching Internet Video 20 Looking for Instructions Looking for instructions in the electronic manual i Manual B wa Additional Information Troubleshooting 23 Sp...

Page 6: ...d M5 x 16 4 except KDL 65HX95x 3D Glasses battery included 2 KDL 65HX95x KDL 55HX955 KDL 55 46 40HX855 KDL 55 46 40HX853 only Pouch for 3D Glasses 2 KDL 65HX95x KDL 55HX955 KDL 55 46 40HX855 KDL 55 46 40HX853 only Camera and microphone unit KDL 65 55HX955 KDL 55 46 40HX855 only Operating Instructions this manual and other documents 1 Refer to the supplied Table Top Stand leaflet to assemble the Ta...

Page 7: ... at approximately 1 5 N m 15 kgf cm Do not remove the Table Top Stand for any reason other than to install corresponding accessories on the TV When removing the Table Top Stand from the TV lay the display face down on a stable work surface that is larger than the TV To prevent damaging the surface of the LCD display make sure to place a soft cloth on the work surface KDL 65HX95x To detach the Tabl...

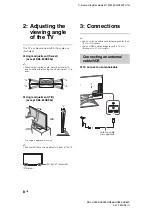
Page 8: ...the stand with one hand to avoid having the stand slip or TV tip over x Angle adjustment Tilt except KDL 65HX95x The angle is approximate value Ensure that there are no objects in front of the TV 3 Connections Use an antenna cable connector no greater than 14 mm in thickness Use an HDMI cable connector within 12 mm thickness 21 mm width x To connect an antenna cable 15 15 15 15 6 IR Sensor 3D Sync...

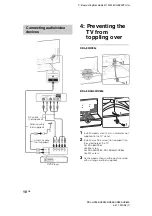
Page 9: ...ting Started 9 GB x To connect a Set Top Box recorder e g DVD recorder with HDMI x Connecting an antenna cable and VCR Set Top Box recorder e g DVD recorder Antenna cable not supplied HDMI cable not supplied Antenna cable not supplied Antenna cable not supplied AV cable not supplied VCR Continued ...

Page 10: ...rew 4 mm in diameter not supplied in the TV stand 2 Install a machine screw not supplied into the screw hole of the TV For KDL 65HX95x Use M6 screw For KDL 55HX955 KDL 55 46 40HX85x Use M4 screw 3 Tie the wood screw and the machine screw with a strong cord not supplied Connecting audio video devices DVD Player Antenna cable not supplied AV cable not supplied Antenna cable not supplied ...

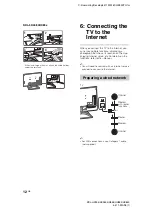
Page 11: ...with a strong cord not supplied 5 Attach the right side cover of the Table Top Stand back to the original position The length of the M4 M6 machine screw differs depending on the cord diameter Please see below illustration 5 Bundling the cables Before bundling the cables remove the cable holder from the AC cover Reuse the cable holder to bundle the other cables Do not bundle the AC power cord toget...

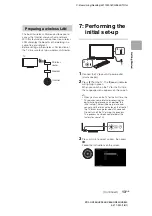
Page 12: ...ct this TV to the Internet you can enjoy multiple functions displaying a photograph that shows its location on the map enjoying Internet video etc For details on the functions refer to the i Manual You will need to contract with an Internet service provider to connect to the Internet For LAN connections use a Category 7 cable not supplied 1 2 4 3 Preparing a wired network TV Internet Modem with ro...

Page 13: ...outlet mains socket 2 Press 1 on the TV The power indicator will light up in green When you switch on the TV for the first time the Language menu appears on the screen When you turn on the TV for the first time the TV requires some internal processing for optimisation before you can perform the initial setup There will be no picture and sound and the timer indicator on the front of the TV blinks o...

Page 14: ...y Select Custom to connect manually If you do not access the Internet or to set up later select Skip If you use WEP security select Custom t Wireless Set up t Scan Then select the network name SSID you want to connect If you cannot find the required network name select Manual Entry and press to enter network name Use the optional USB Wireless LAN Adapter to connect with your wireless router or acc...

Page 15: ...C Users ming Desktop 4411920161 GB03STU fm KDL HX955 HX953 HX855 HX853 HX850 4 411 920 16 1 15 GB ...

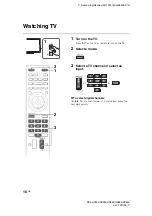
Page 16: ... 920 16 1 16 GB Using Your BRAVIA TV Watching TV 1 Turn on the TV Press 1 on the TV or remote to turn on the TV 2 Select a mode 3 Select a TV channel or select an input x To select digital channels Use 0 9 For channel numbers 10 and above press the next digit quickly 1 3 3 2 1 or or ...

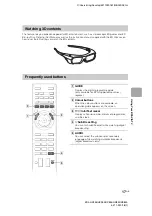
Page 17: ...atch the 3D contents Watching 3D contents Frequently used buttons 3 4 5 1 2 1 GUIDE Displays the digital programme guide only available for EPG supported countries regions 2 Colour buttons When the colour buttons are available an operation guide appears on the screen 3 Info Text reveal Displays channel number details of programmes and the clock 4 Subtitle setting You can turn subtitle on off while...

Page 18: ...dify the TV settings 1 Press HOME 2 Press G g to select Settings category The contents of Settings are displayed on the right See page 19 Category list for all categories 3 Press F f to select Display then press 4 Modify the settings x To exit the Home menu Press HOME x To select using the OPTIONS button Press OPTIONS A list of convenient functions and menu shortcuts are displayed The menu items v...

Page 19: ...t connection Sony Entertainment Network Enables selection of content from the online service SEN Sony Entertainment Network Internet Content Enables access to Internet services for TV TV Allows you to select a list of TV channels or a programme guide Media Enables selection of media files photo music video to play in a connected USB storage device or your home network Inputs Enables selection of d...

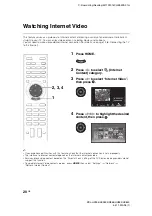
Page 20: ...he Internet If you experience difficulties with this feature check that the Internet connection is set up properly The interface to Internet content depends on the Internet content providers Services block video content based on the Parental Lock setting of the TV Some service providers do not support this function To update Internet Video content services press HOME then select Settings t Network...

Page 21: ...RAVIA TV and can be displayed on the screen To learn more about your TV features access your i Manual with the touch of a button 1 Press i MANUAL 2 Select an item 1 Press G g to select an item 2 Press F f G g to select an item then press The page of the selected item appears You can step through pages using G g Press RETURN to return to the previous page 1 2 RETURN If a scroll bar appears press f ...

Page 22: ...s the yellow button on the remote You can switch between the i Manual screen and the TV screen This feature allows you to refer to the instructions in the i Manual while using your BRAVIA TV Press i MANUAL to switch between the i Manual screen previously displayed and the TV screen To jump to the top page of i Manual press the red button on the remote You can also press HOME then select Settings t...

Page 23: ... TV to the AC power and press 1 on the TV If the 1 standby indicator lights up in red press 1 on the remote Tiny black points and or bright points appear on the screen The screen is composed of pixels Tiny black points and or bright points pixels on the screen do not indicate a malfunction Some programmes cannot be tuned Check the antenna or dish The TV turns off automatically the TV enters standb...

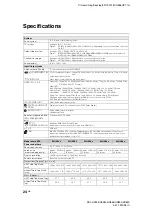
Page 24: ...4 1 and 48 kHz 16 20 and 24 bits Dolby Digital Analogue audio input stereo minijack HDMI IN 2 only common with PC IN ARC Audio Return Channel HDMI IN 1 only VIDEO IN 1 Video Audio input phono jacks DIGITAL AUDIO OUT OPTICAL Digital optical jack Two channel linear PCM Dolby Digital AUDIO OUT i Audio output stereo minijack Headphones jack Speaker Integrated Stand KDL 55 46 40HX85x only Sound output ...

Page 25: ...essories See Checking the accessories page 6 Optional accessories Wall Mount Bracket SU WL50B SU WL500 USB Wireless LAN Adapter UWA BR100 3D Glasses TDG BR750 TDG BR250 TDG BR200 TDG BR100 TDG BR50 Camera and Microphone Unit CMU BR100 except KDL 65HX953 KDL 55 46 40HX853 TV stand SU B553S KDL 55HX85x SU B463S KDL 46HX85x SU B403S KDL 40HX85x Operating temperature 0 ºC 40 ºC Operating humidity 10 8...

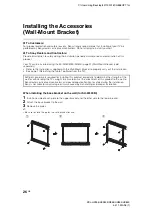
Page 26: ...d with the Wall Mount Bracket to properly carry out the installation See page 7 Detaching the Table Top Stand from the TV When installing the base bracket on the wall for SU WL50B 1 Install one side of each plate to the upper bracket and the other side to the lower bracket 2 Attach the base bracket to the wall 3 Remove the plates Be sure to store the plates in a safe place after use Sufficient exp...

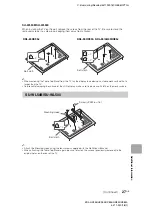
Page 27: ...e TV lay the display face down on a stable work surface that is larger than the TV To prevent damaging the surface of the LCD display make sure to place a soft cloth on the work surface Attach the Mounting Hook using the four screws supplied with the Wall Mount Bracket When attaching the Table Top Stand again be sure to fasten the screws previously removed to the original holes on the rear of the ...

Page 28: ...ook location SU WL50B SU WL500 SU WL50B SU WL500 65HX95x d i d g a 55HX955 e j b 55HX85x 46HX85x 40HX85x a b c c b a Screw location When installing the Mounting Hook on the TV Hook location When installing the TV onto the Base Bracket b a c Mounting Hook Base Bracket a b c Screw location When installing the Mounting Hook on the TV Hook location When installing the TV onto the Base Bracket ...

Page 29: ...920161 GB06OPT fm KDL HX955 HX953 HX855 HX853 HX850 4 411 920 16 1 29 GB Additional Information SU WL50B 1 SU WL500 2 TV installation dimensions table B C A E D Screen centre point A B C D E F G H Screen centre point Continued ...

Page 30: ...cifications for its weight Model Name KDL Display dimensions Screen centre dimension Length for each mounting angle Angle 0 Angle 20 A B C D E F G H SU WL50B 1 65HX95x 1506 901 53 515 110 55HX955 1280 773 93 491 108 55HX85x 1274 750 106 487 94 46HX85x 1077 640 161 486 94 40HX85x 944 566 198 486 99 SU WL500 2 65HX95x 1506 901 1 462 109 386 850 483 55HX955 1280 773 65 463 107 340 729 483 55HX85x 127...

Page 31: ...trongly recommended that you use a Sony wall mount bracket in order to provide adequate air circulation Installed on the wall Installed with stand To ensure proper ventilation and prevent the collection of dirt or dust Do not lay the TV set flat install upside down backwards or sideways Do not place the TV set on a shelf rug bed or in a closet Do not cover the TV set with a cloth such as curtains ...

Page 32: ...andby to work correctly For children Do not allow children to climb on the TV set Keep small accessories out of the reach of children so that they are not mistakenly swallowed If the following problems occur Turn off the TV set and unplug the AC power cord immediately if any of the following problems occur Ask your dealer or Sony service centre to have it checked by qualified service personnel Whe...

Page 33: ...ctromagnetic radiation away from the TV set Otherwise picture distortion and or noisy sound may occur Wireless Function of the unit Do not operate this unit near medical equipment pacemaker etc as malfunction of the medical equipment may result Although this unit transmits receives scrambled signals be careful of unauthorised interception We cannot be responsible for any trouble as a result Cautio...

Page 34: ......

Page 35: ......

Page 36: ... Corporation Printed in Malaysia 4 411 920 16 1 KDL HX955 HX953 HX855 HX853 HX850 4 411 920 16 1 Instructions about Installing Wall Mount Bracket are included within this TV s instructions manual Customer Support ...

Reviews: