


27
GB
Usin
g MENU
Fu
nction
s
KLV-32V400B
3-879-650-
11
(1)
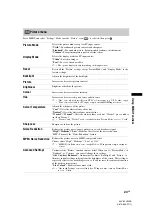
Speaker
Turns on/off the TV’s internal speakers.
“TV Speaker”:
The TV speakers are turned on in order to listen to the TV’s sound
through the TV speakers.
“Audio System”:
The TV speakers are turned off in order to listen to the TV’s sound
only through your external audio equipment connected to the audio output jacks.
You can also turn on the connected equipment that is compatible with control for
HDMI, after making the appropriate settings of control for HDMI.
• All items in “Sound” menu except “Dual Sound” are not available when “Speaker”
is set to “Audio System”.
Audio Out
“Variable”:
The audio output from your audio system can be controlled by the TV’s
remote.
“Fixed”:
The audio output of the TV is fixed. Use your audio receiver’s volume
control to adjust the volume (and other audio settings) through your audio system.
• “Audio Out” is not available for audio system connected to the TV using the HDMI
jacks.
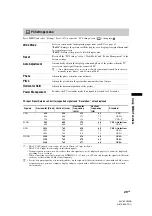
Colour System
Selects the colour system (“Auto”, “PAL”, “SECAM”, “NTSC3.58”, “NTSC4.43”
or “PAL60”) according to the composite video signal from the input source.
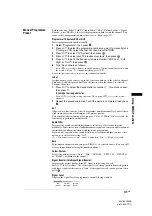
HDMI Set-up
Allows the TV to communicate with equipment that is compatible with the control
for HDMI function, and connected to the HDMI jacks of the TV. Note that
communication settings must also be made on the connected equipment.
Control for HDMI
Sets whether or not to link the operations of the TV and the connected equipment that
is compatible with control for HDMI. When set to “On”, the following menu items
can be performed.
If the specific Sony equipment that is compatible with control for HDMI is
connected, this setting is applied to the connected equipment automatically when the
“Control for HDMI” is set to “On” using the TV.
Auto Devices Off
When this is set to “On”, the connected equipment that is compatible with control for
HDMI turns off when you turn off the TV.
Auto TV On
When this is set to “On”, the TV turns on when you turn on the connected equipment
that is compatible with control for HDMI.
Device List Update
Creates or updates the “HDMI Device List”. Up to 11 compatible equipment items
can be connected, and up to 5 equipment items can be connected to a single jack. Be
sure to update the “HDMI Device List” when you change the connections or settings.
If the specific Sony equipment that is compatible with control for HDMI is
connected, this setting is applied to the connected equipment automatically when the
“Device List Update” is executed on the TV.
HDMI Device List
Displays a list of connected equipment that is compatible with control for HDMI.
• You cannot use “Control for HDMI” and “Device List Update” if the TV
operations are linked to the operations of an audio system that is compatible with
control for HDMI.
Continued


