background image

D:\SONY TV\SY140117_Clover 55 (Rev-3)\4533567E31_US\US06OPT.fm

XBR-79X907B/79X905B/65X907B/65X905B

4-533-567-

E3

(1)

40

Installing the TV against a wall or 
enclosed area

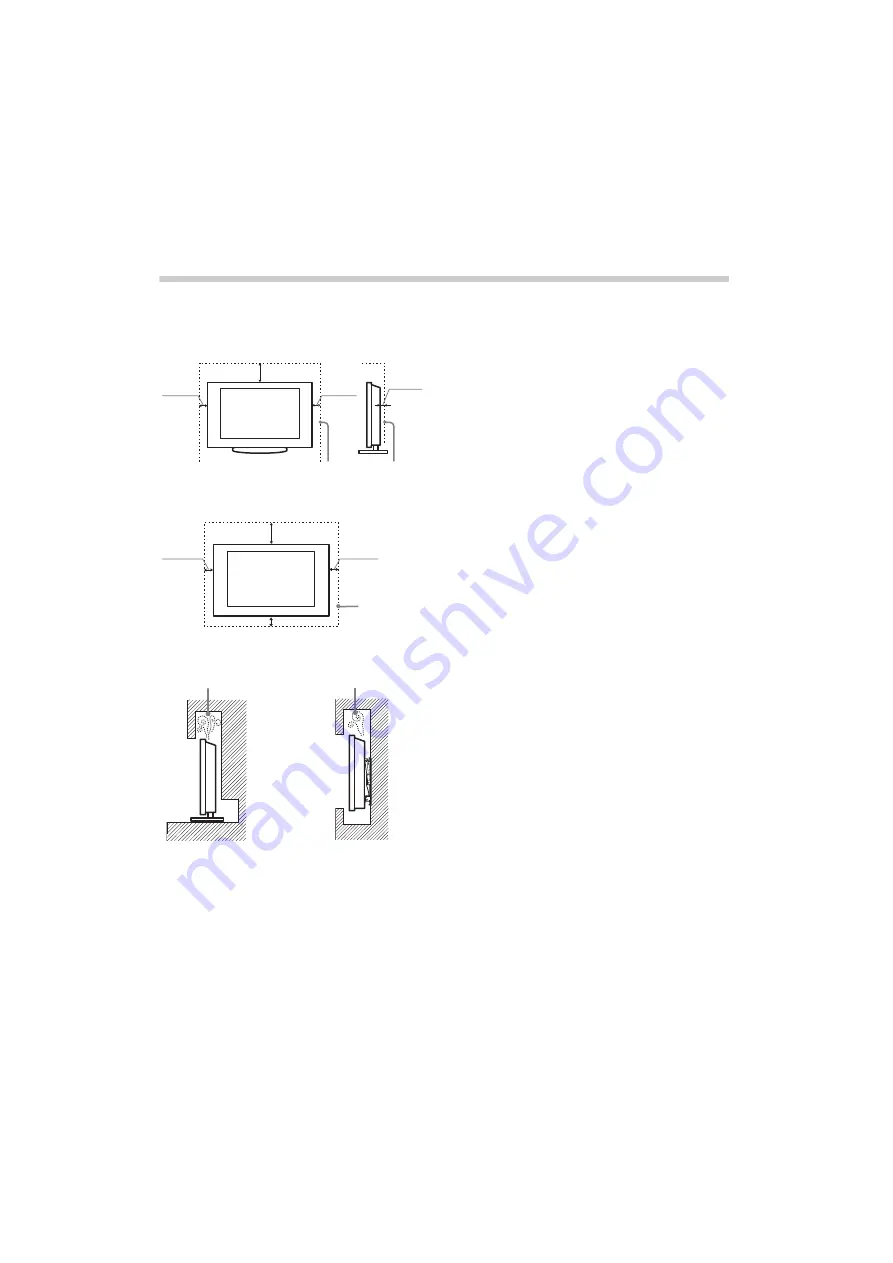
Make sure that your TV has adequate ventilation. Allow enough space around the TV as shown 
in the illustration.

~

Inadequate ventilation can lead to overheating of the TV and may cause damage to your TV or 
cause a fire.

Leave at least this much space around the set.

Installed with stand

10 cm

30 cm

10 cm

6 cm

Installed on the wall

Leave at least this much space around the set.

10 cm

10 cm

10 cm

30 cm

Never install the TV set as follows:

Air circulation is blocked.

Air circulation is blocked.

Wall

Wall

Summary of Contents for Bravia XBR-65X905B

Page 1: ...01COV fm XBR 79X907B 79X905B 65X907B 65X905B 4 533 567 E3 1 4 533 567 E3 1 Television Setup Guide Operating Instructions XBR 79X907B 79X905B 65X907B 65X905B Sony Customer Support http esupport sony com ES LA Please Do Not Return the Product to the Store ...

Page 2: ...aturas elevadas por ejemplo superficies o autos expuestos a la luz solar directa Cuando utilice la función 3D simulado tenga en cuenta que la imagen que se muestra se encuentra modificada de la imagen original debido a la conversión realizada por este televisor Utilice el cable de alimentación de ca especificado por Sony y que corresponda al voltaje de la zona donde vaya a utilizarlo Por razones d...

Page 3: ...00 2013 The Bluetooth word mark and logos are owned by the Bluetooth SIG Inc and any use of such marks by Sony Corporation is under license Other trademarks and trade names are those of their respective owners The N Mark is a trademark or registered trademark of NFC Forum Inc in the United States and in other countries Location of the identification label Labels for the Model No and Power Supply r...

Page 4: ...e tener acceso a programación HD la cual se puede obtener de las siguientes maneras Solicitando a su proveedor servicio de alta definición 4K Recibiendo emisiones de HD por aire a través de una antena para TV de alta definición HD conectada directamente a la parte posterior del TV Visite http www antennaweb org para recibir más información sobre la selección y configuración de antena A través de l...

Page 5: ...D SONY TV SY140117_Clover 55 Rev 3 4533567E31_US US02REG fm XBR 79X907B 79X905B 65X907B 65X905B 4 533 567 E3 1 5 ...

Page 6: ...ore information on how to use your BRAVIA TV refer to the Electronic manual Operating Instructions Electronic manual i Manual Explains how to setup your TV such as connections initial setup and basic operations For more information see the i Manual Explains how to use all the features See page 30 on how to use the i Manual Images and illustrations used in this manual may differ from the actual scr...

Page 7: ... Connecting the TV to the Internet 21 6 Running initial setup 22 Watching TV 23 Using the remote control 24 Using Your BRAVIA TV Discovering the contents you like Discover 26 Enjoying social networking while watching TV Social Viewing 27 Selecting various contents and tools Home Menu 27 Looking for Instructions Looking for instructions in the electronic manual i Manual B e Additional Information T...

Page 8: ... Mount Attachment M6 long 2 Wall Mount Attachment M5 short 2 Active 3D Glasses battery included 2 XBR 65X90xB only Passive 3D Glasses 2 except XBR 65X90xB Camera cover 1 Operating Instructions this manual and other documents Port Replicator accessories set Refer to the model name printed on the remote control Inserting batteries into the remote control Touchpad Remote Control 1 Remove the protecti...

Page 9: ...re setting up your TV Some TV models are packaged with a detached Table Top Stand so you can mount your TV to a wall right away See page 38 Installing the TV to the Wall if you want to mount the TV to a wall If you are not mounting the TV to a wall you will need to attach the Table Top Stand You will need a Phillips screwdriver not supplied and the supplied screws to complete the task Look for the...

Page 10: ... Should this occur allow moisture to evaporate completely before powering the TV on Ensure that there are no objects in front of the TV 1 Attaching the Table Top Stand x Recommended edge position XBR 65X90xB only Refer to the supplied Table Top Stand leaflet for proper attachment Do not put stress on the LCD panel or the frame around the screen Be careful to not pinch your hands or the AC power co...

Page 11: ...ed screws The arrow marks indicate the location of the screw holes used for securing the Table Top Stand If using an electric screwdriver set the torque at approximately 1 5 N m 15 kgf cm x Alternative middle position You can change the Table Top Stand from the edge to the middle position by referring to the instructions below 1 2 Middle position 1 2 3 Thick cushion 1 3 2 Continued ...

Page 12: ...finger tighten only over tightening the connection can damage the TV Before moving the TV disconnect all of the cables connected to the TV to prevent damaging the TV when it is moved Use an HDMI cable connector within 12 mm thickness 21 mm width Use Sony HDMI cable with High Speed indication for HDMI connection For connection with Port Replicator refer to the installation guide supplied with the P...

Page 13: ... Media Player 4K Set Top Box etc to the HDMI IN 2 or HDMI IN 1 jack of the TV to enjoy copyright protected content Recommendation for an F type plug Projection of the inner wire from the connection part must be less than 1 5 mm x Shown with a Set Top Box with COMPONENT connection 900 mA MAX 5 V 900 mA MAX 5 V Set Top Box 1 5 mm max Reference drawing for an F type plug 7 mm max Set Top Box Continue...

Page 14: ...N 2 MHL or HDMI IN 4 MHL from other input when MHL compatible device is connected to HDMI IN 2 MHL or HDMI IN 4 MHL jack The availability of Auto Input Change MHL depends on whether the MHL compatible device can support this feature If Charge MHL during Power Off is set to On you can continue charging the MHL compatible device even when the TV is in standby mode Connect the 4K smartphone or mobile...

Page 15: ...eded for A V receivers that do not support ARC Audio Return Channel Set the speaker settings to audio out press HOME then select Settings t Sound t Speakers t Audio System Set the HDMI CEC settings on the TV and AV receiver to allow for system audio control for ARC connections 900 mA MAX 5 V 900 mA MAX 5 V 1 Side Panel 1 Blu ray Disc HD Cable Box or HD Satellite Receiver 1A V Receiver SAT Dish Cab...

Page 16: ...ort ARC Audio Return Channel when connecting with HDMI Set the speaker settings to audio out press HOME then select Settings t Sound t Speakers t Audio System Set the HDMI CEC settings on the TV and AV receiver to allow for system audio control for ARC connections VIDEO L R 900 mA MAX 5 V 900 mA MAX 5 V Cable Antenna or Blu ray Disc DVD SD Cable Box or SD Satellite Receiver Cable SAT Dish Home The...

Page 17: ...Getting Started x Shown with PC Connection with SD VCR DVD DVI does not support audio signals Connect the audio output of the PC to the PC speakers or an A V receiver to listen to sound from the PC 900 mA MAX 5 V 900 mA MAX 5 V Rear of TV PC DVD VCR Splitter Cable Antenna VCR DVD Combo Notebook PC Side Panel DVI or ...

Page 18: ...re and TV sets Avoid placing or hanging items on the TV Never install the TV on slippery unstable and or uneven surfaces furniture that can easily be used as steps such as a chest of drawers Install the TV where it cannot be pulled pushed or knocked over Install the TV so that the TV s Table Top Stand does not protrude out from the Stand not supplied If the Table Top Stand protrudes out from the S...

Page 19: ...w screwed into the TV s rear cover A screw or similar attach it to the Stand Rope or chain strong enough to support the weight of the TV Make sure that there is no excess slack in the rope or chain The length of the M4 machine screw differs depending on the rope or chain diameter Please see below illustration 3 Anchor the TV to the wall by using bolts wall anchor and chain or rope Please see below...

Page 20: ...ll Securing the TV to the stand without securing the TV and the stand to the wall provides minimum protection against the TV toppling over For further protection be sure to follow the three measures recommended 4 Bundling the cables Before bundling the cables remove the cable holder from the AC cover Do not bundle the AC power cord together with other cables 1 Location of cable clamper when the Ta...

Page 21: ...s illustrated 5 Connecting the TV to the Internet When you connect this TV to the Internet you can enjoy multiple functions For details on the functions refer to the i Manual You will need to contract with an Internet service provider to connect to the Internet For LAN connections use a Category 7 cable not supplied Preparing a wired network TV Internet Modem withrouter functions Router Modem Inte...

Page 22: ... 2 Press POWER on the Touchpad Remote Control The illumination LED will light up in white When you switch on the TV for the first time the Language menu appears on the screen The illumination LED lights up in different colors according to the status of the TV If you do not wish to light up the illumination LED you can turn it off later XBR 79 65X907B Press HOME then select Settings t Preferences t...

Page 23: ...ess HOME then select Settings t Network t Network Setup t Set up network connection t Expert If you use WEP security select Wi Fi t Connect by scan list Then select the network name SSID you want to connect to If you cannot find the required network name select Manual Entry and press the touchpad press if using IR Remote Control to enter network name To perform Network Setup later press HOME then ...

Page 24: ...Use 0 9 For channel numbers 10 and above press the next digit quickly XBR 79 65X905B Use 0 9 and point to select digital channels For example to enter channel 2 1 Press 2 point and 1 then press Using the remote control You can operate the TV by using the supplied Touchpad Remote Control or IR Remote Control Touchpad Remote Control can only be used after registration with the TV You can register th...

Page 25: ... Press HOME 2 Slide to select Help then press the touchpad 3 Slide up down to select Touchpad Tutorial then press the touchpad Follow the instructions on the screen You can also launch the Touchpad Tutorial by pressing HOME then select Settings t Preferences t Touchpad configurations t Start Tutorial Launching the Touchpad Tutorial ...

Page 26: ...t contents etc Contents that appear in Discover vary depending on your TV model region country 1 Slide up from the bottom area 2 Slide up down to select the desired category 3 Slide left right to select the desired item then press the touchpad The selected content is displayed When using IR Remote Control 1 Press DISCOVER 2 Press V v to select the desired category 3 Press B b to select the desired...

Page 27: ...ou will need a broadband Internet connection For details see page 21 5 Connecting the TV to the Internet Then go to Network Setup and follow the on screen instructions to connect your TV to the Internet You may need to update the TV s software to use this function Press HOME select Help t Customer Support t Software Update Selecting various contents and tools Home Menu Select the desired category ...

Page 28: ...d content The content is played back The categories are available depending on your TV model region country Selecting various contents Channel You can view the list of digital broadcast contents and thumbnails of live and future broadcasts You can also change the broadcast system by using Channel List at the bottom of the Home Menu This category is only available when digital channels are preset M...

Page 29: ...ent You can also select keywords searched in the past Inputs You can select an input device connected to the TV Media Server You can select a media server e g USB flash drive home network to browse its content using the Media Browser Settings You can change TV settings e g Picture Display Sound Channel Help You can view information about self diagnostics and customer support You can also access th...

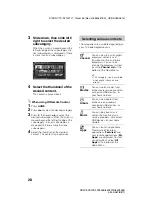
Page 30: ...VIA TV and can be displayed on the screen To learn more about your TV features access your i Manual with the remote control 1 Press HOME 2 Slide to select Help then press the touchpad 3 Slide up down to select i Manual then press the touchpad 4 Select an item 1 Slide left right to select an item 2 Slide up down left right to select an item then press the touchpad If an arrow mark appears slide dow...

Page 31: ...utton then press the touchpad to display the bookmark list Slide up down to select the desired item then press the touchpad To return to the previous screen press RETURN x To remove a bookmark When the bookmarked page is displayed press the Control Bar Slide to select the yellow button then press the touchpad When using IR Remote Control When displaying the page to bookmark press the yellow button...

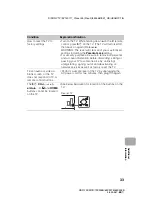
Page 32: ...Diagnostics If the problem persists contact Sony Customer Support information provided on the front cover Condition Explanation Solution There is no picture screen is dark and no sound Check the cable antenna connection Connect the TV to AC power and press 1 on the TV or POWER on the remote control Some programs cannot be tuned Check the antenna The remote control does not function Replace the bat...

Page 33: ... security purposes be sure to remove all personal and account information before discarding selling or passing your TV to someone else by unlinking unregistering signing out of and deactivating all network services as well as factory reset the TV Frozen audio or video a blank screen or the TV does not respond to TV or remote control buttons Perform a simple reset of the TV by unplugging the AC pow...

Page 34: ...ins may be removed with a cloth slightly moistened with a solution of mild soap and warm water If using a chemically pretreated cloth please follow the instruction provided on the package Never spray water or detergent directly on the TV set It may drip to the bottom of the screen or exterior parts and enter the TV set and may cause damage to the TV set Never use strong solvents such as a thinner ...

Page 35: ... Hz 1080 24p 1080i 60 Hz 720p 30 60 Hz 720 24p Side by Side 1080p 60 Hz 1080 24p 1080i 60 Hz 720p 60 Hz Over Under 1080p 30 60 Hz 1080 24p 1080i 60 Hz 720p 60 Hz Audio 5 1 channel linear PCM 32 44 1 and 48 kHz 16 20 and 24 bits Dolby Digital ARC Audio Return Channel HDMI IN 1 only HDMI IN 1 2 3 4 for X905B model series Support 4K resolution Video 2D 4096 2160p 50 60 Hz 4096 2160p 24 Hz 3840 2160p ...

Page 36: ...nd 24 bits Dolby Digital AUDIO OUT i Audio output stereo mini jack Headphone jack supports Subwoofer out DIGITAL AUDIO OUT OPTICAL Digital optical jack Two channel linear PCM Dolby Digital LAN 10BASE T 100BASE TX connector Connection speed may differ depending on the network environment 10BASE T 100BASE TX communication rate and communication quality are not guaranteed for this TV 1 2 3 USB port R...

Page 37: ... 65X90xB Power and others Power requirement 110 V 240 V AC 50 60 Hz Power consumption in use 408 W 314 W in standby 0 3 W Screen size cm measured diagonally inches 199 6 78 6 79 class 163 9 64 5 65 class Display resolution 3 840 dots horizontal 2 160 lines vertical Output Rating USB 1 3 5 V 500 mA MAX USB 2 5 V 800 mA MAX MHL HDMI IN 2 4 5 V 900 mA MAX Dimensions with stand mm 2 031 1 109 442 1 71...

Page 38: ...ony strongly recommends that installation of your TV on the wall be performed by qualified professionals Do not attempt to install it yourself Follow the instruction guide provided with the Wall Mount Bracket for your model Sufficient expertise is required in installing this TV especially to determine the strength of the wall for withstanding the TV s weight The length of the screw for Wall Mount ...

Page 39: ...t attach the Wall Mount Attachment supplied with the TV to the rear of the TV to make it parallel with the wall Be sure to fasten the Wall Mount Attachment when attaching them to the TV If using an electric screwdriver set the torque at approximately 1 5 N m 15 kgf cm 2 1 2 2 Wall Mount Attachment M6 long supplied with the TV Wall Mount Attachment M5 short supplied with the TV ...

Page 40: ...e around the TV as shown in the illustration Inadequate ventilation can lead to overheating of the TV and may cause damage to your TV or cause a fire Leave at least this much space around the set Installed with stand 10 cm 30 cm 10 cm 6 cm Installed on the wall Leave at least this much space around the set 10 cm 10 cm 10 cm 30 cm Never install the TV set as follows Air circulation is blocked Air c...

Page 41: ......

Page 42: ......

Page 43: ......

Page 44: ...n U S A For Your Convenience Online Registration Be sure to register your TV http esupport sony com LA perl registration pl Software Updates Your TV is capable of receiving software updates For the latest information about software updates for your TV visit http esupport sony com LA ...

Reviews: