27
Chapter 3 Using the Control Panel
3
Use the
V
,
v
,
B
and
b
buttons to
set the host name, then press the
[ENTER] button.
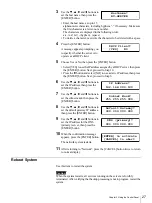
• Enter the host name as up to 15
alphanumeric characters, including hyphens “-” if necessary. Make sure
the first character is a letter, not a number.
The characters are displayed in the following order.
a-z, A-Z, 0-9, - (hyphen), (space)
• To delete a character, overwrite the character to be deleted with a space.
4
Press the [ENTER] button.
A message appears prompting you
to specify whether the server is to
operate as a DHCP client.
5
Choose Yes or No, then press the [ENTER] button.
• Select [YES] to use the IP address assigned by a DHCP server, then press
the [ENTER] button. Next, proceed to Step 10.
• Press the
B
button and select [NO] to use a static IP address, then press
the [ENTER] button. Next, proceed to Step 6.
6
Use the
V
,
v
,
B
and
b
buttons to
set the IP address, then press the
[ENTER] button.
7
Use the
V
,
v
,
B
and
b
buttons to
set the subnet mask, then press the
[ENTER] button.
8
Use the
V
,
v
,
B
and
b
buttons to
set the default gateway IP address,
then press the [ENTER] button.
9
Use the
V
,
v
,
B
and
b
buttons to
set the IP address for the DNS
(primary) server, then press the
[ENTER] button
10
When the confirmation message
appears, press the [ENTER] button.
The network system restarts.
11
After returning to “Network”, press the [CANCEL] button twice to return
to normal display.
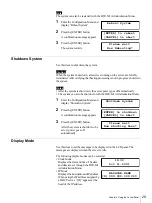
Reboot System
Use this item to restart the system.
Caution
When the system restarts, all services running on the server are forcibly
terminated. After verifying that backup processing is not in progress, restart the
system.
Hostname?
BU-SERVER
DHCP Client?
[YES] NO
IP Address?
192.168.000.100
Subnet Mask?
255.255.255.000
Default Gateway?
000.000.000.000
DNS (primary)?
000.000.000.000
[ENTER] to activate
[CANCEL] to abort


