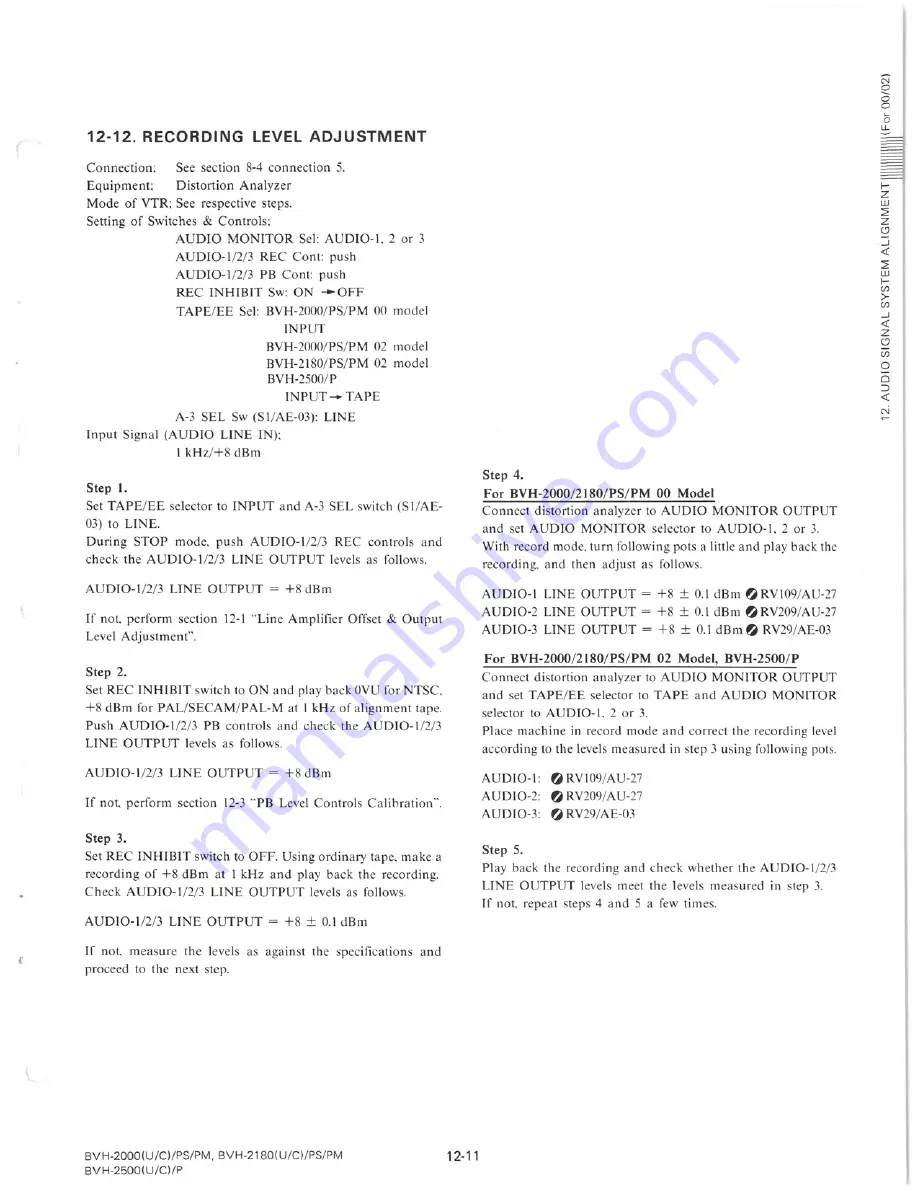
12-12. RECORDING
LEVEL ADJUSTMENT
8-4 connection
5.
VTR~
Setting of Switches
&
Controls:
AUDIO MONITOR
Sel: AUDIO-
L
2 or 3
AUDIO-1/2/3
REC Cont: push
ON
TAPE/EE
Sel: BVH-2000/PS/PM
00 model
INPUT
BVH-2000/PS/PM
02 model
INPUT .... TAPE
A-3 SEL Sw (Sl/AE-03):
LINE
Input Signal (AUDIO
LINE IN)~
Step
I.
Set TAPE/EE
selector to INPUT and A-3 SEL switch (Sl/AE-
03) to LINE.
AUDIO-l/2/3
LINE OUTPUT
=
+8 dBm
If not perform section 12-1 "Line Amplifier Offset
&
Output
Step 2.
Set REC INHIBIT switch to ON and play back OVU for NTSC,
+8 dBm for PAL/SECAM/PAL-M
at 1 kHz of alignment tape.
PB
the
AUDIO-l/2/3
LINE OUTPUT
=
+8 dBm
If not, perform section 12-3 "PB Level Controls Calibration".
Set REC INHIBIT switch to OFF. Using ordinary tape, make a
recording
of +8 dBm at 1 kHz and play back the recording.
Check AUDIO-l/2/3
LINE OUTPUT
levels as follows.
If not, measure
the levels as against the specifications
and
proceed to the next step.
BVH-2000(U/C}/PS/PM,
BVH-2180(U/C)/PS/PM
BVH-2500(U/C}/P
For BVH-2000/2180/PS/PM
00 Model
Connect distortion analyzer to AUDIO MONITOR
OUTPUT
and set AUDIO MONITOR
selector to AUDIO-I.
or 3.
AUDIO-I
LINE OUTPUT
=
+8
±
0.1 dBm ~RVI09/AU-27
AUDIO-2 LINE OUTPUT
=
+8
±
0.1 dBm
!I
RV209/ AU-27
AUDIO-3
OUTPUT
+8
dBm!l
RV29/AE-03
Connect distortion analyzer to AUDIO MONITOR
OUTPUT
and set TAPE/EE
selector to TAPE and AUDIO MONITOR
selector to AUDIO- L 2 or 3.
AUDIO-I:
(lRVl09/AU-27
AUDIO-2:
~ RV209/ AU-27
Step
Play back the recording and check whether the AUDIO-l/2/3
LINE OUTPUT
levels meet the levels measured
in step 3.
If
repeat steps
and 5
few
12-11
..J
«
z
c.:>
CJ)
Summary of Contents for BVH-2000
Page 1: ...he handles available panels are optional Iy ...
Page 4: ......
Page 11: ......
Page 43: ......
Page 45: ......
Page 46: ......
Page 73: ......
Page 87: ......
Page 91: ......
Page 92: ......
Page 105: ......
Page 106: ......
Page 114: ......
Page 117: ......
Page 118: ......
Page 119: ......
Page 120: ......
Page 121: ......
Page 122: ......
Page 123: ......
Page 124: ......
Page 139: ......
Page 141: ......
Page 149: ......
Page 150: ......
Page 155: ......
Page 161: ......
Page 163: ......
Page 179: ......
Page 181: ...ARM 1 C C C ilr l I ...
Page 185: ......
Page 191: ......
Page 195: ......
Page 201: ......
Page 203: ......
Page 219: ......
Page 221: ......
Page 223: ......
Page 224: ......
Page 225: ......
Page 226: ......
Page 227: ......
Page 228: ......
Page 229: ......
Page 239: ......
Page 245: ......
Page 250: ...z o i a o LL Z BVH 2000 U C PS PM BVH 2180 U C PS PM ...
Page 257: ......
Page 259: ......
Page 265: ......
Page 269: ......
Page 305: ......
Page 323: ......
Page 344: ......
Page 370: ...15 ...
Page 371: ......
Page 375: ......
Page 388: ...of Standard Load for Output Check POWER UNIT 1 Standard for Variable a w o a 0 ...
Page 396: ...CN921 8 1 Spec CN921 8 5 Spec hoard BVH 2000 U C PS PM BVH 2500 U C P on ON 100 OFF 5 ...
Page 401: ......
Page 435: ......
Page 449: ......
Page 452: ......
Page 462: ......
Page 471: ......
Page 476: ......
Page 480: ......
Page 482: ... o w o ...
Page 484: ......
Page 492: ......
Page 494: ...80 U C ...
Page 496: ......
Page 497: ......
Page 498: ...14 2 BVH 2000 U C PS PM BVH 2500 U C P 80 U C PS PM w l j j Capstan Ree Servo Check ...
Page 500: ...lel pin 3 12 0 01 Vdc RVl TP5 EQ 02 NG Edge Can nectar Pin 21 B A B R138 w I U U ...
Page 504: ......
Page 505: ...BVH 2000 U C 3 673 996 22 Volume 1 1985 Printed in Japan 1985 4 09 ...


