1-31 (E)
BVP-9500WS/9500WSP MM
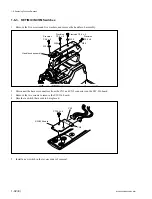
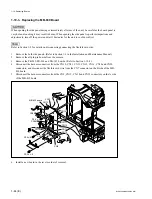
1-6-2. Front Switch Panel Block
1.
Remove the two screws, and remove the front switch panel.
2.
Disconnect the harness connectors from the CN2 and CN3 connectors on the SW-1009 board.
3.
Remove the two screws, and remove the SW-1009 board.
4.
Desolder a switch that needs to be replaced.
5.
Install a new switch in the reverse order of removal.
1-6. Replacing Function Switches
SW-1009 board
Precision
P2.6
x
8
CN3
CN2
Front switch panel
SW-1009 board
Front switch panel
PTP2.6
x
8
Summary of Contents for BVP-9500WS
Page 62: ......
Page 72: ......
Page 206: ......
Page 234: ......
Page 236: ......
Page 246: ......
Page 252: ......
Page 270: ......
Page 277: ......
Page 282: ......
Page 296: ......
Page 322: ......
Page 324: ......
Page 338: ......
Page 340: ......
Page 342: ......
Page 346: ......
Page 350: ......
Page 356: ......
Page 358: ......
Page 360: ......
Page 362: ......
Page 368: ......
Page 372: ......
Page 378: ......
Page 380: ......
Page 382: ......
Page 389: ......


