


4
Mount the Auto Changer
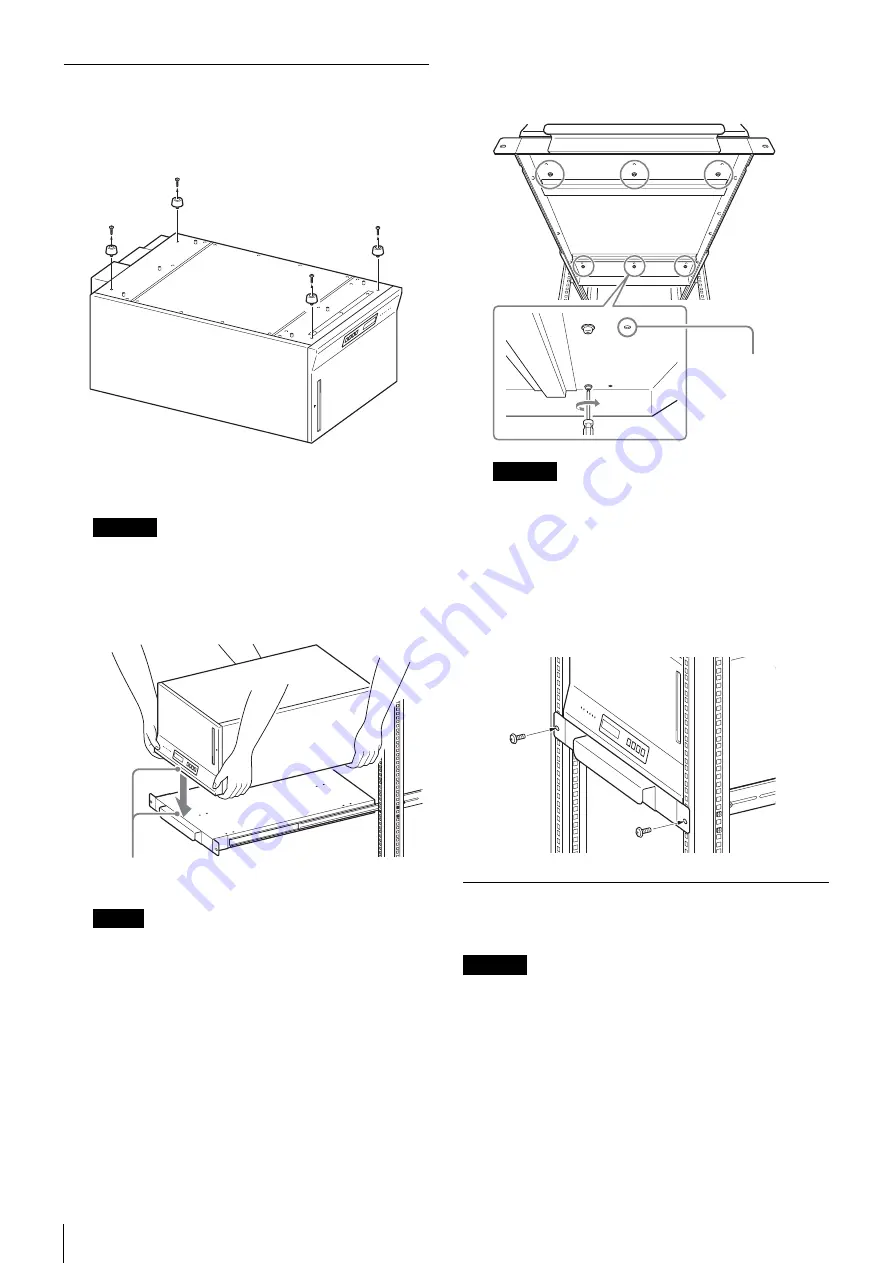
Place the Auto Changer on the tray to mount to the rack.
1
Remove four of the rubber legs at the bottom of the
Auto Changer.
2
Pull out the tray, place the Auto Changer on the tray,
and adjust the mounting position.
Caution
The Auto Changer is heavy, weighing approximately
65 lbs. (30 kg).
Always ensure that at least two people lift the Auto
Changer. Otherwise you may have a back injury or
drop the Auto changer and damage to it.
Note
It is easier to mount the Auto Changer if you position
the front panel of the Auto Changer at the front of the
tray in order to align the screw holes of the Auto
Changer and the tray. (You can also mount the Auto
Changer so as it is sticking out of the tray a little.)
3
Using six of the provided screws, fasten the Auto
Changer to the bottom of the tray as shown in the
figure below.
Caution
Do not perform these mounting steps from beneath
the tray, there is a danger of banging your head or
sustaining an injury if the tray falls on you. Perform
these steps from the front or the rear of the tray.
4
Slide the tray back until the front flanges on the tray
stop the tray.
Using two of the screws you provided to fasten the
front of the tray to the rack.
Dismount the Auto Changer from the
Rack
Caution
The Auto Changer is heavy, weighing approximately 65
lbs. (30 kg).
Always ensure that at least two people lift the Auto
Changer. Otherwise you may have a back injury or drop
the Auto changer and damage to it.
1
Turn off the Auto Changer.
2
Disconnect all cables.
3
Dismount the Auto Changer from the rack by
following the steps 1 to 4 above reversely.
Adjust the position for the front of the Auto
Changer to fit the front of the tray.
If you place the Auto
Changer as it is sticking
out of the tray, using the
adjacent screw holes.


