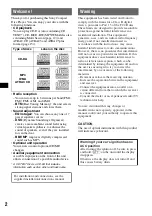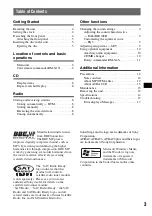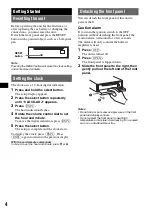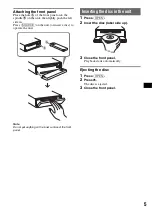
background image

5

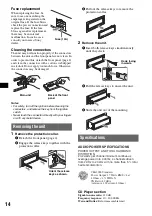
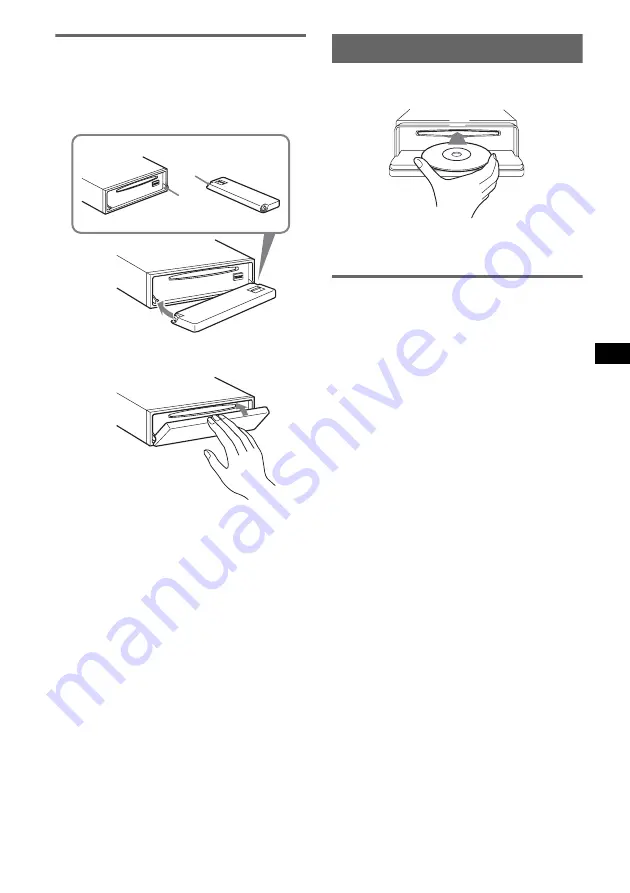
Attaching the front panel

Place the hole 

A

 of the front panel onto the 

spindle 

B

 on the unit, then lightly push the left 

side in.
Press 

(SOURCE)

 on the unit (or insert a disc) to 

operate the unit.

Note

Do not put anything on the inner surface of the front 
panel.

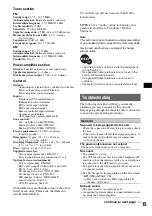
Inserting the disc in the unit

1

Press 

(OPEN)

.

2

Insert the disc (label side up).

3

Close the front panel.

Playback starts automatically.

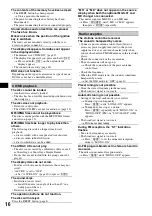
Ejecting the disc

1

Press 

(OPEN)

.

2

Press 

Z

.

The disc is ejected.

3

Close the front panel.

A

B

x

Summary of Contents for CDM8910

Page 1: ...e numbers whenever you call upon your Sony dealer regarding this product Model No Serial No CDX GT350S CDX GT300 To cancel the demonstration DEMO display see page 10 Pour annuler l affichage de démonstration DEMO reportez vous à la page 11 Operating Instructions Mode d emploi 2 653 153 51 1 US FR 2005 Sony Corporation FM AM Compact Disc Player ...

Page 2: ...e limits for a Class B digital device pursuant to Part 15 of the FCC Rules These limits are designed to provide reasonable protection against harmful interference in a residential installation This equipment generates uses and can radiate radio frequency energy and if not installed and used in accordance with the instructions may cause harmful interference to radio communications However there is ...

Page 3: ...g the unit 14 Specifications 14 Troubleshooting 15 Error displays Messages 17 SonicStage and its logo are trademarks of Sony Corporation ATRAC ATRAC3 ATRAC3plus and their logos are trademarks of Sony Corporation R Manufactured under license from BBE Sound Inc The BBE MP process improves digitally compressed sound such as MP3 by restoring and enhancing the higher harmonics lost through compression ...

Page 4: ...ton The setup is complete and the clock starts To display the clock press DSPL Press DSPL again to return to the previous display With the card remote commander In step 4 to set the hour and minute press M or m Detaching the front panel You can detach the front panel of this unit to prevent theft Caution alarm If you turn the ignition switch to the OFF position without detaching the front panel th...

Page 5: ...URCE on the unit or insert a disc to operate the unit Note Do not put anything on the inner surface of the front panel Inserting the disc in the unit 1 Press OPEN 2 Insert the disc label side up 3 Close the front panel Playback starts automatically Ejecting the disc 1 Press OPEN 2 Press Z The disc is ejected 3 Close the front panel A B x ...

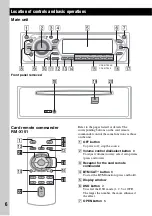
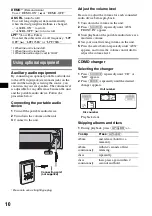
Page 6: ...ff stop the source B Volume control dial select button 9 To adjust volume rotate select setup items press and rotate C Receptor for the card remote commander D BTM CAT 1 button 8 To start the BTM function press and hold E Display window F DSO button 2 To select the DSO mode 1 2 3 or OFF The larger the number the more enhanced the effect G OPEN button 5 CDX GT350S CDX GT300 RESET ql w qk OFF DSPL S...

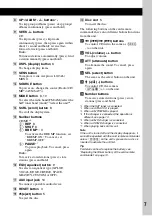
Page 7: ...TOM or OFF Q AUX input jack 10 To connect a portable audio device R RESET button 4 S Z eject button 5 To eject the disc T Disc slot 5 To insert the disc The following buttons on the card remote commander have also different buttons functions from the unit wa buttons To control CD radio the same as SEEK on the unit ws VOL volume button To adjust volume wd ATT attenuate button To attenuate the sound...

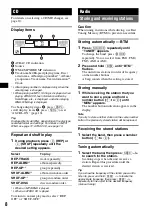
Page 8: ... an accident Storing automatically BTM 1 Press SOURCE repeatedly until TUNER appears To change the band press MODE repeatedly You can select from FM1 FM2 FM3 AM1 or AM2 2 Press and hold BTM until BTM flashes The unit stores stations in order of frequency on the number buttons A beep sounds when the setting is stored Storing manually 1 While receiving the station that you want to store press and ho...

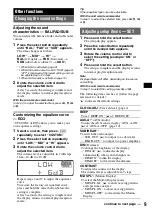
Page 9: ...nd the display returns to normal play reception mode Tip Other equalizer types are also adjustable With the card remote commander In step 3 to adjust the selected item press M or m Adjusting setup items SET 1 Press and hold the select button The setup display appears 2 Press the select button repeatedly until the desired item appears 3 Rotate the volume control dial to select the setting example O...

Page 10: ...pears 3 Start playback of the portable audio device at a moderate volume 4 Set your usual listening volume on the unit 5 Press the select button repeatedly until AUX appears and rotate the volume control dial to adjust the volume level CD MD changer Selecting the changer 1 Press SOURCE repeatedly until CD or MD appears 2 Press MODE repeatedly until the desired changer appears Playback starts Skipp...

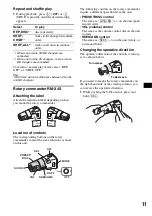
Page 11: ...ols on the rotary commander require a different operation from the unit PRESET DISC control The same as GP ALBM on the unit push in and rotate VOL volume control The same as the volume control dial on the unit rotate SEEK AMS control The same as SEEK on the unit rotate or rotate and hold Changing the operative direction The operative direction of the controls is factory set as shown below If you n...

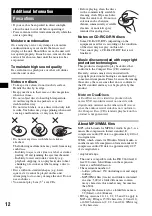
Page 12: ... commercially available cleaners or antistatic spray intended for analog discs Notes on CD R CD RW discs Some CD Rs CD RWs depending on the equipment used for its recording or the condition of the disc may not play on this unit You cannot play a CD R a CD RW that is not finalized Music discs encoded with copyright protection technologies This product is designed to play back discs that conform to ...

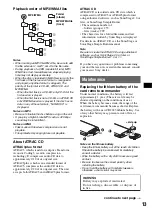
Page 13: ...h is compressed to ATRAC3 or ATRAC3plus format using authorized software such as SonicStage 2 0 or later or SonicStage Simple Burner The maximum number of folders groups 255 files tracks 999 The characters for a folder file name and text information written by SonicStage is displayed For details on ATRAC CD see the SonicStage or SonicStage Simple Burner manual Note Be sure to create the ATRAC CD u...

Page 14: ...s directly with your fingers or with any metal device Removing the unit 1 Remove the protection collar 1Detach the front panel page 4 2Engage the release keys together with the protection collar 3Pull out the release keys to remove the protection collar 2 Remove the unit 1Insert both release keys simultaneously until they click 2Pull the release keys to unseat the unit 3Slide the unit out of the m...

Page 15: ... selector XA C30 AUX IN selector XA 300 Your dealer may not handle some of the above listed accessories Please ask the dealer for detailed information Note This unit cannot be connected to a digital preamplifier or an equalizer which is Sony BUS system compatible Design and specifications are subject to change without notice Troubleshooting The following checklist will help you remedy problems you...

Page 16: ...any characters those may not scroll A SCRL is set to OFF tSet A SCRL ON page 10 or press SCRL The sound skips Installation is not correct tInstall the unit at an angle of less than 45 in a sturdy part of the car Defective or dirty disc The operation buttons do not function The disc will not eject Press the RESET button page 4 MS or MD does not appear on the source display when both the optional MG...

Page 17: ...e is on during automatic tuning NO DISC The disc is not inserted in the CD MD changer tInsert discs in the changer NO ID3 ID3 tag information is not written in the MP3 file NO INFO Text information is not written in the ATRAC3 ATRAC3plus or WMA file NO MAG The disc magazine is not inserted in the CD changer tInsert the magazine in the changer NO MUSIC The disc is not a music file tInsert a music C...

Page 18: ...commerce de Sony Corporation ATRAC ATRAC3 ATRAC3plus et leurs logos sont des marques de commerce de Sony Corporation Type de disques Symbole indiqué sur le disque CD DA MP3 WMA CD ATRAC En ce qui concerne l installation et les connexions consulter le manuel d installation raccordement fourni L utilisation d instruments optiques avec ce produit augmente les risques pour les yeux ATTENTION Avertisse...

Page 19: ...9 Réception des stations mémorisées 9 Recherche automatique des fréquences 9 Autres fonctions Changement des réglages du son 10 Réglage des caractéristiques du son BAL FAD SUB 10 Personnalisation de la courbe de l égaliseur EQ3 10 Réglage des paramètres de configuration SET 10 Utilisation d un appareil en option 11 Raccordement d un appareil audio portatif 11 Changeur CD MD 12 Satellite de command...

Page 20: ... sélection Le réglage est terminé et l horloge démarre Pour afficher l horloge appuyez sur DSPL Appuyez de nouveau sur DSPL pour revenir à l écran précédent Avec la mini télécommande À l étape 4 pour régler l heure et les minutes appuyez sur M ou m Retrait de la façade Vous pouvez retirer la façade de cet appareil pour le protéger du vol Alarme d avertissement Si vous mettez la clé de contact en p...

Page 21: ...CE sur l appareil ou insérez un disque pour le faire fonctionner Remarque Ne posez rien sur la face interne de la façade Insertion du disque dans le lecteur 1 Appuyez sur OPEN 2 Insérez le disque côté imprimé vers le haut 3 Fermez la façade La lecture commence automatiquement Éjection du disque 1 Appuyez sur OPEN 2 Appuyez sur Z Le disque est éjecté 3 Fermez la façade A B x ...

Page 22: ... arrêt de la source B Molette de réglage du volume touche de sélection 10 Réglage du niveau du volume tournez sélection des paramètres du son appuyez et tournez C Récepteur de la mini télécommande D Touche BTM CAT 1 9 Démarrage de la fonction BTM appuyez et maintenez la touche enfoncée E Fenêtre d affichage F Touche DSO 2 Sélection du mode DSO 1 2 3 ou OFF Plus le chiffre est élevé plus l effet es...

Page 23: ...ntrée AUX 11 Raccordement d un appareil audio portable R Touche RESET 4 S Touche Z éjection 5 Éjection du disque T Fente d insertion des disques 5 Insertion du disque Les touches suivantes de la mini télécommande correspondent également à des touches fonctions différentes de celles de l appareil wa Touches Commande du CD de la radio identiques aux touches SEEK de l appareil ws Touche VOL volume Ré...

Page 24: ...ppuyez sur DSPL pour faire défiler les rubriques d affichage D appuyez sur SCRL ou réglez A SCRL ON page 11 Conseil Les rubriques affichées varient selon le type de disque le format enregistré et les réglages Pour plus de détails à propos des fichiers MP3 WMA reportez vous à la page 14 à propos des CD ATRAC reportez vous à la page 15 Lecture répétée et lecture aléatoire 1 En cours de lecture appuy...

Page 25: ...mémoriser appuyez sur une touche numérique 1 à 6 et maintenez la enfoncée jusqu à ce que l indication MEM s affiche Le numéro de la touche apparaît dans la fenêtre d affichage Remarque Si vous essayez de mémoriser une autre station sur la même touche numérique la station mémorisée précédemment est remplacée Réception des stations mémorisées 1 Sélectionnez la bande puis appuyez sur une touche numér...

Page 26: ... Appuyez plusieurs fois sur la touche de sélection jusqu à ce que LOW MID ou HI apparaisse 3 Tournez la molette de réglage du volume pour régler le paramètre sélectionné Le niveau de volume peut être réglé par incréments de 1 dB de 10 dB à 10 dB Répétez les étapes 2 et 3 pour régler la courbe de l égaliseur Pour restaurer la courbe par défaut de l égaliseur appuyez sur la touche de sélection et ma...

Page 27: ...ver avec AUX A OFF page 11 SUB REAR 1 Pour commuter la sortie audio SUB OUT z pour émettre vers un caisson de graves REAR OUT pour émettre vers un amplificateur de puissance DIM Régulateur de luminosité Pour modifier la luminosité de la fenêtre d affichage DIM AT z réduit la luminosité automatiquement lorsque vous allumez les phares DIM ON réduit la luminosité de la fenêtre d affichage DIM OFF dés...

Page 28: ...usieurs changeurs CD ou plusieurs changeurs MD sont raccordés Pour revenir au mode de lecture normal sélectionnez REP OFF ou SHUF OFF Conseil La fonction SHUF ALL ne passe pas de façon aléatoire de la lecture de plages de lecteurs CD à la lecture de plages de changeurs MD Satellite de commande RM X4S Installation de l étiquette Apposez l étiquette comportant les indications suivant la position de ...

Page 29: ...s retirez le disque et attendez environ une heure que l humidité se soit évaporée Pour conserver un son de haute qualité Veillez à ne pas renverser de jus de fruit ou d autres boissons sucrées sur l appareil ou sur les disques Remarques sur les disques Pour qu un disque reste propre ne touchez pas sa surface Saisissez le par les bords Rangez vos disques dans leur boîtier ou dans un chargeur lorsqu...

Page 30: ...ons Nombre maximal de dossiers albums 150 y compris le répertoire de base et les dossiers vides fichiers plages et dossiers MP3 WMA contenus sur un disque 300 lorsqu un nom de fichier ou de dossier contient un grand nombre de caractères ce nombre peut être inférieur à 300 caractères affichables pour un nom de dossier fichier 32 Joliet ou 64 Romeo Les versions des étiquettes ID3 1 0 1 1 2 2 2 3 et ...

Page 31: ...e diminue Remplacez la pile par une nouvelle pile au lithium CR2025 L utilisation de tout autre type de pile entraîne un risque d incendie ou d explosion Remarques sur la pile au lithium Tenez la pile au lithium hors de portée des enfants En cas d ingestion de la pile consultez immédiatement un médecin Essuyez la pile avec un chiffon sec pour assurer un bon contact Veillez à respecter la polarité ...

Page 32: ...onnecteur d antenne externe Fréquence intermédiaire 10 7 MHz 450 kHz Sensibilité 30 µV Amplificateur de puissance Sorties sorties de haut parleurs connecteurs de sécurité Impédance des haut parleurs 4 à 8 ohms Puissance de sortie maximale 52 W 4 à 4 ohms Généralités Sorties Borne de sorties audio commutation avant caisson de graves arrière Borne de commande de relais d antenne électrique Borne de ...

Page 33: ...xpansé pour cales d emballage n est pas utilisé dans l emballage Généralités L appareil n est pas alimenté Vérifiez le raccordement Si tout est en ordre vérifiez le fusible Si l appareil est mis hors tension et que l affichage disparaît il est alors impossible de commander l appareil avec la télécommande tMettez l appareil sous tension L antenne électrique ne se déploie pas L antenne électrique ne...

Page 34: ...n endroit stable du véhicule Le disque est défectueux ou sale Les touches de commande ne fonctionnent pas Impossible d éjecter le disque Appuyez sur la touche RESET page 4 MS ou MD n apparaît pas sur l affichage de la source lorsque vous raccordez en même temps l appareil MGS X1 et le changeur MD en option Cet appareil reconnaît le MGS X1 comme étant un lecteur MD tAppuyez sur SOURCE jusqu à ce qu...

Page 35: ...e recherche automatique des fréquences NO DISC Le disque n a pas été inséré dans le changeur CD MD tInsérez un disque dans le changeur NO ID3 Aucune information des étiquettes ID3 ne figure dans le fichier MP3 NO INFO Aucune information textuelle ne figure dans le fichier ATRAC3 ATRAC3plus ou WMA NO MAG Le chargeur n a pas été inséré dans le changeur CD tInsérez le chargeur dans le changeur NO MUS...

Page 36: ...u have any questions problems regarding this product try the following 1 Read Troubleshooting in these Operating Instructions 2 Reset the unit Note Stored data may be erased 3 Please contact U S A only Call 1 800 222 7669 URL http www SONY com ...

Reviews: