8
27
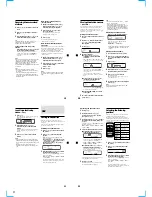
Using the rotary
commander
The rotary commander works by pressing
buttons and/or rotating controls.
You can control also an optional CD/MD unit
with the rotary commander.
By pressing buttons
(the SOURCE and MODE buttons)
Each time you press
(SOURCE)
, the
source changes as follows:
Tuner
t
CD
*
t
MD
*
t
TV
*
*
If the corresponding optional equipment is
not connected, this item will not appear.
Pressing
(MODE)
changes the operation
in the following ways:
• Tuner: FM1
t
FM2
t
FM3
t
AM1
t
AM2
• CD unit
*
: CD1
t
CD2
t
…
• MD unit
*
: MD1
t
MD2
t
…
• TV/Video
*
: TV1
t
TV2
t
AUX
*
If the corresponding optional equipment is
not connected, the item will not appear.
(SOURCE)
(MODE)
By rotating the control
(the SEEK/AMS control)
Rotate the control momentarily and
release it to:
•Locate a specific track on a disc. Rotate
and hold the control until you locate the
specific point in a track, then release it to
start playback.
•Tune in stations automatically. Rotate and
hold the control to find a specific station.
By pushing in and rotating the
control (the PRESET/DISC control)
Push in and rotate the control to:
•Receive the stations memorized on the
number buttons.
•Change the disc.
28
Other operations
Tip
If your car has no ACC (accessory) position on the
ignition key switch, be sure to press
(OFF)
for two
seconds to turn off the clock indication after
turning off the engine.
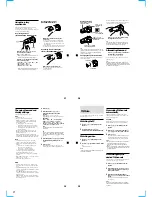
Changing the operative direction
The operative direction of controls is factory-
set as shown below.
OFF
Rotate the VOL control to
adjust the volume.
Press
(OFF)
to
turn off the unit.
Press
(ATT)
to
attenuate the
sound.
Press
(DSPL)
to display
the memorized names.
Press
(SOUND)
to
adjust the volume and
sound menu.
To increase
To decrease
If you need to mount the rotary commander
on the right hand side of the steering column,
you can reverse the operative direction.
Press
(SOUND)
for two seconds while
pushing the VOL control.
Tip
You can also change the operative direction of
these controls with the unit (see “Changing the
sound and display settings” on page 29).
Attenuating the sound
Press
(ATT)
on the rotary commander or
the card remote commander.
“ATT on” flashes momentarily.
To restore the previous volume level, press
(ATT)
again.
Tip
When the interface cable of a car telephone is
connected to the ATT lead, the unit decreases the
volume automatically when a telephone call comes
in (Telephone ATT function).
29
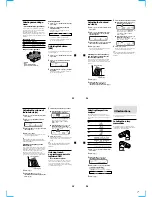
Changing the sound and
display settings
The following items can be set:
SET
•Clock (page 10)
•Beep - to turn on or off the beeps.
•RM (Rotary Commander) - to change the
operative direction of the controls of the
rotary commander.
— Select “norm” to use the rotary
commander as the factory-set position.
— Select “rev” when you mount the rotary
commander on the right side of the
steering column.
•Multi language (language selection) - to
change the display language to English,
French, or Spanish.
•D.Info (Dual Information) - to display the
clock and the play mode at the same time (on)
or to display the information alternately (off).
DIS
•SA (Spectrum Analyzer) - to change the
display pattern of the equalizer display.
•Dimmer - to change the brightness of the
display.
— Select “Auto” to dim the display only
when you turn the lights on.
— Select “on” to dim the display.
— Select “off” to deactivate Dimmer.
•Contrast - to adjust the contrast if the
indications in the display are not
recognisable because of the unit’s installed
position.
•M.Dspl (Motion display) - to turn the motion
display to 1, 2 , or off.
•A.Scrl (Auto Scroll) (page 13)
SND
•EQ Tune (Equalizer tuning) - to adjust the
frequency and volume level of the equalizer
curve.
•Front HPF (High pass filter for the front pre-
output) - to select the cut-off frequency of the
front pre-output.
•Rear HPF (High pass filter for the rear pre-
output) - to select the cut-off frequency of the
rear pre-output.
•SUB LPF (Low pass filter for the subwoofer
output) - to select the cut-off frequency of the
subwoofer output.
1
Press
(MENU)
.
2
Press either side of
(DISC/PRST)
repeatedly until the desired item
appears.
Each time you press (–) side of
(DISC/PRST)
, the item changes as follows:
Example:
Clock
t
Beep
t
RM
t
Multi language
t
D.Info
t
SA
t
Dimmer
t
Contrast
t
M.Dspl
t
A.Scrl
t
Local
t
Mono
t
IF
t
EQ Tune
t
Front HPF
t
Rear HPF
t
SUB LPF
t
Name edit
t
NameDel
t
BTM
Note
The displayed item will differ depending on
the source.
Tip
You can easily switch among categories (“SET”,
“DIS”, “P/M”, “SND” and “EDT”) by pressing
and holding either side of
(DISC/PRST)
for two
seconds.
3
Press either side of
(SEEK/AMS)
to select
the desired setting (Example: “on” or
“off”).
4
Press
(ENTER)
.
After the mode setting is complete, the
display returns to normal playback mode.
30
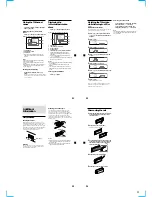
TV/Video
You can connect an optional TV tuner and TV
monitor to this unit.
Watching the TV
1
Press
(SOURCE)
repeatedly until “TV”
appears.
2
Press either side of
(DISC/PRST)
repeatedly to select the desired TV band.
Watching a video
1
Press
(SOURCE)
repeatedly until “TV”
appears.
2
Press
(MODE)
repeatedly to select “Video
1.”
Playback the video.
Note
“Video 2” appears if the VIDEO 2 terminal of the
TV monitor is selected.
Memorizing TV channels
automatically
The unit selects the TV channels with the
strongest signals and memorizes them in the
order of their frequency.
Caution
When tuning in a station while driving, use
Best Tuning Memory to prevent accidents.
1
Press
(SOURCE)
repeatedly until “TV”
appears.
2
Press
(MENU)
, then press either side of
(DISC/PRST)
until “Auto Mem” appears.
3
Press
(ENTER)
.
The unit stores TV channels in the order of
their frequencies on the number buttons.
A beep sounds when the setting is stored.
Notes
• The unit does not store TV channels with weak
signals. If only a few TV channels can be
received, some number buttons will remain
empty.
• When a preset number is indicated in the display,
the unit starts storing TV channels from the one
currently displayed.
Memorizing only the
desired TV channels
You can store up to 6 channels on the number
buttons in the order of your choice.
1
Press
(SOURCE)
repeatedly until “TV”
appears.
2
Press either side of
(SEEK/AMS)
to tune
in the TV channel you want to store on
each number button.
3
Press and hold the desired number
button (
(1)
to
(6)
) until you hear a beep
sound.
The number button indication appears in
the display.
Note
If you try to store another channel on the same
number button, the previously stored channel will
be erased.

