background image

Basic Operations

Basic Operations

9

CFD-222/DW222.E._3-858-169-1X.U/CA/AU/E92

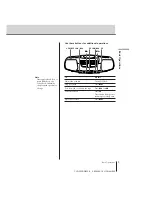
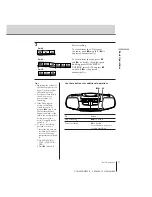
Use these buttons for additional operations

To

Do this

Adjust the volume

Turn VOLUME.

Stop playback

Press 

p6

Fast-forward or rewind the tape

Press 

)

 or 

0

Pause playback

Press 

P

.

Press the button again to
resume play after pause.

Eject the cassette

Press 

p6

.

VOLUME

0/)

p6

P 0/)

p6

P

Note

During playback, do not
press buttons on the
other deck. Otherwise
the playback speed may
change.

Summary of Contents for CFD-222

Page 1: ...CFD 222 DW222 E _3 858 169 1X U CA AU E92 3 858 169 12 1 CD Radio Cassette Corder 1996 by Sony Corporation Operating Instructions CFD 222 CFD DW222 ...

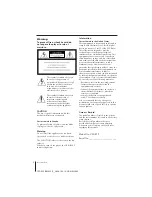
Page 2: ...reasonable protection against harmful interference in a residential installation This equipment generates uses and can radiate radio frequency energy and if not installed and used in accordance with the instructions may cause harmful interference to radio communications However there is no guarantee that interference will not occur in a particular installation If this equipment does cause harmful ...

Page 3: ...ecording on a tape The CD Player 12 Using the display 13 Locating a specific point in a track 14 Playing tracks repeatedly Repeat Play 15 Creating your own program Program Play Setting Up 16 Choosing the power sources 17 Adjusting the sound emphasis TONE MEGA BASS Additional Information 18 Precautions 20 Troubleshooting 22 Maintenance 23 Specifications Back cover Index ...

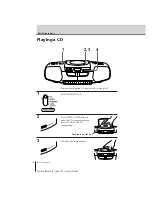
Page 4: ...aying a CD Basic Operations Connect the supplied AC power cord see page 16 1 Set FUNCTION to CD 2 Press OPEN CLOSE down to open the CD compartment and place the CD on the CD compartment 3 Close the CD compartment 4 2 3 1 OPEN CLOSE With the label side up OPEN CLOSE ...

Page 5: ...cks once Playing time Track number AMS SEARCH VOLUME FUNCTION OPEN CLOSE p To Do this Adjust the volume Turn VOLUME Stop playback Press p Pause playback Press Press again to resume play after pause Go to the next track Press AMS SEARCH Go back to the previous track Press AMS SEARCH Remove the CD Press OPEN CLOSE Turn off the player Set FUNCTION to TAPE CD RADIO OFF ...

Page 6: ...c Operations 6 Listening to the radio Connect the supplied AC power cord see page 16 1 Set FUNCTION to RADIO 2 Set BAND to FM or AM 3 Turn TUNING to tune in a radio station If the received FM stereo is too weak the reception becomes monaural 1 2 3 ...

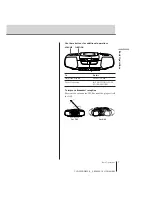
Page 7: ...CA AU E92 Use these buttons for additional operations VOLUME FUNCTION To Do this Adjust the volume Turn VOLUME Turn off the radio Set FUNCTION to TAPE CD RADIO OFF To improve broadcast reception Reorient the antenna for FM Reorient the player itself for AM For FM For AM ...

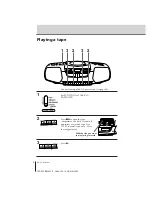
Page 8: ...nect the supplied AC power cord see page 16 1 Set FUNCTION to TAPE CD RADIO OFF 2 Press p6 to open the tape compartment on deck A or deck B and insert a recorded tape Use TYPE I normal tape only Close the compartment 3 Press 1 3 2 3 2 With the side you want to play facing forward ...

Page 9: ... Do this Adjust the volume Turn VOLUME Stop playback Press p6 Fast forward or rewind the tape Press or 0 Pause playback Press P Press the button again to resume play after pause Eject the cassette Press p6 VOLUME 0 p6 P 0 p6 P Note During playback do not press buttons on the other deck Otherwise the playback speed may change ...

Page 10: ...y 2 Select the program source you want to record To record from the CD player set FUNCTION to CD and insert a CD see page 4 To record from the radio set FUNCTION to RADIO select the band and tune in the station you want see page 6 To record from the tape insert a recorded tape into deck A see page 8 and set FUNCTION to DUBBING Recording on a tape Display 3 1 With the side you want to record on fac...

Page 11: ...k B Pause recording P on deck B Press the button again to resume recording Tips Adjusting the volume or the audio emphasis see page 17 will not affect the recording level For the best results use the AC power as a power source for recording If the AM program makes a whistling sound after you ve pressed r in step 3 set the ISS Interference Suppress Switch at the rear to the position that most decre...

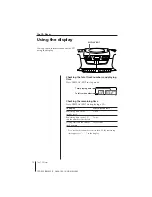
Page 12: ...PLAY ENT in stop mode Total playing time Total track numbers Checking the remaining time Press DISPLAY ENT while playing a CD To display Press DISPLAY ENT Remaining time on the Once current track Remaining time on the CD Twice and the number of tracks left Playing time and the current Three times track number For a track whose number is more than 20 the remaining time appears as in the display DIS...

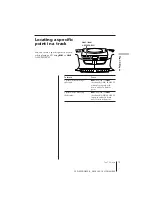
Page 13: ... specific point in a track while playing a CD using or AMS SEARCH To locate Press a point while listening to forward or the sound backward AMS SEARCH while playing and hold down until you find the point a point while observing forward or the display backward AMS SEARCH in pause and hold down until you find the point AMS SEARCH ...

Page 14: ...y To repeat Select a single track REP 1 all tracks REP ALL tracks in random order SHUF REP programed tracks PGM REP 3 Do either of the following to start repeat play When you ve selected REP1 select the track by pressing or AMS SEARCH and press When you ve selected REP ALL and SHUF REP press When you ve selected PGM REP program tracks see step 3 on page 15 then press To cancel Repeat Play Press PL...

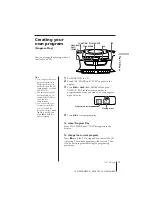
Page 15: ...ert a blank tape into deck B and press r on deck B to start recording 1 Set FUNCTION to CD 2 PressPLAY MODE until PGM appears in the display 3 Press or AMS SEARCH then press DISPLAY ENT for the tracks you want to program in the order you want You can program up to 20 tracks 4 Press to start program play To cancel Program Play Press PLAY MODE until PGM disappears in the display To change the curren...

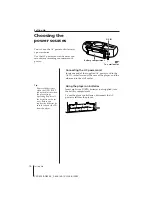
Page 16: ...nd of the supplied AC power cord to the AC IN socket located at the rear of the player and the other end to the wall outlet Using the player on batteries Insert eight size D R20 batteries not supplied into the battery compartment To use the player on batteries disconnect the AC power cord from the player Tip Replace the batteries when the OPR BATT indicator dims or when the player stops operating ...

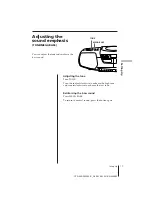
Page 17: ...ONE MEGA BASS You can adjust the tone and reinforce the bass sound Adjusting the tone Turn TONE Turn the control clockwise to enhance the high tone and counterclockwise to enhance the low tone Reinforcing the bass sound Press MEGA BASS To return to normal sound press the button again MEGA BASS TONE ...

Page 18: ...rate properly In this case remove the CD and wait about an hour for the moisture to evaporate If the player has not been used for a long time set it in the playback mode to warm it up for a few minutes before inserting a cassette If you have any questions or problems concerning your player please consult your nearest Sony dealer On safety As the laser beam used in the CD player section is harmful ...

Page 19: ...inside the car Do not stick paper or sticker on the CD nor scratch the surface of the CD After playing store the CD in its case If there is a scratch dirt or fingerprints on the CD it may cause tracking error Notes on cassettes Break off the cassette tab from side A or B to prevent accidental recording If you want to reuse the tape for recording cover the broken tab with adhesive tape To record on...

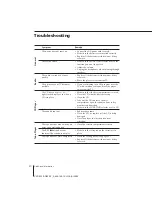
Page 20: ...unction you want to operate Adjust the volume Unplug the headphones when listening through speakers Replace all the batteries with new ones if they are weak Move the player away from the TV If you are listening to an FM program near the TV with an indoor antenna move the player away from the TV Make sure that the disc compartment is closed Place the CD with the label surface up Clean the CD Take o...

Page 21: ... heads pinch roller and capstan See page 22 Demagnetize the heads using a demagnetizer see page 22 The TYPE II high position or TYPE IV metal tape is being used Use TYPE I normal tape only Tape Player After trying the above remedies if you still have problems unplug the AC power cord and remove all the batteries After all the indications in the display disappear plug the power cord and insert the ...

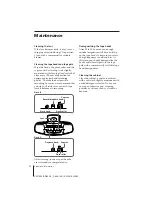
Page 22: ...ravels before each recording Maintenance Demagnetizing the tape heads After 20 to 30 hours of use enough residual magnetism will have built up on the tape heads to begin to cause loss of high frequency sound and hiss At this time you should demagnetize the heads and all metal parts in the tape path with a commercially available tape head demagnetizer Cleaning the cabinet Clean the cabinet panel an...

Page 23: ...AM Built in ferrite bar aerial Cassette corder section Recording system 4 track 2 channel stereo Fast winding time Approx 140 s sec with Sony cassette C 60 Frequency response TYPE I normal 70 10 000 Hz General Speaker Full range 10 cm dia 4 ohms cone type 2 Outputs Headphones jack stereo minijack For 16 68 ohms impedance headphones Power output excluding US model 3 W 3 W at 4 ohms 10 harmonic dist...

Page 24: ...ating your own program 15 D E F G H Demagnetizing the tape heads 22 Display 12 R Recording on a tape 10 Repeat Play 14 S Selecting tracks 5 Setting up 16 Sound emphasis 17 T Troubleshooting 20 TONE 17 U V W X Y Z Using the display 12 I J K Improving broadcast reception 7 L Listening to the radio 6 Locating a specific point in a track 13 M N O MEGA BASS 17 P Q Playing a CD 4 a tape 8 tracks repeate...

Reviews: