15
CFD-G55
Focus Bias Check
1.
Connect an oscilloscope between TP RF and TP VREF on
CD board.
2.
Insert the test disc (YEDS-18).
3.
Set the CD test mode.
4.
Press the
u
button three times (LPC ON).
5.
Confirm that the oscilloscope waveform is as shown in the figure
below. (eye pattern)
A good eye pattern means that the diamond shape (
◊
) in the
center of the waveform can be clearly distinguished.
6.
Press the
u
button.(LPC OFF)
7.
Perform confirmation in step 4 again.
• RF Signal Reference Waveform (eye pattern)
RF level
0.85
±
0.2 Vp-p (LPC ON)
0.95
±
0.4 Vp-p (LPC OFF)
VOLT/DIV : 200mV
TIME/DIV : 500 ns
CD SECTION
CD Test Mode
• How to put the set into CD test mode
1.
Press the POWER button to turn the power on.
2.
Insert the test disc (YEDS-18). (Part No. : 3-702-101-01)
(Function is set to CD.)
3.
Set the CD test mode by momentary shorting both sides of
TEST- 1 on MAIN board.
4.
Press the
x
button two times. The set is set to the CD test
mode.
(The message
80
is displayed.)
• How to release the CD test mode
Turn the power off.
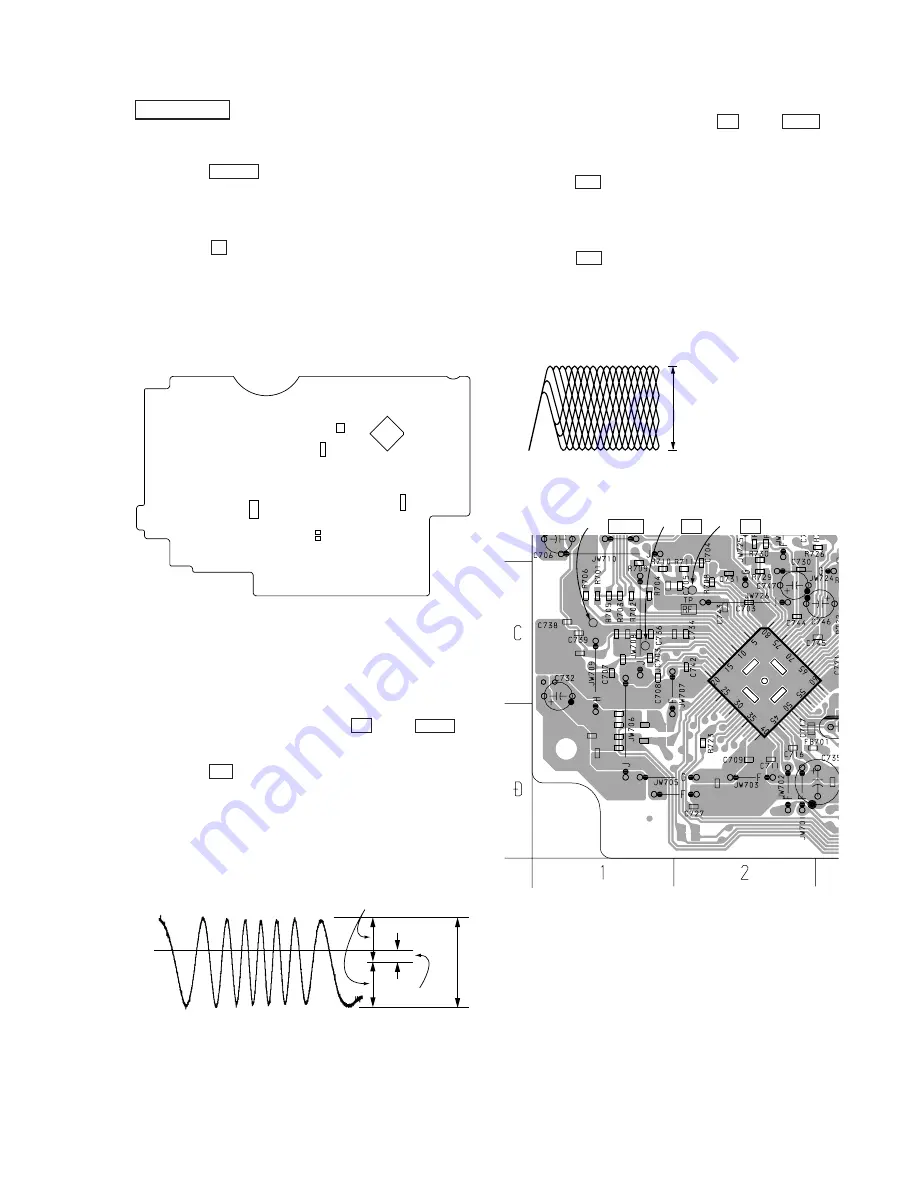
[MAIN BOARD] (Conductor side)
Traverse Waveform Check
1.
Connect an oscilloscope between TP TE and TP VREF on
CD board.
2.
Set the CD test mode.
3.
Press the
u
botton to play the test disc (YEDS-18).
4.
Confirm that the center of the traverse waveform will be at 0V.
5.
Confirm that the peak-to-peak voltage value of the traverse
waveform meets the specification.
6.
Release the CD test mode.
• Traverse waveform
A (DC voltage)
symmetry
0V
A = 0
±
220 mV
B = 0.95
±
0.55 Vp-p
B
VOLT/DIV : 200mV
TIME/DIV : 1 ms
IC803
IC802
IC805
IC321
IC801
TEST-1
[CD BOARD] (Conductor side)
IC701
TP VREF
TP TE
TP RF
Summary of Contents for CFD-G55 - Cd Radio Cassette-corder
Page 26: ...26 26 CFD G55 5 10 Schematic Diagram MAIN Section 1 2 See page 34 for IC Block Diagrams ...
Page 29: ...29 29 CFD G55 5 13 Schematic Diagram AMP Section ...
Page 31: ...31 31 CFD G55 5 15 Schematic Diagram CONTROL Section ...
Page 33: ...33 33 CFD G55 5 17 Schematic Diagram POWER Section ...
Page 53: ...53 CFD G55 MEMO ...


