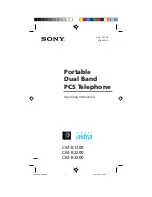
background image

Operating Instructions

CM-B1200
CM-B2200
CM-B3200

Portable
Dual Band
PCS Telephone

3-861-742-12

80-68385-6

B2200 01-09draft3

8/21/98, 12:11 PM

1

Summary of Contents for CM-B1200

Page 1: ...Operating Instructions CM B1200 CM B2200 CM B3200 Portable Dual Band PCS Telephone 3 861 742 12 80 68385 6 B2200 01 09draft3 8 21 98 12 11 PM 1 ...

Page 2: ...y of their respective holders Design and specifications are subject to change without notice Talk and standby times are subject to change DISPOSAL OF LITHIUM ION BATTERY LITHIUM ION BATTERY DISPOSE OF PROPERLY You can return your unwanted lithium ion batteries to your nearest Sony Service Center or Factory Service Center Note In some areas the disposal of lithium ion batteries in household or busi...

Page 3: ...owever that these Rules and Regulations and Safety Precautions sections do not constitute legal advice and are intended merely for general information purposes If you have specific questions please contact your cellular PCS carrier System Operator License If your home system is in the U S you do not require a separate license to operate your cellular PCS telephone obtaining a cellular PCS telephon...

Page 4: ... it is unlawful for any unauthorized person to divulge or use any information obtained from intercepting or listening in on conversations intended for others you should not assume that your conversation is completely secure Commercially available scanning equipment can permit a third party to monitor the radio channels used for cellular PCS telephone calls Interference No person shall interfere wi...

Page 5: ...hone in the most power efficient manner Safety precautions IMPORTANT For safe and efficient operation of your phone observe these guidelines Your dual band analog digital CDMA hand held portable cellular PCS telephone uses both analog frequency modulation FM technology and digital Code Division Multiple Access CDMA technology CDMA is a newer radio frequency RF technology than the FM technology tha...

Page 6: ...enna immediately Take your phone to an authorized service center for repair Use only the supplied or approved antenna Unauthorized antennas modifications or attachments could impair call quality damage the phone and violate FCC regulations Driving Check the laws and regulations on the use of cellular PCS telephones in the areas where you drive Always obey them Also when using your phone while driv...

Page 7: ...ldren to play with your phone It is not a toy Children could hurt themselves or others by poking themselves or others in the eye with the antenna for example Children also could damage the phone or make calls that increase your telephone bill Blasting areas To avoid interfering with blasting operations turn your unit OFF when in a blasting area or in areas posted Turn off two way radio Constructio...

Page 8: ...andard NFPA 58 For a copy of this standard contact the National Fire Protection Association One Batterymarch Park Quincy MA 02269 Attn Publication Sales Division In Canada vehicles using liquefied petroleum gas such as propane or butane must comply with the Canadian Gas Association CAN CGS B149 2 For a copy of this standard contact the Canadian Standards Association 178 Rexdale Blvd Etobicoke ON M...

Page 9: ...ignals from the Phone Book 38 About the Features menu 39 Adjusting the volume 41 Checking and setting the timers 45 Using the Directory 48 Miscellaneous extra features 56 Setting security options 60 Setting display options 66 Adjusting network settings 70 Using the Short Messaging Service 77 Troubleshooting 85 List of menu items 86 Specifications 88 Glossary 90 Index 93 Getting Started Basic Opera...

Page 10: ... using this list If there is something missing please contact your nearest Sony dealer Portable Dual Band QN 003BPLH PCS Telephone 1 Hi Cap Li Ion Battery Pack 1 Hand Strap 1 QN 001AC AC Adapter 1 Unpacking your phone B2200 10 20draft3 8 21 98 12 11 PM 10 ...

Page 11: ...11 Getting Started Attaching the hand strap 1 2 B2200 10 20draft3 8 21 98 12 11 PM 11 ...

Page 12: ...12 Looking at your phone 1 2ABC 3DEF 5JKL 6MNO 8TUV 0OPER 4GHI 7PQ RS 9WX YZ 1 PWR CLR SEND º 2 9 6 8 END 5 3 4 7 B2200 10 20draft3 8 21 98 12 11 PM 12 ...

Page 13: ...to turn the phone on or off Connector 16 Use to connect the phone to either the AC adapter a cigarette lighter adapter a desktop charger or a hands free car kit 1 Antenna 18 2 Earpiece 3 Display 14 4 SEND button 21 to 23 Press to make outgoing calls and to receive incoming calls 5 Jog Dial navigator 19 Push and turn for menu navigation and for changing settings on menus In this manual the icon ind...

Page 14: ...f the current status of your phone The bottom four rows of the display are for text such as phone numbers names and operational prompts Each row displays a maximum of 12 characters 1 Short character display Shows settings such as the number of the currently displayed Features menu as well as Phone Book and Calls List memory locations 2 in use out of service icon 18 21 23 71 The in use icon appears...

Page 15: ...dapter Attaching the battery pack 1 Hook the battery pack onto the bottom of the phone 1 and ease the battery pack down 2 2 Attach the battery pack by pressing down firmly on the thumb indent To remove the battery pack 1 Push the battery pack release tab upwards 2 Lift the top of the battery pack 1 and pull it out 2 Charging the battery pack 1 2 2 1 B2200 10 20draft3 8 21 98 12 11 PM 15 ...

Page 16: ...ppear instead and stops flashing When the power is turned off The message Battery is Charging is displayed and flashes When the battery pack is fully charged the message Charging is Complete is displayed and stops flashing Notes If you make or receive a call when the battery pack is not charged sufficiently the call will be cut off In that case you will hear an alarm indicating that the battery is...

Page 17: ... circuit it Doing so may cause the battery pack to leak or get hot which could cause personal injury Do not try to disassemble the battery pack Checking the battery Battery duration CDMA mode Analog mode In standby mode 60 hours 14 hours In use continuously 4 hours 2 hours Battery condition The battery icon indicates the battery level as follows when the power is on Note that the battery icon disp...

Page 18: ...rs Now the phone is ready to use To check the signal strength The signal strength icon indicates various levels of signal strength It is best to make calls when the signal is strong although calls can be made when the signal strength is weak If you are out of the service area The out of service icon appears and the phone searches for a service signal If a signal cannot be found the phone enters po...

Page 19: ...enu Phone Book or Calls List Push Selects the item indicated by the flashing arrow Accepts the digits characters entered using the keypad Push and Hold Locks the keypad for more than Mutes unmutes the phone To go back If you want to go back to the previous display press CLR If you want to return to the standby display either press END or hold down CLR Scrolling through menu items To scroll through...

Page 20: ...e standby display reappears in the language selected Alphanumeric table Each time you press a number button the letters numbers are cycled as shown on the following table Note Each language has its own alphanumeric table To view another language table refer to the respective phone operating instructions Not all areas distribute the phone operating instructions in all languages To obtain operating ...

Page 21: ...l time 3 Press END to end the call when you are finished The icon disappears and the final elapsed call time flashes for 10 seconds The standby display automatically reappears Tips When dialing you can insert a pause to attach a DTMF Dual Tone Multiple Frequency number to the number you are calling see page 38 for a description of DTMF If Auto Hyphen is turned on the phone number is hyphenated aut...

Page 22: ...djust the volume using the Sounds menu see page 43 To mute unmute the microphone during a call Push and hold Tip You can also mute the microphone using the Sounds menu see page 42 To redial the last number On the standby display press SEND The number you dialed last is redialed automatically B2200 21 24draft3 8 21 98 12 12 PM 22 ...

Page 23: ...l When the call is connected the call timer appears and displays the elapsed call time 2 Press END to end the call when you are finished The icon disappears and the final elapsed call time flashes for 10 seconds The standby display automatically reappears Tips Using the Jog Dial navigator you can adjust the earpiece volume or mute the microphone during a call see page 22 Enhanced voice privacy is ...

Page 24: ... alert the phone number of the caller is displayed if caller ID is supported similar to a normal incoming call If the phone number matches a Phone Book entry the name is also displayed If you miss a call If you miss an incoming call a notification message appears accompanied by an audible alert To return to the standby display either press CLR END or If the caller supported caller ID the caller s ...

Page 25: ...ge 27 2 Push The Options menu appears 3 Turn to select Save then push A display appears prompting you for a name to accompany the number 4 Use the number buttons to enter the name If you press the same button in quick succession the letter you just entered changes See the Alphanumeric table on page 20 For the next entry wait until the cursor moves one step to the right or use or to move the cursor...

Page 26: ...he location number then push A confirmation message appears followed by the status of the Phone Book Tip You can also use the Directory menu to store Phone Book numbers see page 48 If the Phone Book is full A message appears if no memory locations are available After entering a name a display appears prompting you to specify a memory slot to overwrite To cancel hold down CLR PHONE BOOK LOCATIONS 2...

Page 27: ... A Time Pause waits for a specified period of time before sending the second string A Hard Pause requires the pause to be manually released before sending the second string Links You can join two or more Phone Book entries e g a doctor s phone number and your medical record number Once you have specified the first entry you insert a link Then specify the second number by entering its memory locati...

Page 28: ...ars 6 Turn to select the item you want to edit then push The stored information that corresponds to the selected item appears 7 Enter the new information Enter new information the same way you stored original information see page 25 The old information is overwritten 8 When you are finished push The Options menu reappears when you edit the phone number New information is saved immediately when you...

Page 29: ...e Phone Book entry you want to erase The contents of the selected memory location are displayed 3 Push The Options menu appears 4 Turn to select Erase then push A message appears prompting you to confirm the erasure 5 Push again The selected entry is erased After a few seconds the standby display reappears Tips You can also use the Directory menu to erase one Phone Book entry at a time see page 50...

Page 30: ... the selected entry is restricted After a few seconds the standby display reappears To unrestrict an entry 1 Select the Phone Book entry that you want to unrestrict The display indicates the entry is restricted 2 Push The Options menu appears 3 Turn to select Restrict then push A message appears prompting you to enter the lock code 4 Use the number buttons to enter the lock code Now the selected e...

Page 31: ...e phone dials the number stored in the selected Phone Book entry The icon appears Tips You can search for a phone number by name or memory location see pages 33 and 34 Whenever the phone number is displayed you can call it by pushing SEND If the phone number of a selected Phone Book entry is too long to fit on the screen you can still view the overflow digits by selecting View Number on the Option...

Page 32: ...r stored in the entered memory location Touch dialing You can dial a phone number stored in the Phone Book without pressing SEND Before using this feature make sure that Touch Dial on the Extras menu is set to on see page 57 1 Use the number buttons to enter the memory location number and hold down the last digit of the memory location number for about two seconds The name and phone number of the ...

Page 33: ... From the standby display turn once The Saved s display appears 2 Push The Search display appears 3 Enter only the first letter of the name you want to find 4 Push All Phone Book entries that begin with the entered character are displayed alphabetically 5 Turn to view the next entry Tip You can also use the Directory menu to search the Phone Book by name see page 52 SEARCH FOR S Enter Name Find SO...

Page 34: ...ce The Saved s display appears 2 Push The Search display appears 3 Enter at least two characters 4 Push The entries containing the selected string are displayed starting from the lowest memory location number 5 Turn to view the next entry that contains the search string Searching by memory location The phone searches for a memory location that matches the entered digit s and displays a list of opt...

Page 35: ...e number The phone lists all entries that contain the entered digit s 1 On the standby display enter at least the first three digits of the phone number you want to find 2 Push The Options menu appears 3 Turn up to select Find Number then push The Phone Book lists and displays all entries matching the entered digits Depending on the Sort Book setting see page 68 the entries are listed either alpha...

Page 36: ...ls List is empty is displayed if there are no entries 3 Turn to select the entry you want The contents of the selected entry are displayed 4 Push The Options menu appears 5 Push again to call the selected entry The phone dials the selected Calls List entry The icon appears Tips You can also dial by pressing SEND after selecting the entry in step 3 on page 35 If the selected entry contains a pause ...

Page 37: ...l or the time and date of the call by using the Options menu see step 4 on page 36 To view Select digits that do not fit on the screen View Number the duration of the call Duration the time and date of the call Time Date To save the number to the Phone Book Select Save from the Options menu step 4 on page 36 by pushing the Jog Dial navigator B2200 25 38draft3 8 21 98 12 12 PM 37 ...

Page 38: ... entry is displayed Use the Directory menu to search for the Phone Book entry see pages 52 to 54 2 Push The Options menu appears 3 Turn to select Number Tone then push A DTMF signal containing the entered digits is sent in a burst DTMF signal in standby mode You can send a DTMF signal only during a call If you try to send a DTMF signal in standby mode the following message is displayed Notes To en...

Page 39: ...e following example shows how to set the backlight 1 On the standby display push to select Features If the standby display is not shown press END or hold down CLR then push to display the Features menu The arrow and the menu number flash indicating which menu will be selected by pushing in this case the Sounds menu F 1 2 Turn to select Display then push The Display menu appears The arrow and the l...

Page 40: ...ay To return to the previous display Press CLR To go back further press CLR again Notes If you reach the last menu item and try to turn further a beep indicates that you have reached the end of the menu To view other menu items turn in the opposite direction The standby display automatically reappears after 30 seconds of inactivity Tip Each menu item can be accessed quickly from the standby displa...

Page 41: ...s displayed at the top of the screen when the standby display appears Tip If you set the ringer volume to escalate the telephone rings twice at a low volume then once at medium volume and thereafter at a high volume To mute the ringer When you are unable to take a call e g during a meeting turn down to quickly mute the ringer The unanswered call will be stored in the Calls List Notes Only the curr...

Page 42: ... microphone push and hold for one second The Features menu appears for a moment and the microphone is now unmuted Adjusting the keybeep volume F13 You can adjust the volume of the beep that sounds when you press a button 1 Turn to select Keybeep Vol from the Sounds menu then push The Keybeep Vol menu appears 2 Turn up to raise the keybeep volume and down to lower it You can select from four keybee...

Page 43: ... 1 to 7 A higher number indicates higher volume 3 Push to enter the new setting The standby display reappears Setting the ringer type F15 You can set the type of beep that sounds for an incoming call 1 Turn to select Ringer Type from the Sounds menu then push The Ringer Type menu appears 2 Turn to select the ringer type You can select from five different ringer settings The ringer sounds every tim...

Page 44: ...n if you set the keybeep type to clicks Setting the keybeep length F17 You can set the length of the beep that sounds when you press a button This setting affects both the keybeep feedback and DTMF transmission tones The phone sends a short DTMF burst default or plays every tone of the DTMF signal as long as the key is held down 1 Turn to select Beep Length from the Sounds menu then push The Beep ...

Page 45: ... the standby display Checking and resetting the duration of recent calls F22 You can view the total duration of the most recent calls 1 Turn to select Recent Calls from the Timers menu then push The Recent Calls display appears 2 Press 1 to reset or hold down CLR to go back to the standby display If you choose to reset the counter of recent calls and the corresponding durations are reset Checking ...

Page 46: ...before every full minute 1 Turn to select Minute Alert from the Timers menu then push The Minute Alert menu appears 2 Turn to select on or off 3 Push to enter the new setting The standby display reappears MINUTE ALERT OFF Choices To Set F23 F B2200 39 55draft3 8 21 98 12 13 PM 46 ...

Page 47: ... not turn itself off automatically 3 Push to enter the new setting If you set the phone to power off in 30 minutes for example the following display appears Notes If you press any button or operate the Jog Dial navigator the timer is reset and the countdown starts over The phone does not turn itself off automatically during a call If the Auto Off timer is set the phone turns off after a user speci...

Page 48: ...ne numbers F32 For quick and easy dialing the Phone Book allows you to store up to 99 phone numbers 1 Turn to select Save from the Directory menu then push The following display appears 2 Use the number buttons to enter the phone number then push The Options menu appears See the Alphanumeric table on page 20 3 Turn to select Save then push A display appears prompting you for a name to accompany th...

Page 49: ...are finished push to store the phone number and name A confirmation message appears 6 Push to store the new number in the first available memory location If you want to store it in another location turn to select the desired location then push A confirmation message appears followed by the status of the Phone Book Tip You can also use the Options menu to store Phone Book numbers see page 25 PHONE ...

Page 50: ... Book entry to be erased 2 Turn to select the entry you want to erase then push A message appears prompting you to confirm that the selected Phone Book entry should be erased You can also use the number buttons to select the entry to be erased 3 Push again The selected entry is erased After a few seconds the standby display reappears Tips You can also use the Options menu to erase one Phone Book e...

Page 51: ...o select the entry to be edited A message appears prompting you to confirm that the selected Phone Book entry should be edited 3 Push again The Edit menu appears 4 Turn to select the item you want to change then push You can change the name phone number or memory location by selecting Name Phone or Location respectively The stored information that corresponds to the selected item appears 5 Enter t...

Page 52: ... enter only one character the phone lists all entries that begin with the entered character 1 Turn to select Find Name from the Directory menu then push The Search display appears prompting you for a search string 2 Enter only the first letter of the name you want to find 3 Push All Phone Book entries that begin with the entered character are displayed alphabetically 4 Turn to view the next entry ...

Page 53: ... the lowest memory location number 1 Turn to select Find Name from the Directory menu then push The Search display appears prompting you for a search string 2 Enter at least two characters 3 Push The entries containing the selected string are displayed starting from the lowest memory location number 4 Turn to view the next entry SEARCH FOR Enter Name Find F35 B2200 39 55draft3 8 21 98 12 13 PM 53 ...

Page 54: ...e search string is displayed If the selected entry is empty the display shows the message Phone Book storage location XX is empty After a few seconds the standby display reappears Tips You can also use the Options menu to find Phone Book memory locations see page 34 You can also turn to scroll through the entire Phone Book instead of entering the memory location number in step 2 Phone Book storage...

Page 55: ...lowing you to view the Calls List If the Calls List is empty the display shows the message Calls List is empty 2 Turn to view the Calls List entries The most recent entry is displayed first To view the rest of the ten most recent entries turn Tip You can also view the Calls List from the standby display see page 36 To place a call Press SEND in step 2 You can also push to go to the Options menu th...

Page 56: ...menu turn to select Keyguard then push The following message appears After a few seconds the standby display reappears The keypad lock icon and the text Keyguard On indicates that the keypad is locked To unlock the keypad To turn the Keyguard off press 1 2ABC and 3DEF in quick succession To answer an incoming call when the keypad is locked Just press SEND You do not need to unlock the keypad When ...

Page 57: ...43 You can set the interval for redialing If the attempt to dial is unsuccessful the phone tries to redial it up to five times 1 Turn to select Auto Retry from the Extras menu then push The Auto Retry menu appears 2 Turn to select the interval setting You can select off on 60 secs on 30 secs or on 10 secs If you select off the phone does not try to redial automatically 3 Push to enter the new sett...

Page 58: ...andby display reappears The message AutoAnswer is displayed on the standby display only when you select on and the phone is in the hands free car kit Setting all buttons to answer incoming calls F45 You can have all buttons except PWR answer incoming calls by turning this feature on 1 Turn to select Any Key Answ from the Extras menu then push The Any Key Answ menu appears 2 Turn to select on or of...

Page 59: ...Pad from the Extras menu then push The Scratch Pad display appears prompting you to enter a phone number 2 Use the number buttons to enter the digits 3 Push The Options menu appears Besides storing digits you can enter hyphens pauses and links see page 27 4 Turn to select Store Exit then push The information is stored as a scratch pad entry in the Calls List When the Calls List reaches more than 1...

Page 60: ...er incoming calls and dial 911 or other stored emergency numbers 1 Push to select Lock Phone from the Security menu The Lock Phone menu appears 2 Turn to select when the phone will be locked You can select never on power up or right now If you select never the phone is available for use at any time without a lock code If you select on power up the phone is locked every time you turn it on 3 Push t...

Page 61: ...ush The Enter New Code display appears prompting you to enter a new lock code 2 Use the number buttons to enter a lock code The lock code must be exactly four digits long 3 Push to store the new lock code in memory A confirmation display appears IMPORTANT Keep a record of your lock code If you forget it contact your service provider New lock code is 2345 F52 ENTER NEW CODE Save Code F52 B2200 56 7...

Page 62: ...o unrestrict an entry Follow the procedure for restricting an entry on the previous page to select the entry you want to unrestrict Notes The phone number of a restricted entry is not displayed when you view the Phone Book and make a call Restricted entries are not listed or displayed after a digit string search see pages 34 and 53 Calling editing and erasing a restricted entry requires the four d...

Page 63: ...the four digit lock code see page 60 1 Turn to select Restrict All from the Security menu then push The Restrict All menu appears 2 Turn to set restriction of all Phone Book entries on or off 3 Push to enter the new setting The standby display reappears Note If you restricted some entries by using Restrict they are still restricted when you turn off Restrict All B2200 56 76draft3 8 21 98 12 14 PM ...

Page 64: ...ou revert to the factory defaults all your custom menu settings are erased Erasing all Phone Book entries F56 You can erase all Phone Book entries at once 1 Turn to select Erase Book from the Security menu then push The Erase Book display appears 2 Press 1 to erase all Phone Book entries or push to quit without erasing If you erase all entries the following display appears ERASE BOOK 1 To Erase Ph...

Page 65: ...other than 911 which you cannot erase You can call these numbers even when the phone is locked 1 Turn to select Emergency from the Security menu then push The first Emergency display appears 2 Turn to select the emergency memory location then push A message appears prompting you to enter the phone number for the emergency entry 3 Use the number buttons to enter the number 4 Push to store the emerg...

Page 66: ...anner text is displayed 2 Push again to start editing A message prompts you to enter a new banner 3 Use the number buttons and to enter the new banner text The banner can be up to 12 characters long For details on character entry see the Alphanumeric table on page 20 4 Push to save the new banner The standby display reappears Your new banner is displayed DISPLAY Banner Backlight Auto Hyphen F61 BA...

Page 67: ...r off If the phone is used in conjunction with a hands free car kit a cigarette lighter adapter or a single or dual slot battery charger the added option of always on leaves the backlight on 3 Push to enter the new setting The standby display reappears Tip Your phone has two backlight settings one in charging mode and one in battery mode The factory setting for charging mode is always on For faste...

Page 68: ...rn to select on or off 3 Push to enter the new setting The standby display reappears Sorting the Phone Book F64 You can determine how the Phone Book will be displayed and also set the phone to sort the entries either alphabetically or by memory location 1 Turn to select Sort Book from the Display menu then push The Sort Book menu appears 2 Turn to set the sorting preferences You can choose to sort...

Page 69: ...enu then push The Menu Length menu appears 2 Turn to set the menu length You can select short or long 3 Push to enter the new setting The standby display reappears Items on the short menu The short menu contains the following items Ringer Vol see page 41 My Number see page 48 Saved s see pages 31 33 36 Lock Phone see page 60 Long Menu see pages 86 Note The item Saved s contains the items Find Name...

Page 70: ...a personal phone number associated with your phone Setting the phone s mode F71 You can determine whether your dual band phone switches to analog mode when you roam off the Network You have three options Automatic digital or analog searches for digital service first then analog service if digital could not be found Disabled digital only Until OFF analog only until phone is turned off 1 Push to sel...

Page 71: ...twork menu The Roam Alert menu appears 2 Turn to select on or off 3 Push to enter the new setting The standby display reappears When you enter another service area The roaming icon R appears on the display A beep accompanies the icon if you have turned the roam alert on If you leave any valid service area The following display appears indicating that you are outside the area serviced by your home ...

Page 72: ...o be alerted by an audible alarm when a call is dropped 1 Turn to select Drop Alert from the Network menu then push The Drop Alert menu appears 2 Turn to select on or off 3 Push to enter the new setting The standby display reappears When a call is dropped The following display appears A beep will sound if you have turned the drop alert on B2200 56 76draft3 8 21 98 12 14 PM 72 ...

Page 73: ...you that enhanced voice privacy is not available A beep will sound if you have turned the voice privacy alert on When enhanced voice privacy is regained A display appears notifying you that enhanced voice privacy is once again available A beep accompanies the display when enhanced voice privacy is regained and you have turned the voice privacy alert on Note The network automatically turns on enhan...

Page 74: ...Auto N A M menu appears 2 Turn to set automatic switching on or off 3 Push to enter the new setting The standby display reappears Switching NAM s manually F76 If automatic switching is turned off you can configure the phone for manual switching between the two NAM s You must switch from one NAM to the other if the phone enters a service provider s coverage area that matches the other NAM setting T...

Page 75: ...twork menu then push The Activation menu appears 2 Turn to select which system block to activate the service on then push The following display appears prompting you for confirmation To go back one step press CLR To cancel activation and return to the standby display press END 3 Press 1 to confirm The phone calls up a service provider When a service provider is contacted the following display appe...

Page 76: ... than your home system s signal This option will help you to avoid higher costs or other calling problems 1 Turn to select System Pref from the Network menu then push The System Pref menu appears 2 Turn to select Standard or Home Only 3 Push to enter the new setting The standby display reappears NETWORK Activation Force Call System Pref F78 B2200 56 76draft3 8 21 98 12 14 PM 76 ...

Page 77: ... you press any key this display disappears The message icon remains displayed as long as there are unread messages Tip If you receive duplicate messages the phone deletes the older one and stores the new one with the indication DUPLICATE Checking message storage capacity Voice mail messages Voice mail messages are stored remotely by your service provider Your phone will simply notify you if you ha...

Page 78: ...next section Text messages and pagings that you have already read but are still stored in memory see page 79 Reading text messages You can read both new and old messages stored in memory After reading messages you can protect or erase them To read new messages 1 From the Messages display turn to select New Text then push The first message is displayed If there are no new messages the following dis...

Page 79: ...ck icon indicates that the message is locked see page 80 If a number is too long to fit an ellipsis is used 2 Turn to scroll through the list of old messages 3 To read the selected message push The selected message is displayed 4 Turn to scroll through the message If you do not scroll the display automatically scrolls down to the end of the message which is indicated with a hollow box 5 When you h...

Page 80: ...ncoming messages you must erase the locked messages manually To respond to a text message 1 After reading a text message push The Options menu appears 2 Turn to select Send then push The phone dials the callback phone number which is attached to the message If the callback number is not attached to the message no call is made and the following message is displayed Tip You can also dial the callbac...

Page 81: ...sor and to insert spaces between characters If you enter the wrong character press CLR to clear the character highlighted by the cursor 4 When you are finished push to store the phone number and name A message appears prompting you to confirm the save procedure 5 Push to store the new number in the first available memory location If you want to store it in another location turn to select the desir...

Page 82: ...1 Turn down to select Erase Old from the Messages display then push If the Messages display is not shown press then select Erase Old 2 Press 1 to erase all old messages To go back to the Messages display without erasing the messages push Erase old text msgs 1 Erase Quit MESSAGES 15 Voice 3 New Text 0 Old Text OPTIONS Erase Msg Send Next Msg B2200 77 84draft3 8 21 98 12 15 PM 82 ...

Page 83: ...ack to the Messages display 2 Turn to scroll through the message A hollow box indicates the end of the message To dial a callback number 1 After reading a voice mail notification message push The Options menu appears 2 Turn to select Send then push The phone dials the callback phone number which is attached to the message Tip You can also dial the callback phone number by pressing SEND from the Me...

Page 84: ...reading a voice mail notification message push The Options menu appears 2 Turn to select Erase Msg then push The voice mail notification message is erased The Messages display reappears indicating that there are currently no voice mail notification messages stored in memory B2200 77 84draft3 8 21 98 12 15 PM 84 ...

Page 85: ...hone cannot hear you You hear the caller Adjust the earpiece volume If possible 22 43 only faintly also reduce the noise around you The call is cut off You are possibly out of the coverage area 18 dropped Redial the number If the problem continues contact your carrier Also see Out of service icon appears above You hear an You are attempting to use the phone in an 18 alternate area without service ...

Page 86: ... 4 43 F16 Key Sound tones clicks 44 F17 Beep Length standard long 44 Submenu F 2 Timers F21 All Calls total call time number of calls 45 F22 Recent Calls total call time number of calls 45 F23 Minute Alert on off 46 F24 Auto Off never in 3 hours in 2 hours in 1 hour in 30 mins 47 Submenu F 3 Directory F31 My Number 48 F32 Save 48 F33 Erase 50 F34 Edit 51 F35 Find Name 52 F36 Phone Book No default ...

Page 87: ...u F 6 Display F61 Banner No default banner 66 F62 Backlight off for 7 secs for 15 secs always on 67 F63 Auto hyphen on off 68 F64 Sort Book by loc alphabetic 68 F65 Language English French Spanish 20 F66 Menu Length long short 69 Submenu F 7 Network F71 Set Analog disabled until off automatic 70 F72 Roam Alert on off 71 F73 Drop Alert on off 72 F74 Priv Alert on off 73 F75 Auto N A M on off 74 F76...

Page 88: ...including antenna Mass weight Approx 7 7 oz 203 g including battery RF power CDMA 0 01 µW to 300 mW output FM 6 mW to 600 mW Operational 22 F to 140 F 30 C to 60 C temperature excluding battery pack Supplied QN 003BPLH Hi Cap Li Ion Battery Pack 1 accessories QN 001AC AC Adapter 1 Hand strap 1 Design and specifications are subject to change without notice Enhanced Variable Rate Codec available B22...

Page 89: ...ging Stand Rapid Charging Cigarette Lighter Adapter QN 017SKT Starter Kit QN 019LC Carrying Case Single Slot Charging Stand Rapid Charging Cigarette Lighter Adapter QN 018SKT Starter Kit QN 018LC Carrying Case Single Slot Charging Stand Rapid Charging Cigarette Lighter Adapter QN 018LC Carrying Case for CM M2300 B2200 S2100 series telephones QN 019LC Carrying Case for CM M3300 B3200 S3100 series t...

Page 90: ...cannot receive service from that carrier Also see Roam D Dropped call A call terminated because of a deep long fade or because the user left the coverage area DTMF Dual Tone Multiple Frequency also known as touch tone Tone generated when you press a telephone button number or Can be used to access answering machines pagers telephone banking services data services and other electronic services E ES...

Page 91: ...onomical alternative to roaming and long distance charges N NAM Number Assignment Module Portion of your telephone s memory programmed to contain information about your subscription to the carrier Your telephone can have up to two NAM s P Pause You can insert a Time Pause or Hard Pause in the phone number memory data A pause causes the phone to wait either for a specified time or until manually re...

Page 92: ...for details Speed dialing Making a call using Phone Book memory locations Also see Phone Book T Touch dialing A quick way of making a call using a number stored in a Phone Book memory location Also see Speed dialing Touch tone See DTMF V Voice mail An extended service offered by carriers that allows you to retrieve voice mail messages stored in your voice mailbox Check with your carrier for detail...

Page 93: ...display 14 Clearing See Deleting Coverage area 71 Cursor 25 49 Index D Dialing See Calling Deleting Calls List entries 65 Characters 26 50 Message 82 Phone Book entries 29 50 Phone numbers 29 50 Voice mail 84 Digital icon 14 Display 14 Display settings Accessing 39 Autohyphenation 68 Backlight 67 Banner 66 Time 45 Displays Calling 21 Features menu 39 Hyphens pauses links 27 Menu setting 69 Securit...

Page 94: ...ng 29 50 Editing 28 51 Number searching 33 52 53 Storing 25 48 Menus Accessing 39 Message button 78 Message icon 77 Messages Calling back 80 Displaying 78 Erasing 82 Locking 80 Message list 78 Receiving 77 Microphone 22 42 Minute alert 46 Multiple city registration 91 Muting the microphone 22 42 Muting the ringer 23 41 N NAM Number Assignment Module 70 74 Number buttons 21 25 O Out of service icon...

Page 95: ...rgency numbers 65 Lock mode 60 New lock code 61 Restriction 62 Sending See Calling Service area 71 Signal strength icon 18 SMS Short Messaging Service 77 Special characters 20 Special features Accessing 56 Changing DTMF transmission 44 Enabling touch dialing 57 Muting the microphone 42 Muting the ringer 23 41 Setting auto answer 58 Setting auto retry 58 Using the scratch pad 59 Standby display 18 ...

Page 96: ... any questions or comments please call SONY WIRELESS HOTLINE 1 800 578 SONY 7669 Visit our website at www sony com wireless to register your product online and find out about additional Sony technology Printed in USA B2200 85 96draft3 8 21 98 12 15 PM 96 ...

Reviews: