Setting Up
41
GB
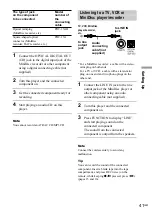
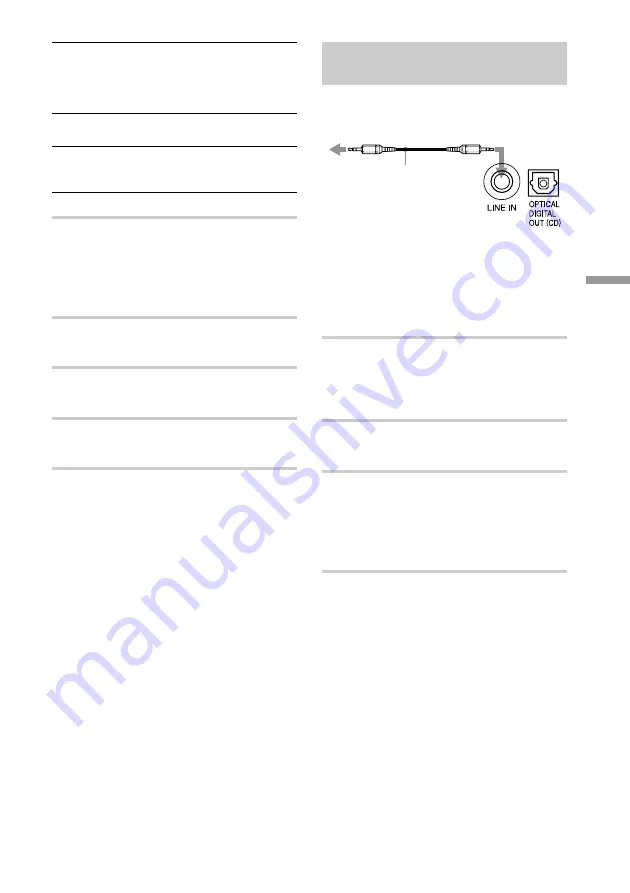
Listening to a TV, VCR or
MiniDisc player/recorder
* For a MiniDisc recorder: a cable with a stereo-
mini plug on both ends.
For a TV or VCR: a cable with a stereo-mini
plug on one end and two phono plugs on the
other end.
1
Connect the LINE IN jack to the line
output jack of the MiniDisc player or
other component using an audio
connecting cable (not supplied) .
2
Turn this player and the connected
component on.
3
Press FUNCTION to display “LINE”
and start playing sound on the
connected component.
The sound from the connected
component is output from the speakers.
Note
Connect the cords securely to avoid any
malfunction.
Tip
You can record the sound of the connected
component. Insert a blank tape into the tape
compartment, and press REC twice (on the
remote, while keeping
z/X
pressed, press
Y
).
(pages 15 and 16).
TV, VCR, MiniDisc
player/recorder,
etc.
to LINE IN
jack
to line
output
jack
Audio
connecting
cable*(not
supplied)
The type of jack
Model
on the component
number of
to be connected
the
connecting
cable
Optical miniplug
POC-15AB
(MiniDisc recorder, etc.)
Square-shaped optical
POC-15A
connector (MiniDisc
recorder, DAT recorder, etc.)
1
Connect the OPTICAL DIGITAL OUT
(CD) jack to the digital input jack of the
MiniDisc recorder or other component
using a digital connecting cable (not
supplied) .
2
Turn this player and the connected
component on.
3
Get the connected component ready for
recording.
4
Start playing an audio CD on this
player.
Note
You cannot record an ATRAC CD/MP3 CD.

