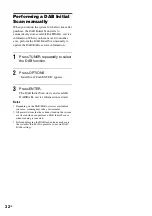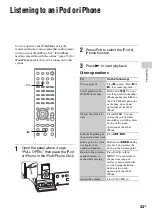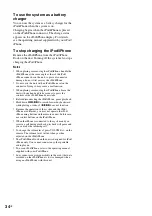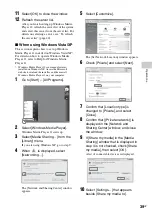
24
GB
1
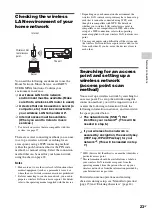
Press HOME NETWORK to select
the Home Network function.
If the network setting display appears, go to
step 4.
If the network setting display does not
appear, press OPTIONS.
2
Press
M
/
m
to select “Network,”
then press ENTER.
3
Press
M
/
m
to select “Settings,”
then press ENTER.
4
Press
M
/
m
to select “Wireless LAN
Settings,” then press ENTER.
If “Change Setting?” appears, select “OK,”
then press ENTER.
5
Press
M
/
m
to select “Access Point
Scan,” then press ENTER.
The system starts searching for access points,
and displays a list of up to 20 available
network name (SSID).
6
Press
M
/
m
to select the desired
network name (SSID), then press
ENTER.
The security setting display appears.
7
Enter the security key (WEP key,
WPA/WPA2 key), then press
ENTER.
By default, the security key appears as
“*****.” Press DISPLAY repeatedly to
encrypt and disclose the security key.
The IP setting display appears.
8
On the IP setting, press
M
/
m
to
select “Auto,” then press ENTER.
The proxy setting display appears.
When using a fixed IP address
Select “Manual” in step 8, then press
ENTER. The IP address input display
appears.
Enter the values for “IP Address,” “Subnet
Mask,” “Default Gateway,” “Primary DNS”
and “Secondary DNS.” When you press
ENTER after entering the value for
“Secondary DNS,” the proxy setting display
appears.
9
On the proxy setting, press
M
/
m
to
select “Do Not Use,” then press
ENTER.
The confirmation display appears.
When using a proxy server
Select “Use” in step 9, then press ENTER.
The proxy address input display appears.
Set the values for “Proxy Address” and “Port
Number.” When you press ENTER after
setting the value for “Port Number,” the
confirmation display appears.
10
Press
M
/
m
to select “OK,” then
press ENTER.
“Complete!” appears after the network
settings are complete, and “
” lights up on
the display. To return to the options menu,
press ENTER.
(Depending on the network environment, the
network settings may take some time.)
11
Perform the server settings.
To listen to audio content stored on the
server, you need to set up your server
(page 37).
Tip
When checking the network settings, press OPTIONS,
then select “Network” – “Information” – the desired
setting item on the menu.
Note
If your network has not been secured by encryption (using
the security key), the security setting display does not
appear in step 7.
Summary of Contents for CMT-MX700Ni
Page 77: ...77GB Precautions Specifications ...
Page 78: ...78GB ...
Page 79: ...79GB Precautions Specifications ...
Page 80: ... 2010 Sony Corporation Printed in China 4 199 695 12 1 ...

