20(E)
Operations
Menu Operation
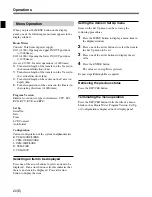
When you press the MENU button on the display
panel, one of the following menu items appears in the
display window.
Hours Meter
Console: Total time of power supply
I/O1 (
×
1000): Opening the upper IN/OUT port door
(
×
1000 times)
I/O2 (
×
1000): Opening the lower IN/OUT port door
(
×
1000 times)
Access (
×
1000): Transfer operations (
×
1000 times)
X: Transferred length of the transfer on the X axis (in
the horizontal direction) (km)
Y: Transferred length of the transfer on the Y axis (in
the vertical direction) (km)
Z: Transferred length of the carrier on the Z axis (in
depth) (km)
R: Transfer operations of the carrier on the R axis (in
the rotating direction) (
×
1000 times)
Program Version
Firmware version (six types of firmware: CCC, SV1,
RCX, RCY, RCR, and RCZ)
Set Up
Serial No.
Date
Time
LCD Contrast
Auto Initial
Configuration
Current configuration of the system in alphanumerics
B: CSM-200BF/200BS
1: CSM-100BF/100BS
6: CSM-60BF/60BS
D: CSM-200D
C: CSM-200C
Selecting an item to be displayed
Press one of the arrow buttons to select an item to be
displayed. If an arrow button is lit, this indicates that
there is an item to be displayed. Press a lit arrow
button to display the item.
Setting the items in Set Up menu
Items on the Set Up menu can be set using the
following procedures.
1
Press the MENU button to display a menu item in
the display window.
2
Press one of the arrow buttons to select the item in
the Set Up menu to be set.
3
Press one of the arrow buttons to display the set
value.
4
Press the ENTER button.
The value set in step
3
is registered.
Repeat steps
2
through
4
as required.
Retrieving the previous status
Press the ESC/CLR button.
Terminating the menu operation
Press the ESC/CLR button while the title of a menu
block such as Hours Meter, Program Version, Set Up
or Configuration is displayed on the display panel.


