– 17 –
Getting started
11
Notes
•
The battery life and number of images will be decreased if you use your camera at low
temperatures, use the flash, repeatedly turn the power on/off or use the zoom.
•
The capacity of the “Memory Stick” is limited. The above figures are a guide when you
continuously record/play back while replacing the “Memory Stick.”
•
If sufficient battery remaining time is indicated but the power runs out soon, fully charge the
battery so that the correct battery remaining time appears.
•
Do not short the DC plug of the AC power adaptor with a metallic object, as this may cause
malfunction.
•
Do not expose the battery pack to water.
12
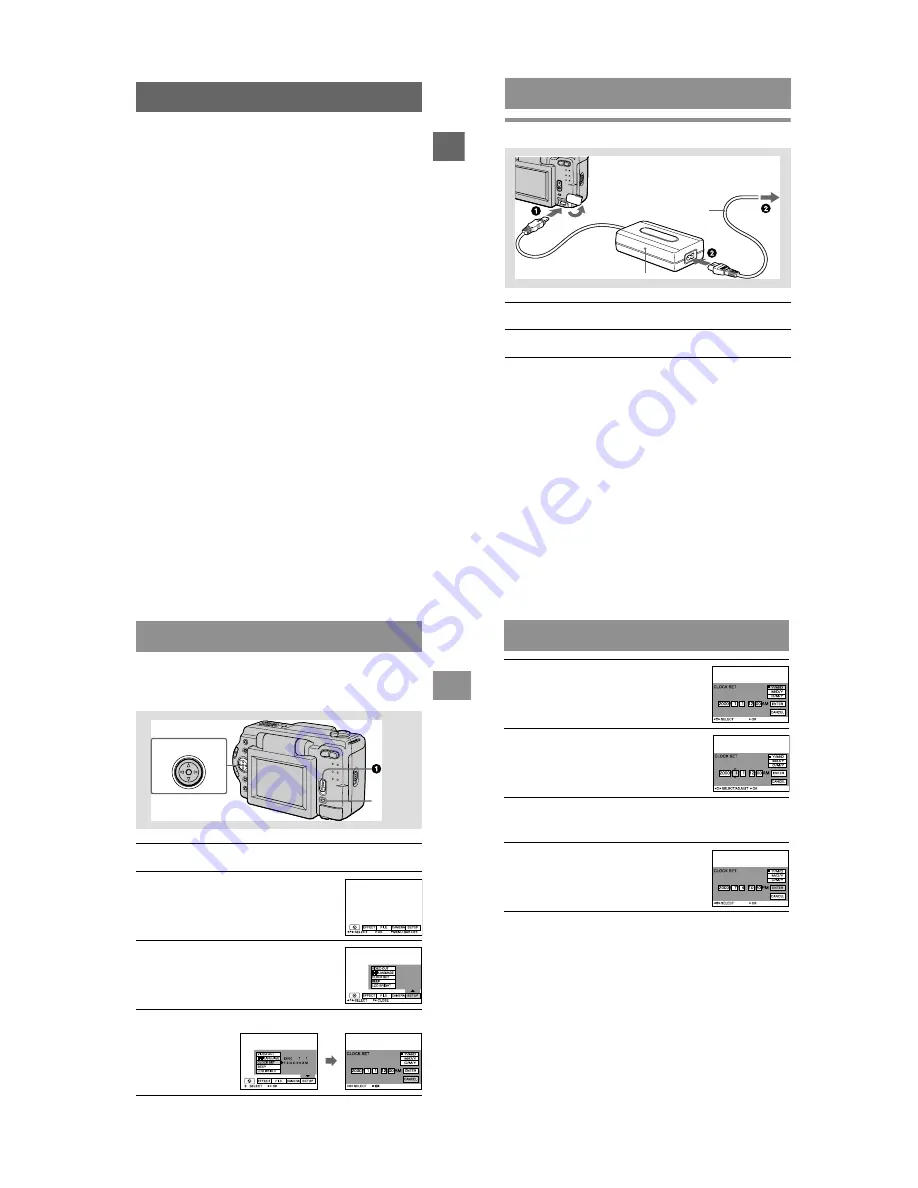
Using the AC power adaptor
Using a car battery
Use Sony DC adaptor/charger.
1
Open the DC IN jack cover and connect the DC connecting cable to
the DC IN jack of your camera with the
v
mark facing up.
2
Connect the power cord (mains lead) to the AC power adaptor and
then to a wall outlet (mains).
AC-L10 AC power adaptor
DC IN jack cover
To the wall outlet (mains)
Power cord
(mains lead)
Getting star
ted
13
Setting the date and time
When you first use your camera, set the date and time. If these are not set, the
CLOCK SET screen appears whenever you turn on your camera for recording.
1
Slide down the POWER switch to turn on the power.
The POWER lamp lights up.
2
Press
v
on the control button.
The menu bar appears on the LCD screen.
3
Select [SETUP] with
B
on the control button,
then press the center
z
.
4
Select [CLOCK SET] with
v
/
V
on the control button, then press the
center
z
.
Control button
POWER
lamp
14
To cancel the date and time setting
Select [CANCEL] with
v
/
V
/
b
/
B
on the control button, then press the center
z
.
5
Select the desired date display format with
v
/
V
on the control button, then press the
center
z
.
Select from Y/M/D (year/month/day), M/D/Y
(month/day/year) or D/M/Y (day/month/year).
6
Select the year, month, day, hour or minute
item you want to set with
b
/
B
on the control
button.
The item to be set is indicated with
v
/
V
.
7
Set the numeric value with
v
/
V
on the control button, then press
the center
z
to enter it.
After entering the number,
v
/
V
moves to the next item.
If you selected [D/M/Y] in step
5
, set the time on a 24-hour cycle.
8
Select [ENTER] with
B
on the control
button, then press the center
z
at the
desired moment to begin clock movement.
The date and time are entered.


