7
D-VM1
SECTION 3
DISASSEMBLY
Note :
Disassemble the unit in the order as shown below.
Note :
Follow the disassembly procedure in the numerical order given.
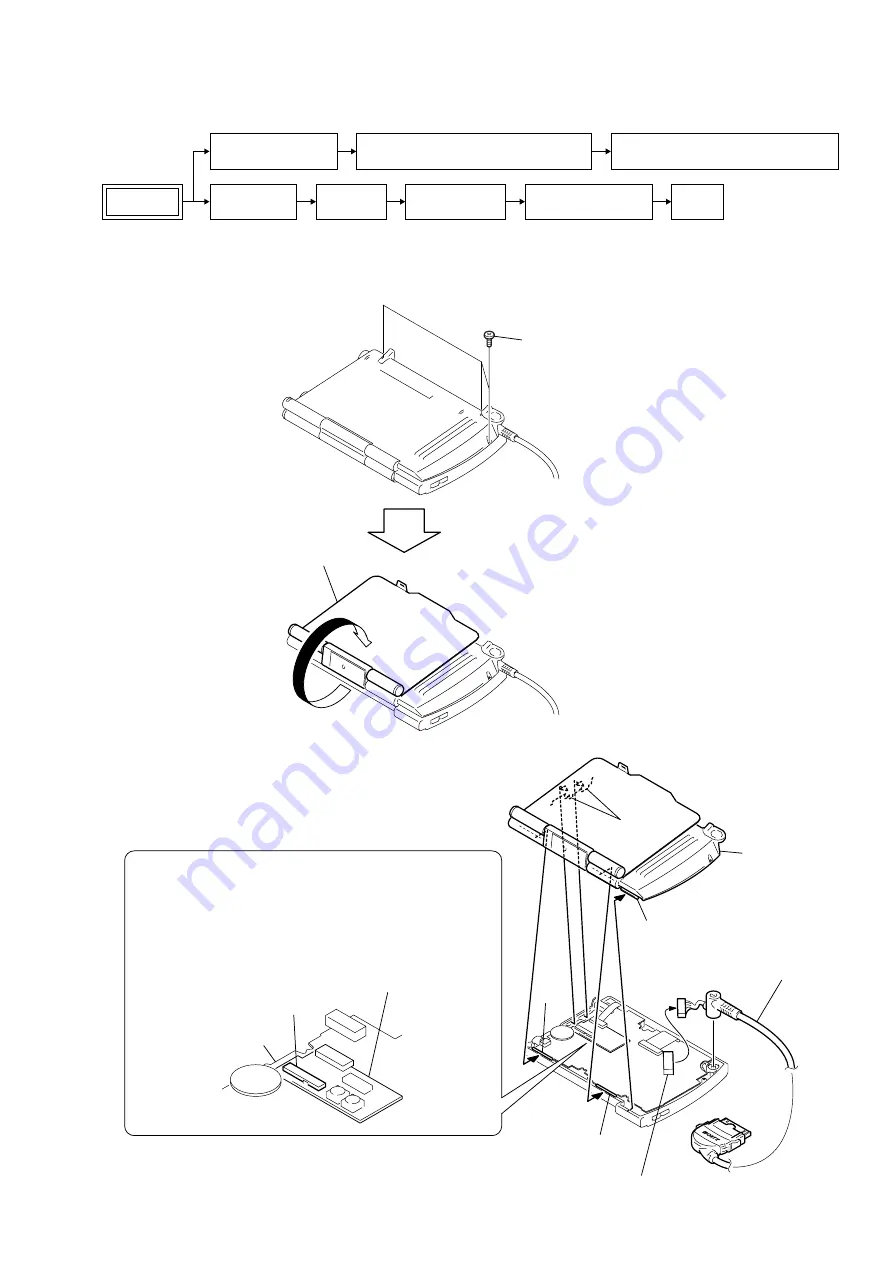
3-1. CABINET (REAR), CONNECTION CORD (MONITOR)
Main section
Monitor unit section
Set
Lid (disc)
Cabinet (upper)
Cabinet (rear), Connection coard (monitor)
Inverter unit,
TFT board,
Liquid crystal indicator display (LCD901)
CDM501, Main board
Buckle
2
1
Three screws (+BM1.7
×
6)
Lid (LCD M)
3
Release the claws in the direction of the arrow
in the order starting from step
A
to
E
.
6
Cord, connection (Monitor)
5
Connector, 30pin (CN1302)
A
B
C
D
E
Claw
Two claws
Claw
Claw
4
Cabinet
(Rear M)
TFT board, complete
Piezo-electric transformer
Inverter unit
Note: If you are going to repair the monitor unit.
Do not touch the inverter unit and piezo-electric transformer
that are mounted on the TFT board both in the statuses
of power-on and power-off.
(Touching these components may damage them.)

