211
Viewing images with your computer Visualisation d’images à l’aide de votre ordinateur
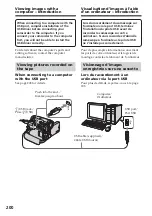
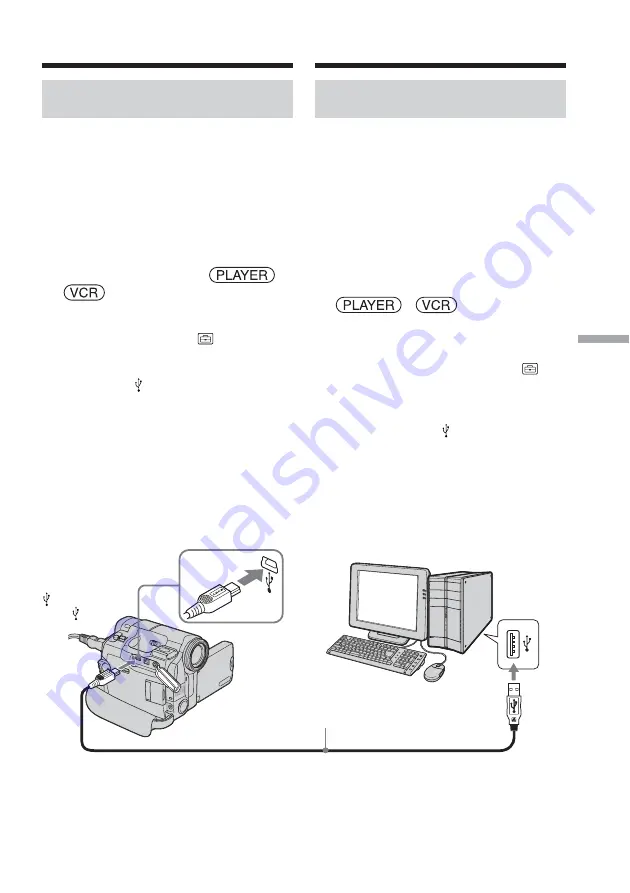
USB port/
Port USB
USB cable (supplied)/
Câble USB (fourni)
(USB) jack/
Prise (USB)
Computer/Ordinateur
1)
DCR-TRV12E/TRV14E
2)
DCR-TRV19E/TRV22E/TRV33E
Connecting your camcorder to a
computer using the USB cable
(For Windows users)
Raccordement de votre caméscope à
votre ordinateur à l’aide du câble USB
(pour les utilisateurs de Windows)
Making the computer
recognise your camcorder
If you are using Windows 2000, log in with
permission of administrators.
If you are using Windows XP, log in with
permission of computer administrators.
Viewing pictures recorded on the
tape
(
1
)
Connect the AC Adaptor to your
camcorder.
(
2
)
Set the POWER switch to
1)
/
2)
.
(
3
)
Press FN to display PAGE1.
(
4
)
Press MENU to display the menu.
(
5
)
Select USB STREAM in
, then press
EXEC (p. 249).
(
6
)
Select ON, then press EXEC.
(
7
)
Connect the (USB) jack on your
camcorder to the USB port on the
computer using the supplied USB cable.
The computer recognises your
camcorder, and the Windows Add
Hardware Wizard starts.
Détection du caméscope par
l’ordinateur
Si vous utilisez Windows 2000, ouvrez une
session de travail en tant qu’administrateur.
Si vous utilisez Windows XP, ouvrez une
session de travail en tant qu’administrateur de
l’ordinateur.
Visionnage d’images enregistrées
sur une cassette
(
1
)
Branchez l’adaptateur secteur sur votre
caméscope.
(
2
)
Réglez le commutateur POWER sur
1)
/
2)
.
(
3
)
Appuyez sur FN pour afficher PAGE1.
(
4
)
Appuyez sur MENU pour afficher le
menu.
(
5
)
Sélectionnez USB STREAM sous
,
puis appuyez sur EXEC (p. 259).
(
6
)
Sélectionnez ON, puis appuyez sur
EXEC.
(
7
)
Raccordez la prise (USB) de votre
caméscope au port USB de votre
ordinateur avec le câble USB fourni.
Votre ordinateur reconnaît le caméscope
et l’assistant d’ajout de nouveau
matériel Windows démarre.
1)
DCR-TRV12E/TRV14E
2)
DCR-TRV19E/TRV22E/TRV33E

