background image

Playback

54

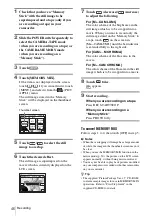
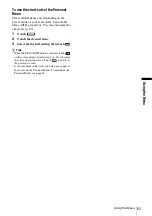
To return to the single display mode, touch the 
picture that you want to display.

To view pictures in other folders in the 
index screen

1

Touch .

2

Touch .

3

Touch [PB FOLDER].

4

Select a folder with 

/

, then touch 

.

Playing back with 
ease 

– Easy Handycam

Easy Handycam operation allows easy 
playback for even first time users by 
providing only the basic functions for 
playback. Also screen font size increases for 
easy viewing. Make sure you have a recorded 
cassette or a recorded “Memory Stick” 
inserted into your camcorder.

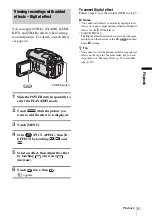
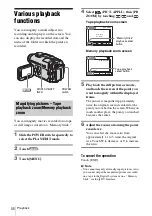
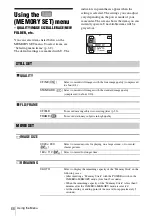
1

Press OPEN and open the LCD panel. 

2

Slide the POWER switch repeatedly 
until the PLAY/EDIT lamp lights up.

3

Press EASY.

EASY lights up in blue.

EASY

POWER switch

OPEN

Slide the POWER 
switch while 
pressing the green 
button.

Summary of Contents for DCR TRV480 - Digital8 Handycam Camcorder

Page 1: ...2 515 268 12 1 2005 Sony Corporation Camera Operations Guide US Camera Operations Guide Read this first Digital Video Camera Recorder DCR TRV380 TRV480 SERIES TM ...

Page 2: ...ntenance servicing instructions in the literature accompanying the appliance b Notice If static electricity or electromagnetism causes data transfer to discontinue midway fail restart the application or disconnect and connect the communication cable USB etc again For customers in the U S A and CANADA RECYCLING LITHIUM ION BATTERIES Lithium Ion batteries are recyclable You can help preserve our env...

Page 3: ...s for a digital device pursuant to Subpart B of Part 15 of FCC Rules This product contains mercury Disposal of this product may be regulated if sold in the United States For disposal or recycling information please contact your local authorities or the Electronics Industries Alliance http www eiae org Notes on use Note on a cassette tape You can record on standard 8 mm and Hi8 Digital8 video casse...

Page 4: ... you see Instructions with no specific model names are for all models Instructions with specific model names are for the indicated models only Before you start reading this manual check the model name of your camcorder The on screen displays in each local language are used in illustrating the operating procedures Change the screen language before using your camcorder if necessary p 24 The screens ...

Page 5: ...g a cassette tape 22 Inserting a Memory Stick 23 Step 7 Setting the screen language 24 Recording Recording movies 26 Recording for a longer time 28 Using zoom 29 Using the built in light 29 Recording in mirror mode 30 Using the self timer 31 Recording still images Memory photo recording 32 Selecting image quality 33 Using the self timer 34 Recording a still image on a Memory Stick while recording ...

Page 6: ...cording END SEARCH 47 Searching manually EDIT SEARCH 47 Reviewing the most recently recorded scenes Rec review 48 Playback Viewing movies recorded on a tape 49 Playing back in various modes 50 Viewing recordings with added effects Digital effect 51 Viewing recordings on a Memory Stick 52 Playing back in various modes from a Memory Stick 53 Playing back with ease Easy Handycam 54 Making full use of...

Page 7: ...ing to a VCR or TV 89 Dubbing to another tape 90 Recording pictures from a VCR or TV 91 Dubbing pictures from a tape to a Memory Stick 92 Dubbing still images from a Memory Stick to a tape 93 Dubbing selected scenes from a tape Digital program editing 94 Deleting recorded pictures 101 Marking recorded images with specific information Image protection Print mark 102 Printing recorded images PictBri...

Page 8: ... Memory Stick 138 About the InfoLITHIUM battery pack 140 About i LINK 141 Maintenance and precautions 142 Specification 145 Quick Reference Identifying parts and controls 148 Index 154 Two operating instructions are supplied with your camcorder Camera Operations Guide This manual First Step Guide for using the supplied applications included in the supplied CD ROM ...

Page 9: ...9 ...

Page 10: ... battery pack in the direction of the arrow until it clicks a Slide the OPEN EJECT lever in the direction of the arrow and open the lid until it clicks The cassette compartment comes out automatically b Insert the cassette with its window side facing up then push the center of the back of the cassette c Press Close the cassette lid after the cassette compartment slides back in by itself OPEN EJECT...

Page 11: ...r camcorder p 148 b Press OPEN and open the LCD panel c While pressing the green button slide the POWER switch down to light up the CAMERA TAPE lamp The power turns on d Press REC START STOP Recording starts To change to standby mode press REC START STOP again YoucanalsouseRECSTART STOP of the LCD panel a Slide the POWER switch repeatedly until the PLAY EDIT lamp lights up b Touch rewind c Touch p...

Page 12: ... to the camcorder To charge the battery see page 16 2 Insert a Memory Stick into the camcorder a Lift up the viewfinder b Slide the battery pack in the direction of the arrow until it clicks Insert it so that the b mark is at the bottom left corner Push in until it clicks b mark ...

Page 13: ...N and open the LCD panel c While pressing the green button slide the POWER switch repeatedly until the CAMERA MEMORY lamp lights up The power turns on d Press PHOTO lightly A short beep sound is heard when the focus is adjusted e Press PHOTO fully Ashutter soundis heard and the still image is recorded a Slide the POWER switch repeatedly until the PLAY EDIT lamp lights up b Touch The most recently ...

Page 14: ... allows easy recording playback for even first time users by providing only the basic functions for recording playback For details see instructions for each operation See page 35 for recording page 54 for playback Easy Handycam operation ON Press EASY when recording playing back EASY lights up in blue 1 and screen font size increases 2 during Easy Handycam operation ...

Page 15: ...er of that item supplied AC Adaptor 1 Power cord 1 Lens cap 1 See page 148 on how to attach the lens cap Shoulder strap 1 See page 149 on how to attach the shoulder strap Wireless Remote Commander 1 A button type lithium battery is already installed A V connecting cable 1 USB cable 1 Rechargeable battery pack NP FM30 1 CD ROM Picture Package Ver 1 5 1 Camera Operations Guide This manual 1 ...

Page 16: ...utlet when using the AC Adaptor Disconnect the AC Adaptor from the wall outlet immediately if any malfunction occurs Do not install the appliance in a confined space such as a bookcase or build in cabinet 1 Lift up the viewfinder 2 Attach the battery pack by sliding it in the direction of the arrow until it clicks 3 With the v mark on the DC plug facing up connect the AC Adaptor to the DC IN jack ...

Page 17: ...attery pack To check the remaining battery Battery Info You can check the battery s current charge level and its current remaining recording time both during charging or when the power is turned off 1 Set the POWER switch to CHG OFF 2 Press OPEN and open the LCD panel 3 Press DISPLAY BATT INFO The battery information appears for about 7 seconds Keep the button pressed to view it for about 20 secon...

Page 18: ...other devices in the Hi8 standard 8 mm system is reduced by about 20 b Notes The power will not be supplied from the battery pack when the AC Adaptor is connected to the DC IN jack of your camcorder even if its power cord is disconnected from the wall outlet The recording and playback time will be shorter when you use your camcorder in low temperature The CHG charge lamp flashes during charging or...

Page 19: ...n in Charging the battery pack p 16 Step 3 Turning the power on You need to slide the POWER switch repeatedly to select the desired power mode to record or play When using this camcorder for the first time the CLOCK SET screen appears p 21 While pressing the green button slide the POWER switch down The power turns on To enter the recording or playing mode slide the switch repeatedly until the resp...

Page 20: ...touch z Tips If you rotate the LCD panel 180 degrees to the lens side you can close the LCD panel with the LCD screen facing out If you are using the battery pack for power source you can adjust the brightness by selecting LCD BL LEVEL from the LCD SET on the STANDARD SET menu p 81 Even if you adjust the LCD screen backlight the recorded picture will not be affected You can turn off the operation ...

Page 21: ...ode The LCD screen lights up To hide the buttons on the LCD screen touch To use the large capacity battery pack When you use the large capacity battery pack NP QM71D QM91D on your camcorder extend the viewfinder and pull it up to the optimal angle for viewing Step 5 Setting the date and time Set the date and time when using this camcorder for the first time If you do not set the date and time the ...

Page 22: ...rotection see page 137 b Notes Do not force the cassette into the compartment This may cause a malfunction of your camcorder The recording time when you use your camcorder is half of the indicated time on Hi8 tape If you select the LP mode in the menu settings the recording time is 3 4 of the indicated time on Hi8 tape 1 Slide the OPEN EJECT lever in the direction of the arrow and open the lid unt...

Page 23: ...ally slides back in 3 Close the lid Inserting a Memory Stick For details on the Memory Stick such as write protection see page 138 b Note When using the half sized Memory Stick the Memory Stick Duo make sure you attach the Memory Stick Duo adaptor Your camcorder may malfunction when it is inserted without an adaptor p 139 Insert the Memory Stick with the b mark at the bottom left corner until it c...

Page 24: ...ck your camcorder turn the power off eject the Memory Stick or remove the battery pack Otherwise image data may be damaged Step 7 Setting the screen language You can select the language to be used on the LCD screen 1 Turn on your camcorder 2 Press OPEN to open the LCD panel 3 Touch 4 Touch LANGUAGE If the item is not displayed on the screen touch If you cannot find it touch MENU and select it from...

Page 25: ...Getting started Getting started 25 5 Select the desired language with then touch z Tip Your camcorder offers ENG SIMP simplified English for when you cannot find your native tongue among the options ...

Page 26: ...TAPE lamp lights up and your camcorder is set to the standby mode To record on a Memory Stick MPEG MOVIE EX Slide the POWER switch repeatedly until the CAMERA MEMORY lamp lights up and the currently selected recording folder appears on the screen 4 Press REC START STOP Recording starts REC appears on the LCD screen and the Camera recording lamp lights up Press REC START STOP again to stop recordin...

Page 27: ...62 H END SEARCH EDIT SEARCH Rec review display switch button p 47 Indicators displayed during recording on a Memory Stick The indicators will not be recorded on the Memory Stick Date time p 57 will not be displayed during recording A Recording folder B Remaining battery The indicated time may not be correct depending on the environment of use When you opened or closed the LCD panel it takes about ...

Page 28: ...dingmedia withoutbeingdisplayed onthe screen You can view this information during playback by selecting DATA CODE in the menu setting p 57 Recording for a longer time To record for a longer time on a tape In the STANDARD SET menu select REC MODE then LP p 79 In the LP mode you can record 1 5 times longer than you can when recording in the SP mode A tape recorded in the LP mode should be played bac...

Page 29: ...o press the zoom buttons on LCD frame support the LCD panel with your hand Using the built in light You can use the built in light to suit your shooting situation The recommended distance between the subject and camcorder is about 1 5 m 5 feet Press LIGHT repeatedly to select a setting The settings are displayed cyclically in the following order No indicator displayed Always records without using ...

Page 30: ... the POWER switch set to CAMERA MEMORY When it stays on in the mode for more than 5 minutes When you leave it on for more than 5 minutes with no cassette inserted or after the tape has run out When you use the conversion lens optional light from the built in light is blocked and may not illuminate the subject properly Recording in mirror mode You can turn the LCD panel towards the subject so that ...

Page 31: ... CAMERA SET menu 3 Touch ON then appears 4 Press REC START STOP You will hear a beep sound counting down for about 10 seconds The count down indication begins from 8 The recording starts To stop recording press REC START STOP To cancel the count down Touch RESET or press REC START STOP To cancel the self timer Follow steps 1 and 2 then select OFF in step 3 REC START STOP REC START STOP SELF TIMER ...

Page 32: ...ghtly You will hear a light beeping sound when the focus and brightness settings are adjusted Recording does not start at this point The number of images that can be recorded varies depending on the image quality setting and the recording environment 5 Press PHOTO fully A shutter sound is heard When bars of disappears the image is recorded on the Memory Stick To check the most recently recorded im...

Page 33: ...that timing is recorded The recording time date and the camera settings data are recorded automatically on the recording media without being displayed on the screen You can view this information during playback by selecting DATA CODE in the menu setting p 57 Selecting image quality Select the MEMORY SET menu STILL SET then QUALITY p 68 The number of pictures you can record on a Memory Stick varies...

Page 34: ... it from the CAMERA SET menu 3 Touch ON then appears 4 Press PHOTO You will hear a beep sound counting down for about 10 seconds The count down indication begins from 8 The image is recorded When bars of disappears the image is recorded on the Memory Stick To cancel the count down Touch RESET To cancel the self timer Follow steps 1 and 2 then select OFF in step 3 PHOTO PHOTO SELF TIMER OFF ON OFF ...

Page 35: ...Stick Recording with ease Easy Handycam With this Easy Handycam operation most of the camera settings are set to automatic mode only basic functions become available and screen font size increases for easy viewing Even first time users can enjoy easy recording Before recording follow steps 1 to 7 in Getting started p 15 p 24 Recording a movie During Easy Handycam operation you can record movies on...

Page 36: ...y made settings are restored when you cancel Easy Handycam operation Recording a still image 1 Remove the lens cap Pull the lens cap string down and attach it to the grip belt 2 Press OPEN and open the LCD panel 3 Slide the POWER switch repeatedly until the CAMERA MEMORY lamp lights up 4 Press EASY The EASY lights up in blue 5 Press and hold PHOTO lightly to adjust focus then press fully A shutter...

Page 37: ...SELF TIMER In the CAMERA MEMORY mode only Touch ON then Press PHOTO fully You will hear a beep sound counting down for about 10 seconds When the bars of disappear the image is recorded on the Memory Stick Adjusting the exposure The exposure is adjusted automatically in the default setting Adjusting the exposure for backlit subjects When your subject has its back to the sun or other light you can a...

Page 38: ...t AUTO in step 3 Or set EXPOSURE to AUTO p 38 b Notes You cannot use the Flexible spot meter together with Color Slow Shutter function NightShot plus function If you set PROGRAM AE SPOT METER is automatically set to AUTO z Tip If you set SPOT METER EXPOSURE is automatically set to MANUAL Adjusting the exposure manually You can fix the brightness of a picture at the best exposure When recording ind...

Page 39: ...able you to record an image brighter The Color Slow Shutter function enables you to record an image more faithful to the original colors Set the NIGHTSHOT PLUS switch to ON and NIGHTSHOT PLUS appear To cancel NightShot plus set the NIGHTSHOT PLUS switch to OFF To record higher sensitivity pictures on the tape Super NightShot plus The Super NightShot plus function enables you to use the NightShot p...

Page 40: ...y in total darkness When you are recording in a place with no light at all use the NightShot plus or Super NightShot plus functions You cannot use the Super NightShot plus Color Slow Shutter function together with FADER function Digital effect PROGRAM AE You cannot use the Color Slow Shutter function together with Manual exposure Flexible spot meter When using the Super NightShot plus or Color Slo...

Page 41: ... step 3 Or set FOCUS to AUTO p 41 b Note You cannot use the SPOT FOCUS function together with PROGRAM AE z Tip If you set SPOT FOCUS FOCUS is automatically set to MANUAL Adjusting the focus manually You can adjust the focus manually according to the recording conditions Use this function in the following cases To record a subject behind a window covered with raindrops To record horizontal stripes ...

Page 42: ...r recording When you want to record a close up image of a subject move the power zoom lever towards W wide angle to fully magnify the image then adjust the focus 5 Touch To adjust the focus automatically Follow steps 1 and 2 then touch AUTO in step 3 Recording a picture using various effects Fading in and out of a scene FADER You can add the following effects to currently recording pictures BLACK ...

Page 43: ...nd 3 then touch OFF in step 4 b Notes For DCR TRV480 The OVERLAP WIPE and DOT FADER functions do not work with tapes recorded on other devices in the Hi8 standard 8 mm system The title does not fade in or fade out Erase it before operating the FADER function if it is not needed You cannot use the FADER function together with Super NightShot plus function Color Slow Shutter function Digital effect ...

Page 44: ... or a title written on white paper with a movie TRAIL You can record a picture so that an incidental image like a trail is left SLOW SHUTTR slow shutter You can slow down the shutter speed This mode is suitable for shooting a subject more clearly in a dark place OLD MOVIE You can add an old movie type atmosphere to pictures Your camcorder automatically records pictures in the letterbox mode for al...

Page 45: ... cannot superimpose a still image on a tape which you have already finished recording MTCAM LUMI Memory Luminance key You can swap the brighter white area of a still image into a movie To use this function have a still image of an illustration or title handwritten on white paper recorded on a Memory Stick beforehand CAMTM CHROMA Camera Chroma key You can superimpose a movie on top of a still image...

Page 46: ... in MTCAM LUMI until the bar indicator is extended fully to the right side For CAMTM CHROMA The color scheme of the blue area in the movie For MTCAM CHROMA The color scheme of the blue area in the still image which is to be swapped into a movie 8 Touch twice appears 9 Start recording When you are recording on a tape Press REC START STOP When you are recording on a Memory Stick Press PHOTO fully To...

Page 47: ...rectly when there is a blank section between recorded sections on the tape For DCR TRV480 The END SEARCH function does not work for the tapes recorded on other devices in the Hi8 standard 8 mm system z Tip You can do this operation also by selecting END SEARCH in the menu setting When PLAY EDIT mode is selected you can do this operation by selecting END SEARCH short cut on p 62 Searching manually ...

Page 48: ...e the POWER switch repeatedly to select the CAMERA TAPE mode 2 Touch 3 Touch once The last few seconds of the most recently recorded scene are played back Then your camcorder is set to the standby mode b Note For DCR TRV480 The Rec review function does not work for the tapes recorded on other devices in the Hi8 standard 8 mm system 0 00 00 STBY 60min EDIT ...

Page 49: ... to the point you want to view 4 Touch play to start playback To adjust the volume 1 Touch 2 Touch VOLUME If the item is not displayed on the screen touch If you cannot find it touch MENU and select it from the STANDARD SET menu 3 Adjust the volume by touching decrease increase then touch To stop playback Touch stop To pause Touch pause during playback Touch it again to restart the playback Playba...

Page 50: ...sound Also you may see mosaic like images of the previously played picture remaining on the screen when playing back in the Digital8 system For DCR TRV480 Noise may appear when your camcorder plays back tapes recorded on other devices in the Hi8 standard 8 mm system 1 During playback or playback pause touch 2 Touch VAR SPD PB If the item is not displayed on the screen touch If you cannot find it t...

Page 51: ... an effect then adjust the effect by touching decrease increase 6 Touch twice then appears To cancel Digital effect Follow steps 2 to 4 then select OFF in step 5 b Notes You cannot add effects to externally input pictures Also you cannot output pictures edited with digital effects via the DV Interface For DCR TRV480 The Digital effect function does not work with tapes recorded on other devices in ...

Page 52: ...picture When you view a movie touch when the selected movie appears on the screen To adjust the volume of movies 1 Touch 2 Touch VOLUME If the item is not displayed on the screen touch If you cannot find it touch MENU and select it from the STANDARD SET menu 3 Adjust the volume by touching decrease increase then touch To stop or pause movies Touch Touch it again to restart the playback To delete p...

Page 53: ...renamed folders and modified pictures may not appear on the screen z Tip Once you record a picture in a folder the same folder will be set as the default folder for playback You can select a playback folder in the menu p 70 Playing back in various modes from a Memory Stick Using the screen in step 4 in Viewing recordings on a Memory Stick p 52 the following operations are available To search for a...

Page 54: ...ration allows easy playback for even first time users by providing only the basic functions for playback Also screen font size increases for easy viewing Make sure you have a recorded cassette or a recorded Memory Stick inserted into your camcorder 1 Press OPEN and open the LCD panel 2 Slide the POWER switch repeatedly until the PLAY EDIT lamp lights up 3 Press EASY EASY lights up in blue EASY POW...

Page 55: ...on 1 Touch MENU The available menu items are displayed on the screen 2 Touch the desired item 3 Select the desired setting For CLOCK SET 1 Set Y year with then touch 2 Set M month D day hour and minutes in the same way as Y year then touch For LANGUAGE Select the desired language with then touch For BEEP See page 84 For VOLUME Adjust the volume by touching decrease increase then touch For DATA COD...

Page 56: ...t you want to magnify within the displayed frame The picture is magnified approximately twice the original size and centered at the point you touched on the screen When you touch another place the point you touched becomes the center 6 Adjust the zoom ratio using the power zoom lever You can select the zoom ratio from approximately 1 1 to 5 times the original size Touch W to decrease or T to incre...

Page 57: ...rded while recording pictures on a tape or a Memory Stick 1 Slide the POWER switch repeatedly to select the PLAY EDIT mode 2 Touch during playback or playback pause 3 Touch DATA CODE If the item is not displayed on the screen touch If you cannot find it touch MENU and select it from the STANDARD SET menu 4 Select CAMERA DATA or DATE TIME then touch To hide the date time or the camera settings data...

Page 58: ...otes Camera setting data do not appear when movies on a Memory Stick are played back For DCR TRV480 The data code function does not work with tapes recorded on other devices in the Hi8 standard 8 mm system z Tip Exposure adjustment value 0EV appears when a Memory Stick is played back ...

Page 59: ...nected to a VCR Connect your camcorder to the LINE IN input on the VCR using the A V connecting cable Set the input selector on the VCR to LINE When your TV is monaural When your TV has only one audio input jack Connect the yellow plug of the A V connecting cable to the video input jack and connect the white left channel or the red right channel plug to the audio input jack of your TV or VCR When ...

Page 60: ...ape counter To cancel the operation Press ZERO SET MEMORY on the Remote Commander again b Notes There may be a discrepancy of several seconds between the time code and the tape counter Zero set memory will not function correctly if there is a blank section between recorded sections on the tape For DCR TRV480 The zero set memory function does not work with tapes recorded on other devices in the Hi8...

Page 61: ... and displayed To cancel the operation Press STOP on the Remote Commander b Notes If one day s recording is less than 2 minutes your camcorder may not accurately find the point where the recording date changes The Date search will not function correctly when there is a blank section between recorded sections on the tape For DCR TRV480 The date search function does not work with tapes recorded on o...

Page 62: ...tem directly to select it You can scroll and see all items The available items vary depending on the power mode of your camcorder Unavailable items will be grayed out 6 Select the desired setting changes to If you decide not to change the setting touch to return to the previous screen 7 Touch then to hide the menu screen You can also touch return to go back a screen each time you touch the button ...

Page 63: ...tomize the short cuts p 86 1 Touch 2 Touch the desired item 3 Select the desired setting then touch z Tips When the PLAY EDIT mode is selected touch on the screen displayed after step 2 p 62 to display the video operation screen Touch to return to the previous screen It is convenient if the items you often use appear as short cuts on the Personal Menu To customize the Personal Menu see page 86 ...

Page 64: ...Select this when not using PROGRAM AE SPOTLIGHT spotlight Select to prevent people s faces from appearing excessively white when subjects are lit by strong light such as in a theater or at a wedding PORTRAIT soft portrait Select to bring out the subject such as people or flowers while creating a soft background SPORTS sports lesson Select to minimize shake when shooting fast moving subjects such a...

Page 65: ...s NS LIGHT When using the NightShot plus function to record you can record clearer pictures by using the NightShot Light to emit infrared rays invisible COLOR SLOW S See page 40 for details GON Select to automatically activate the electronic shutter to adjust the shutter speed when recording in bright conditions OFF Select when recording without using the electronic shutter GON Select to use the N...

Page 66: ...n you connect your camcorder to a TV compatible with the ID 1 ID 2 system and play the tape the TV switches to full mode automatically Refer also to the manuals supplied with your TV GOFF Select to deactivate the digital zoom Up to 20 times zoom is performed optically 40 Select to activate the digital zoom 20 times through 40 times zoom is performed digitally 990 Select to activate the digital zoo...

Page 67: ...D 2 system sends a copyright protection signal with the ID 1 signals inserted between video signals in an analog connection STEADYSHOT You can select this function to compensate for camera shake GOFF Standard setting to record pictures to play back on a 4 3 TV The recorded picture will not be wide ON Select to record a picture to be played back on a 16 9 wide TV The recorded picture will be played...

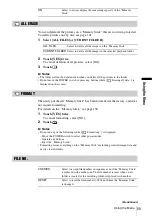
Page 68: ...ect to record still images with the fine image quality compressed to about 1 4 STANDARD Select to record still images with the standard image quality compressed to about 1 10 GFIELD To record moving subjects correcting jitter p 33 FRAME To record stationary subjects in high quality G320 240 Select to record movies for playing on a large screen or to record clearer pictures 160 112 Select to record...

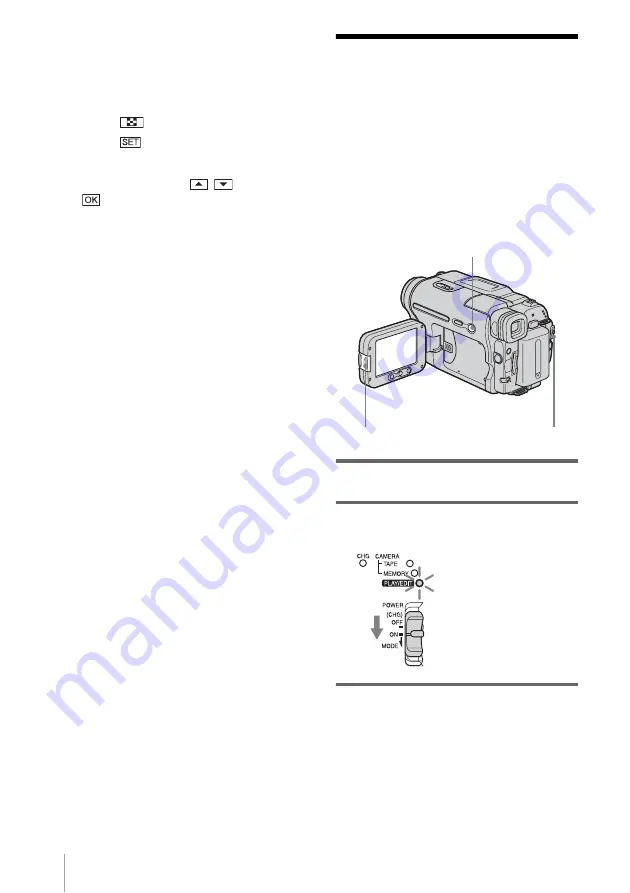
Page 69: ...ice To cancel formatting select NO 2 Touch b Notes Do not do any of the following while Formatting is displayed Move the POWER switch to select other power modes Operate any buttons Eject the Memory Stick Formatting erases everything on the Memory Stick including protected image data and newly created folders FILE NO ON Select to always display the remaining capacity of the Memory Stick ALL FILES ...

Page 70: ... will have to format the Memory Stick p 69 or delete them using your computer The number of pictures that can be recorded on a Memory Stick decreases as the number of folders increases on the Memory Stick REC FOLDER As the default setting pictures are saved in the 101MSDCF folder You can select a folder to save your pictures Create new folders from the NEW FOLDER menu then select the folder to be ...

Page 71: ...etails D EFFECT See page 44 51 for details PICT EFFECT You can add special effects such as films to a picture before or after recording on a tape appears when the effect is selected OK 0 00 00 60min STBY FADER PICT APPLI OVRLAP D EFFECT GOFF Select when not using the Picture effect setting NEG ART Select to record play the picture with the color and brightness of the picture reversed SEPIA Select ...

Page 72: ...r a selected playback folder in sequence slide show 1 Touch 2 Touch PB FOLDER 3 Select ALL FILES or CURRNT FOLDER then touch 4 Touch REPEAT 5 Touch ON or OFF then 6 Touch END 7 Touch START Your camcorder plays back the images recorded on the Memory Stick in sequence To cancel the slide show touch END To pause touch PAUSE MOSAIC Select to record picture appearing mosaic patterned This effect is not...

Page 73: ...REC You can achieve excellent recordings of flowers blooming etc with this function Connect your camcorder to the wall outlet using the supplied AC Adaptor during the operation a REC TIME b INTERVAL 1 Touch 2 Touch INTERVAL 3 Select a desired interval time then touch You can select from 30 seconds 1 5 or 10 minutes for the interval 4 Touch REC TIME 5 Select a desired recording time then touch You ...

Page 74: ... 84 INT REC STL This function is useful to observe the movement of clouds or the changes of daylight Your camcorder will shoot a still image at a selected interval and record it on a Memory Stick a Shooting time b Interval 1 Touch 2 Select a desired interval time 1 5 or 10 minutes then touch 3 Touch ON then touch 4 Touch flashes 5 Press PHOTO fully stops flashing and the Interval photo recording s...

Page 75: ...described below When you touch the screen during the demonstration The demonstration starts again in about 10 minutes When a cassette or Memory Stick is inserted When a mode other than CAMERA TAPE is selected If A SHUT OFF is set to 5 min when the camcorder is used on the battery pack the power will be turned off after approximately 5 minutes p 84 PRINT See page 104 for details GON Select to see a...

Page 76: ... BURN DVD When your camcorder is connected to a Sony VAIO series personal computer you can easily burn the picture recorded on the tape on a DVD Direct Access to Click to DVD using this command See Creating a DVD Direct Access to Click to DVD p 113 for details BURN VCD When your camcorder is connected to a personal computer you can easily burn the picture recorded on the tape on a CD R using this ...

Page 77: ...h To select the type of letter to enter the title Select or 3 Touch to move s to select the next character and enter the character in the same manner 4 When you have finished entering characters touch 2 Touch 3 Touch color position SIZE as necessary to select a desired color position or size Color white t yellow t violet t red t cyan t green t blue Position You can select from 8 to 9 choices Size ...

Page 78: ...ke 5 minutes or longer to enter characters set A SHUT OFF on the STANDARD SET menu to NEVER p 84 The power will not be turned off Even though the power goes off the characters you have entered remain stored in memory Turn the power back on then start again from step 1 to continue superimposing the title When you superimpose a title while you are recording the beep does not sound z Tip To change a ...

Page 79: ...ritten properly between the scenes AUDIO MODE b Note For DCR TRV480 You cannot select AUDIO MODE when you dub tapes recorded in the Digital8 system to another VCR However you can select AUDIO MODE when you dub tapes recorded on other devices in the Hi8 standard 8 mm system to another VCR via the DV Interface VOLUME See page 49 52 for details MULTI SOUND You can select how to play back audio record...

Page 80: ...h stereo sound or dual sound track tape with main and sub sound 1 Digital8 system Select to play back a stereo tape with the left channel sound or a dual sound track tape with main sound For DCR TRV480 Hi8 standard 8 mm system Select to play back a stereo tape with monaural sound or a dual sound track tape with main sound 2 Digital8 system Select to play back a stereo tape with the right channel s...

Page 81: ...orded on other devices in the Hi8 standard 8 mm system LCD SET The recorded picture will not be affected by this setting LCD BRIGHT See page 20 for details LCD BL LEVEL You can adjust the brightness of the LCD screen s backlight b Notes When you connect your camcorder to outside power sources BRIGHT is automatically selected for the setting When you select BRIGHT battery life is reduced by about 1...

Page 82: ...our camcorder The analog signal input to the A V jack of your camcorder will be converted and output from the DV Interface of your camcorder For details refer to Connecting an analog VCR to the computer via your camcorder p 116 GAUTO Select to automatically detect the system Hi8 standard 8 mm or Digital8 that was used to recorded on the tape and play back the tape During switching of systems the s...

Page 83: ...isplay date time and the camera settings data during playback DATE TIME Select to display the date and time during playback p 57 CAMERA DATA Select to display the camera settings data during playback p 57 GAUTO Select to display the remaining tape indicator for about 8 seconds After you select the CAMERA TAPE mode with the cassette inserted and your camcorder calculates the remaining amount of tap...

Page 84: ...d a melody when you start stop recording operate the touch panel or when an unusual condition occurs on your camcorder NORMAL Select to sound a beep instead of the melody OFF Select to cancel the melody the beep sound the shutter sound or touch panel operation confirmation beep GLCD PANEL Select to show the displays such as the time code on the LCD screen and in the viewfinder V OUT PANEL Select t...

Page 85: ...n set the date and time p 21 WORLD TIME You can adjust the time difference when using your camcorder abroad Set the time difference by touching the clock will be adjusted in accordance with the time difference If you set the time difference to 0 the clock returns to the originally set time LANGUAGE You can select or change the language used for the on screen display p 24 You can select from Englis...

Page 86: ...ET UP If the desired menu is not displayed on the screen touch until the menu is displayed 3 Touch ADD 4 Touch to select a menu category then touch The available items vary depending on the power mode of the camcorder Only the available items are displayed 5 Touch to select a menu item then touch 6 Touch YES The menu is added to the end of the list 7 Touch 1 3 0 00 00 60min MENU FADER EXPO SURE PR...

Page 87: ...er 1 Touch 2 Touch P MENU SET UP If the menu is not displayed on the screen touch until the desired menu is displayed 3 Touch SORT 1 3 0 00 00 60min MENU FADER EXPO SURE PRGRAM AE SPOT METER SPOT FOCUS P MENU SET UP ADD SORT DELETE 0 00 00 RESET 60min END Select button to delete 1 3 0 00 00 60min END MENU FADER EXPO SURE PRGRAM AE SPOT METER SPOT FOCUS D e l e t e t h i s f r o m CAMERA TAPE mode ...

Page 88: ...ntil the menu is displayed 3 Touch RESET 4 Touch YES 5 Touch YES The Personal Menu settings return to the default settings To cancel initialization touch NO 6 Touch OK Select new location 1 3 1 2 3 4 5 6 60min END MENU FADER EXPO SURE PRGRAM AE SPOT METER SPOT FOCUS 0 00 00 END OK Select new location 1 3 1 2 3 4 5 6 60min MENU FADER EXPO SURE PRGRAM AE SPOT METER SPOT FOCUS 0 00 00 1 3 0 00 00 60m...

Page 89: ...o LCD PANEL the default setting p 84 When you are connecting your camcorder to a monaural device connect the yellow plug of the A V connecting cable to the video jack and the red right channel or the white left channel plug to the audio jack on the VCR or the TV To use an i LINK cable for connection Use an i LINK cable optional to connect your camcorder to other device via the DV Interface The vid...

Page 90: ... to the VCR via the DV Interface you cannot record the title indicators and words entered on the index screen of the Memory Stick When dubbing using the A V connecting cable press DISPLAY BATT INFO to hide indicators such as time code p 57 Otherwise they will be recorded on the tape To record the date time and camera settings data have them displayed on screen p 57 Pictures edited with Picture eff...

Page 91: ...DIT PLAY menu p 76 3 Touch REC PAUSE When recording on a Memory Stick 1 Touch 2 Touch MENU 3 Select the EDIT PLAY menu then REC CTRL with an icon 5 Start playing the cassette on your VCR or select a TV program The picture played on the connected device appears on the LCD screen of your camcorder 6 Touch REC START at the point you want to start recording 7 Stop recording When recording on a tape To...

Page 92: ...naural or still images on a Memory Stick Make sure you have a recorded tape in the Digital8 system and a Memory Stick inserted into your camcorder 1 Slide the POWER switch to select the PLAY EDIT mode 2 Search and record the scene you want to record When recording a still image 1 Touch play to playback the tape 2 Press PHOTO lightly at the scene you want to record Check the image and press it full...

Page 93: ...e by pressing REC START STOP during tape playback For the recording time of movies see page 28 Dubbing still images from a Memory Stick to a tape You can record still images on a tape Make sure you have the Memory Stick with the images and a tape inserted into your camcorder 1 Slide the POWER switch to select the PLAY EDIT mode 2 Search for the point where you want to start dubbing by touching rew...

Page 94: ...ected scenes as programs p 98 b Note For DCR TRV480 The Digital program editing does not work with tapes recorded on other devices in the Hi8 standard 8 mm system Step 1 Preparing your camcorder and VCR for operation Follow the steps below when you are performing a digital program edit for the first time to a tape in a VCR You can skip this setting if you have set up the VCR by the following proce...

Page 95: ... PLAY then touch 7 Touch to select PROG EDIT then touch 8 Touch OTHER DEVICE 9 Touch EDIT SET 10Touch CONTROL 11Select IR or i LINK When connecting with an A V connecting cable Touch IR then Follow the procedure described in To set the IR SETUP code p 96 When connecting with an i LINK cable Touch i LINK then Go on to Step 2 Adjusting the synchronization of the VCR p 97 OK 60min STILL SET MEMORY SE...

Page 96: ...C The recording starts on your VCR when the setting is correct Completed appears when the IR SETUP code test is finished Go on to Step 2 Adjusting the synchronization of the VCR p 97 When recording fails to start select another IR SETUP code and try again IR SETUP code list The following IR SETUP codes are recorded on your camcorder by default It is set at 3 as the default setting Infrared ray emi...

Page 97: ...rded when you start recording from the beginning of the tape 3 Touch then ADJ TEST 4 Touch EXEC A picture about 50 seconds long with 5 IN and OUT indicators each for adjusting synchronization is recorded Multitech 23 32 80 NEC 21 33 35 Olympic 77 78 Optimus 22 Orion 60 Panasonic 16 17 77 78 Pentax 8 42 Philco 26 70 77 78 Philips 47 77 78 83 Pioneer 78 Quasar 6 16 17 77 78 RCA PROSCAN 7 8 16 40 41 ...

Page 98: ...recording is set 11Touch END twice Recording the selected scenes as programs When you are performing a digital program edit for the first time to a tape in a VCR go through the procedures described in Steps 1 and 2 p 94 to p 97 beforehand b Note You cannot dub the title or display indicators However you can dub the title which has already been recorded on a tape 1 Prepare a cassette or a Memory St...

Page 99: ...pause playback You can adjust the position with frame 10Touch MARK OUT The ending point of the first program is set and the lower part of the program mark changes to light blue 11Repeat steps 7 to 10 and create programs 12Set your VCR to recording pause Skip this step if your camcorder is connected via an i LINK cable or recording on a Memory Stick 0 00 00 00 60min VAR SPD PB REC CTRL OK PRINT PIC...

Page 100: ...til the cassette is ejected To erase programs 1 Follow steps 1 to 6 in Recording the selected scenes as programs p 98 then touch UNDO 2 Touch DEL 1MARK to delete the last set program Or touch ALL ERASE to delete all the programs 3 Touch EXEC The programs are deleted To cancel this operation touch CANCEL b Notes You cannot set the starting point or ending point on a blank section of the tape If the...

Page 101: ... displaying 6 pictures at once 1 Slide the POWER switch to select the PLAY EDIT mode 2 Touch 3 Touch 4 Touch 5 Touch DELETE 6 Touch the picture you want to delete appears on the image to be deleted To display the next or the previous 6 pictures touch 7 Touch 8 Touch YES The selected pictures are deleted To cancel deletion touch NO b Notes Pictures cannot be deleted when the write protect tab of th...

Page 102: ... 7 Touch 8 Touch END To cancel image protection Follow steps 1 to 5 then touch the image to cancel image protection disappears from the image Selecting still images for printing Print mark You can mark images that you want to print out while viewing them on your camcorder You cannot specify the number of printouts The DPOF Digital Print Order Format standard is used to select images for printing o...

Page 103: ...e Print mark disappears from the image b Note Do not mark images on your camcorder if the Memory Stick already has some images with the Print mark put on other devices This may change the information of the images with the Print mark put on the other device 101 0002 SET END 101 2 10 SET END DELETE PB FOLDER PRO TECT PR I NT MARK 2 10 PRINT MARK 101 0002 101 appears on the selected image 2 10 PRINT...

Page 104: ...DIT mode 2 Select 3 Touch MENU 4 Select STANDARD SET then USB PLY EDT by touching and 5 Select PictBridge then touch 6 Touch 7 Connect the USB jack p 150 of your camcorder to a printer using the supplied USB cable The location of the USB jack of the printer differs depending on the model Refer to the operating instructions supplied with your printer for details on operation 8 Select PICT APPLI the...

Page 105: ...t the USB cable from your camcorder and printer b Notes Do not attempt the following operations when is on the screen The operations may not be performed properly Slide the POWER switch to select other power modes Disconnecting the USB cable from your camcorder or printer Removing the Memory Stick from your camcorder If the printer stops working disconnect the USB cable and restart the operation f...

Page 106: ...ur camcorder by selecting from thumbnails Still images and movies are saved in folders by date Music Video Slideshow Producer You can select your favorite movies and still images from pictures saved on your computer and easily create a short original video or slide show with added music and visual styles Automatic Music Video Producer You can easily create a short original video with added music a...

Page 107: ... recommended For using ImageMixer VCD2 Intel Pentium III 800 MHz or faster recommended Application DirectX 9 0c or later this product is based on DirectX technology It is necessary to have DirectX installed Windows Media Player 7 0 or later Macromedia Flash Player 6 0 or later Sound system 16 bit stereo sound card and stereo speakers Memory 64 MB or more Hard disk Available memory required for ins...

Page 108: ...ing the software and First Step Guide on a computer You need to install the software etc with the supplied CD ROM on your computer before connecting your camcorder and your computer Once you install it the installation is not required thereafter The software to be used varies depending on the OS system you are using Windows computer Picture Package including ImageMixer VCD2 Macintosh computer Imag...

Page 109: ...Double click PICTUREPACKAGE Disc drive Drive names such as E may vary depending on the computer 4 Click Install Depending on the operating system on the computer a message appears notifying you that First Step Guide cannot be installed automatically with the InstallShield Wizard In such a case manually copy First Step Guide to your computer according to the message instructions 5 Select the langua...

Page 110: ... Step Guide 12Click Next then follow the on screen instructions to install ImageMixer VCD2 13If the Installing Microsoft R DirectX R screen is displayed follow the steps below to install DirectX 9 0c If not skip to step 14 1 Read License Agreement then click Next 2 Click Next 3 Click Finish 14Make sure Yes I want to restart my computer now is checked then click Finish The computer turns off once t...

Page 111: ...ning on the computer before installing the software 3 Place the CD ROM in the disc drive of your computer 4 Double click CD ROM icon 5 Copy FirstStepGuide pdf stored in the desired language in the FirstStepGuide folder to your computer 6 Copy IMXINST SIT in the MAC folder of the CD ROM to a folder of your choice 7 Double click IMXINST SIT in the folder it was copied to 8 Double click the unzipped ...

Page 112: ...ces the Music Contents are the copyrighted work of the respective owners thereof and are protected by copyright laws and other applicable laws of each country region Except to the extent expressly permitted by applicable laws you are not permitted to use including without limitation copying modifying reproducing uploading transmitting or placing to the external network accessible to the public tra...

Page 113: ...ks of their respective companies Furthermore and are not mentioned in each case in this manual Creating a DVD Direct Access to Click to DVD b Note You can only use an i LINK cable for this operation You cannot use a USB cable You can create DVDs when you connect your camcorder to a Sony VAIO series computer that supports Click to DVD via an i LINK cable optional The picture is automatically copied...

Page 114: ... Click to DVD Automatic Mode Launcher is set up for each Windows XP user 1 Turn on the computer Quit all applications running with an i LINK 2 Prepare the power source for your camcorder then slide the POWER switch repeatedly to select the PLAY EDIT mode Use the supplied AC Adaptor as the power source since it takes a few hours to create a DVD 3 Insert a recorded cassette into your camcorder 4 Con...

Page 115: ...disconnect the i LINK cable optional or turn off the power of your camcorder while WRITING or CONVERTING is displayed When any of the following occurs copying of the picture is canceled A DVD containing the data up to the point the operation was canceled is created Refer to the help files of Click to DVD Automatic Mode Launcher for details When there is a blank portion of 10 seconds or longer on t...

Page 116: ...your camcorder An A V jack works as an input as well as an output It switches automatically depending on the operational status Software that can record the video signal must be installed on your computer beforehand Before operation Set DISPLAY in the menu settings to LCD PANEL the default setting p 84 1 Turn on the analog video unit 2 Slide the POWER switch repeatedly to select the PLAY EDIT mode...

Page 117: ... software Picture Package or ImageMixer VCD2 do not support the digital convert function You may not be able to output the pictures correctly depending on the condition of the analog video signal input to your camcorder You cannot transfer pictures with copyright protection signals to a computer You can use a USB cable instead of an i LINK cable optional to transfer pictures to a computer Note how...

Page 118: ...the AC Adaptor to connect to the wall outlet p 19 The camcorder does not operate even when the power is set to on cDisconnect the AC Adaptor from a wall outlet or remove the battery pack then reconnect it after about 1 minute If the functions still do not work press the RESET button using a sharp pointed object If you press the RESET button all settings including the clock setting except the Perso...

Page 119: ...alfunction cFully charge the battery again If the problem persists replace the battery pack with a new one It may be damaged p 16 140 The power turns off frequently although the remaining battery indicator indicates that the battery pack has enough power to operate A problem has occurred in the remaining battery time indicator or the battery pack has not been charged enough cFully charge the batte...

Page 120: ...DE to OFF on the menu p 75 An unknown indicator appears on the screen cRefer to the indicator list p 153 The letters on the screen are larger than usual or the menu settings CAMERA SET etc are not displayed cPress the EASY button to cancel Easy Handycam operation p 35 54 The buttons do not appear on the touch panel cTouch the LCD panel lightly cPress DISPLAY BATT INFO or DISPLAY on the Remote Comm...

Page 121: ...itable for auto focus Adjust the focus manually p 41 A vertical band appears when recording candlelight or electric light in the dark This occurs when the contrast between the subject and the background is too high This is not a malfunction A vertical band appears when recording a bright subject This phenomenon is called the smear effect This is not a malfunction Tiny spots in white red blue or gr...

Page 122: ...ppropriately p 81 cMake sure the red and white plugs of the A V connecting cable are connected p 59 The sound breaks off cClean the head using the cleaning cassette optional p 143 Cannot perform the Date search with the recording date displayed on the screen There is a blank section in the beginning or middle of the tape This is not a malfunction The picture is not played back correctly cFor DCR T...

Page 123: ...ed on other devices may not be played back This is not a malfunction Pictures cannot be deleted cRelease the lock on the write protect tab of the Memory Stick p 138 cCancel image protection on the picture p 102 The maximum number of pictures that you can delete at one time is 100 Delete them in groups of less than 100 pictures each Cannot format the Memory Stick cRelease the lock on the write prot...

Page 124: ...in step11 of Step 1 Preparing your camcorder and VCR for operation p 94 cAdjust the synchronization of the VCR p 97 cEnter a correct IR SETUP code p 96 cSelect the mode used to cancel recording pause again p 96 cSet your camcorder and the VCR more than 30 cm 12 in apart p 96 cSet PB MODE to AUTO in the STANDARD SET menu p 82 The program may not be set to a blank section on the tape You cannot perf...

Page 125: ...a USB cable You cannot view the pictures recorded on a tape on the computer cDisconnect the cable from the computer turn on the camcorder then connect it again cSlide the POWER switch repeatedly to select the PLAY EDIT mode set USB PLY EDT to USB STREAM in the STANDARD SET menu p 83 Only when connecting to the Windows computer with a USB cable You cannot view the pictures recorded on a tape on the...

Page 126: ...emory Stick into your camcorder cDisconnect the USB device other than the keyboard the mouse and the camcorder from the computer cSet USB PLY EDT to STD USB in the STANDARD SET menu p 83 The computer does not recognize the Memory Stick during camcorder operation such as tape playback or editing cFinish camcorder operation before connecting the camcorder to the computer Symptom Cause and or Correct...

Page 127: ... pictures recorded on a tape USB Audio Device in the Sound video and game controllers folder USB Device in the Other devices folder USB Composite Device in the Universal Serial Bus Controller folder For copying and viewing pictures recorded on a Memory Stick Sony Handycam or Sony DSC with a mark in the Other devices folder 5 When the Confirm Device Removal screen appears click OK 6 Turn off the po...

Page 128: ...rollers folder Composite USB Device in the Other devices folder For copying and viewing pictures recorded on a Memory Stick Sony Handycam or Sony DSC with a mark in the Other devices folder 7 When the Confirm Device Removal screen appears click OK 8 Turn off the power of your camcorder disconnect the USB cable then restart the computer 9 Place the CD ROM in the disc drive of your computer 10 Follo...

Page 129: ...video and game controllers folder USB Device in the Other devices folder For copying and viewing pictures recorded on a Memory Stick Sony Handycam or Sony DSC with a mark in the Other devices folder 8 When the Confirm Device Removal screen appears click OK 9 Turn off the power of your camcorder disconnect the USB cable then restart the computer 10 Place the CD ROM in the disc drive of your compute...

Page 130: ...another device on the Select audio device screen 3 Follow the on screen instructions click Next then click Done b Note Sound is not supported on Windows 98 The movie is not smooth during USB streaming cChange the settings as described in the following procedures 1 Select Start Programs All Programs for Windows XP Picture Package Handycam Tools and USB Streaming Tool then start up USB Streaming Too...

Page 131: ...Troubleshooting Troubleshooting 131 First Step Guide is not displayed correctly cRefer to First Step Guide in PDF For copying the PDF file see page 112 Symptom Cause and or Corrective Actions ...

Page 132: ...ed above have occurred Remove and insert the cassette then operate your camcorder again Do not perform this procedure if moisture starts to condense p 143 cRemove the power source Reconnect it again and operate your camcorder again cChange the tape cPress the RESET button and operate your camcorder again p 148 E 61 ss E 62 ss cContact your Sony dealer or local authorized Sony service facility Info...

Page 133: ...ss than 5 minutes remaining on the tape No cassette is inserted The write protect tab on the cassette is set to lock p 137 Fast flashing The tape has run out Z Eject cassette warning Slow flashing The write protect tab on the cassette is set to lock p 137 Fast flashing Moisture condensation has occurred p 143 The self diagnosis display code is displayed p 132 Warning indicator pertaining to image ...

Page 134: ...ert a Memory Stick cSee page 23 Reinsert the Memory Stick cReinsert the Memory Stick a few times cFormat the Memory Stick p 69 The Memory Stick might be damaged Try with another Memory Stick Do not eject the Memory Stick during writing This is a read only Memory Stick Incompatible type of Memory Stick cSee page 138 This Memory Stick is not formatted correctly cCheck the format then format the Memo...

Page 135: ...or Cancel the task cCheck the printer Cannot print Check the printer cSwitch off the printer and switch it on again then disconnect the USB cable and reconnect it Others Cannot record due to copyright protection Cannot record 44 1 kHz audio on a Memory Stick Already added to CAMERA TAPE mode s P MENU Already added to CAMERA MEMORY mode s P MENU Already added to PLAY EDIT mode s P MENU x Dirty vide...

Page 136: ...ock by time difference You can easily set the clock to the local time by setting a time difference when using your camcorder abroad Select WORLD TIME in the TIME LANGU menu then set the time difference p 85 System Used in NTSC Bahama Islands Bolivia Canada Central America Chile Colombia Ecuador Guyana Jamaica Japan Korea Mexico Peru Surinam Taiwan the Philippines the U S A Venezuela etc PAL Austra...

Page 137: ...s on your tape re record from the beginning to the end of the tape as described above Copyright signal When you play back If the cassette you play back on your camcorder contains copyright signals you cannot copy it to a tape in another video camera connected to your camcorder When you record You cannot record software on your camcorder that contains copyright control signals for copyright protect...

Page 138: ... Memory Stick formatted by the Windows OS or using Macintosh computers does not have guaranteed compatibility with your camcorder Data read write speed may vary depending on the combination of the Memory Stick and Memory Stick compliant product you use To prevent accidental erasure of images Slide the write protect tab on the Memory Stick to the write protect position The position and shape of the...

Page 139: ... similar object to let the Memory Stick Duo slide out Notes on using the Memory Stick PRO The maximum memory capacity of a Memory Stick PRO that can be used on your camcorder is 2 GB 1 GB for a Memory Stick PRO Duo This unit does not support high speed data transfer Notes on image data compatibility Image data files recorded on a Memory Stick by your camcorder conform to the Design Rule for Camera...

Page 140: ...one of the following to use the battery pack for a longer time Put the battery pack in a pocket to warm it up and insert it in your camcorder right before you start taking shots Use a large capacity battery pack NP FM50 QM71D QM91D optional Frequent use of the LCD screen or a frequent playback fast forward or rewind operation wears out the battery pack faster We recommend using a large capacity ba...

Page 141: ...is i LINK i LINK is a digital serial interface for transferring digital video digital audio and other data to other i LINK compatible device You can also control other device using the i LINK i LINK compatible device can be connected using an i LINK cable Possible applications are operations and data transactions with various digital AV devices When two or more i LINK compatible device are connect...

Page 142: ...connected About the required i LINK cable Use the Sony i LINK 4 pin to 4 pin cable during DV dubbing i LINK and are trademarks of Sony Corporation Maintenance and precautions On use and care Do not use or store the camcorder and accessories in the following locations Anywhere extremely hot or cold Never leave them exposed to temperatures above 60 C 140 F such as under direct sunlight near heaters ...

Page 143: ...ed again if the or Z does not appear when the power is turned on again If moisture starts to condense your camcorder sometimes cannot detect condensation If this happens the cassette is sometimes not ejected for 10 seconds after the cassette lid is opened This is not a malfunction Do not close the cassette lid until the cassette is ejected Note on moisture condensation Moisture may condense when y...

Page 144: ... operation 1 Slide the POWER switch up to CHG OFF 2 Eject the cassette and Memory Stick from your camcorder then disconnect any connecting cables except the AC Adaptor from your camcorder 3 Slide the POWER switch repeatedly to select the PLAY EDIT mode while pressing DISPLAY BATT INFO on your camcorder then press and hold DISPLAY BATT INFO for about 5 seconds 4 Touch the displayed on the screen wi...

Page 145: ...to CHG OFF for more than 24 hours Specification Video camera recorder System Video recording system 2 rotary heads Helical scanning system Still image recording system Exif Ver 2 2 1 1 Exif is a file format for still images established by the JEITA Japan Electronics and Information Technology Industries Association Files in this format can have additional information such as your camcorder s setti...

Page 146: ...eneral Power requirements DC 7 2 V battery pack DC 8 4 V AC Adaptor Average power consumption when using the battery pack During camera recording using the viewfinder 2 9 W During camera recording using the LCD 3 8 W Operating temperature 0 C to 40 C 32 F to 104 F Storage temperature 20 C to 60 C 4 F to 140 F Dimensions approx 85 98 151 mm 3 3 8 3 7 8 6 in w h d Mass Approx 800 g 1 lb 12 oz main u...

Page 147: ... mAh Dimensions approx 38 2 20 5 55 6 mm 1 9 16 13 16 2 1 4 in w h d Mass approx 65 g 2 3 oz Operating temperature 0 C to 40 C 32 F to 104 F Type Lithium ion Types of differences Design and specifications are subject to change without notice Model DCR TRV380 TRV480 Available recording system Digital8 Digital8 Available playback system Digital8 Hi8 8 Digital8 ...

Page 148: ...rame p 26 H Zoom buttons on LCD frame p 29 I RESET button If you press RESET all the settings including the date and time except the Personal Menu items return to the default J Viewfinder p 3 20 K CHG charge lamp p 16 L LIGHT button p 29 M Access lamp p 23 138 N Battery pack p 16 O Memory Stick slot p 23 P BACK LIGHT button p 37 The BACK LIGHT button is not available during Easy Handycam operation...

Page 149: ...for shoulder strap D PHOTO button p 32 E CAMERA TAPE CAMERA MEMORY PLAY EDIT mode lamps p 19 F POWER switch p 19 G Grip belt p 4 H REC START STOP button p 26 I DC IN jack p 16 To attach the shoulder strap Attach the shoulder strap supplied with your camcorder to the hooks for the shoulder strap continued ...

Page 150: ...ote sensor Infrared ray emitter p 96 I Camera recording lamp p 26 J Microphone A Viewfinder lens adjustment lever p 20 B Eyecup C Cassette compartment p 22 D OPEN EJECT lever p 22 E Tripod receptacle Make sure that the length of the tripod screw is less than 5 5 mm 7 32 inch Otherwise you cannot attach the tripod securely and the screw may damage your camcorder ...

Page 151: ...order point towards the remote sensor to control your camcorder H REC START STOP button p 31 I Power zoom button p 29 J DISPLAY button p 60 These buttons are not available during Easy Handycam operation To remove the insulation sheet To change the button type battery 1 While pressing on the tab inset your fingernail into the slit to pull out the battery case 2 Remove the button type lithium batter...

Page 152: ...mander may not function properly The Remote Commander may not function properly when the remote sensor is obstructed with a conversion lens optional When you are operating with the Remote Commander supplied with your camcorder your VCR may also operate In that case select a commander mode other than VTR 2 for your VCR or cover the sensor of your VCR with black paper CAUTION Danger of explosion if ...

Page 153: ...34 Interval recording p 73 Interval still image recording p 74 Built in light p 29 Frame recording p 73 0 00 00 STBY P MENU 60min Example Indicators in the CAMERA TAPE mode Time code p 27 Tape counter p 27 Self diagnosis p 132 Picture number p 53 Exposure adjustment scale Outputting analog images and sound in digital format p 82 DV input p 91 Zero set memory p 60 NightShot plus p 39 Super NightSho...

Page 154: ... EFFECT 44 51 Digital program editing PROG EDIT 94 DIGITAL ZOOM 66 Digital8 system 137 Direct Access to Click to DVD 113 DirectX 9 0c 110 Display DISPLAY 84 Display indicators 153 DNR 80 DOT FADER 43 Dual sound track tape 79 Dubbing REC CTRL 91 DV Interface 113 116 E Easy Handycam 35 54 EDIT SEARCH 47 END SEARCH 47 77 Erase ALL ERASE still image 69 Exposure 37 F FADER 42 FILE NO 69 Fine FINE See I...

Page 155: ...ure effect PICT EFFECT 71 Picture Package 108 Picture search 50 Playback VAR SPD PB Double speed 50 Frame 50 Reverse 50 Slow 50 Playback zoom PB ZOOM 56 Playing time 18 Power mode 19 PRINT See PictBridge Print mark 102 PROGRAM AE 64 Program edit PROG EDIT 76 R REC FOLDER 70 Rec review 48 Recording capacity Display 27 REMAINING 68 83 Recording lamp REC LAMP 83 Recording mode REC MODE 27 79 Recordin...

Page 156: ...wfinder 20 Volume VOLUME 49 52 W Warning indicators 132 Warning messages 132 WHITE FADER 42 Wide angle See Zoom Windows 107 108 WIPE 43 WORLD TIME 85 Write protect tab 137 138 Z Zero set memory 60 Zoom 29 Printed in Japan ...

Reviews: