background image

44

GB

To

Stop playback

Pause playback

Fast-forward

Rewind

Tips

• You can use the digipad for tape operations.
• Pressing TAPE A/B while the power is off

automatically turns the power on.

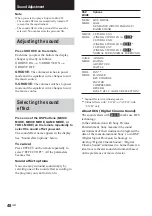
Searching for the beginning of a

track (AMS*)

During playback, press 

.

 or 

>

 repeatedly

for the number of songs you want to skip
forward (or backward).

The search direction, + (forward) or – (back),
and number of songs being skipped (1–9)
appear in the display.

* Automatic Music Sensor

Note

The AMS function may not operate correctly under
the following circumstances:
– When the unrecorded space between songs is less

than 4 seconds long.

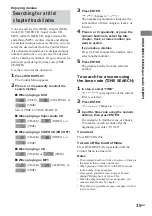
Insert with the
side you want
to play/record
facing forward.

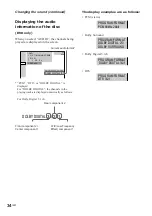
Example: searching forward 2 songs

Do this

Press 

x

.

Press 

X

.

Press again to resume
playback.

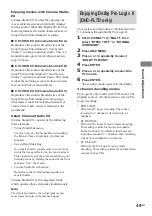
Press 

M

 while playing the

front side or press 

m

 while

playing the reverse side.

Press 

m

 while playing the

front side or press 

M

 while

playing the reverse side.

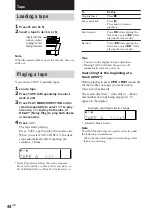
Loading a tape

1

Press 

Z

 A or 

Z

 B.

2

Insert a tape in deck A or B.

Note

When the cassette deck is open, the disc tray does not
slide out.

Playing a tape

You can use TYPE I (normal) tapes.

1

Load a tape.

2

Press TAPE A/B repeatedly to select
deck A or B.

3

Press PLAY MODE/DIRECTION on the
remote repeatedly to select 

g

 to play

one side, 

j

 to play both sides, or

RELAY* (Relay Play) to play both decks
in succession.

4

Press 

hH

.

The tape starts playing.

Press 

hH

 again to play the reverse side.

When you select 

j

 or RELAY, the deck

stops automatically after repeating the
sequence 5 times.

* Relay Play always follow this cyclic sequence:

Deck A (front side) 

t

 Deck A (reverse side) 

t

Deck B (front side) 

t

 Deck B (reverse side) 

t

Tape

B

A

B

A

Summary of Contents for DHC-FL7D - Display Side Hi Fi Component System

Page 1: ...2 Sony Corporation DHC FL7D DHC FL5D Owner s Record The model and serial numbers are located on the rear of the unit Record the serial number in the space provided below Refer to them whenever you call upon your Sony dealer regarding this product Model No Serial No DHC FL7D only ...

Page 2: ... be of sufficient magnitude to constitute a risk of electric shock to persons This symbol is intended to alert the user to the presence of important operating and maintenance servicing instructions in the literature accompanying the appliance WARNING This equipment has been tested and found to comply with the limits for a Class B digital device pursuant to Part 15 of the FCC Rules These limits are...

Page 3: ...rates Dolby Digital Pro Logic Surround and the DTS Digital Surround System Manufactured under license from Dolby Laboratories Dolby Pro Logic and the double D symbol are trademarks of Dolby Laboratories Manufactured under license from Digital Theater Systems Inc DTS and DTS Digital Surround are registered trademarks of Digital Theater Systems Inc Notes on DTS audio playback Excessive noise may be ...

Page 4: ...playback from the point you stopped the disc Resume Play 23 Playing repeatedly Repeat Play 24 Playing DVDs using the menu 25 Playing VIDEO CDs with PBC functions Ver 2 0 PBC Play 25 Table of Contents Setting up for DVD VIDEO CD CD Using the Setup Display 26 Setting the display or sound track language LANGUAGE SETUP 27 Settings for the display SCREEN SETUP 28 Custom settings CUSTOM SETUP 29 Speaker...

Page 5: ...sonal sound effect file Personal file 51 Display Turning off the display Power Saving Mode 52 Using the display 52 Other Features To adjust the brightness of the display 53 To listen to multi channel sound 53 Singing along Karaoke 54 About indicators 55 Falling asleep to music Sleep Timer 55 Waking up to music Daily Timer 56 Optional Components Hooking up optional components 57 Listening to audio ...

Page 6: ... rear panel Note on playback operations of DVDs and VIDEO CDs Some playback operations of DVDs and VIDEO CDs may be intentionally set by software producers Since this system plays DVDs and VIDEO CDs according to the disc contents the software producers designed some playback features may not be available Also refer to the instructions supplied with the DVDs or VIDEO CDs Note on PBC Playback Contro...

Page 7: ...E R ECHO LEVEL Asian model only wa 54 EFFECT North American and European models only w 48 50 59 GROOVE North American and European models only wa 48 64 MD VIDEO Except for North American model wd 59 MIC jack Except for North American and European models ql 54 MIC LEVEL Except for North American and European models w 54 MULTI CHANNEL DECODING indicator 3 PHONES jack qh REC PAUSE START qf 45 46 Remo...

Page 8: ... x stop wl go back wj go forward wj m rewind ra M fast forward ra V v B b ENTER eg 10 wa To use these functions press the button while pressing SHIFT F S FUNCTION 0 19 45 54 58 59 63 GAME MODE eh 48 GROOVE ef 48 KARAOKE PON eh 54 MOVIE MODE es 48 MUSIC MODE ej 48 Numeric buttons wd 18 22 25 35 38 40 42 P FILE el 51 PLAY MODE DIRECTION w 17 19 21 22 44 46 54 62 PRESET wj PREV NEXT wj REPEAT FM MODE...

Page 9: ... you can operate as pressing and holding these buttons Adjusting the equalizer curve in EQ EDIT operations page 50 The curve made by sliding the finger is reflected in the display Selecting parameters in DSP EDIT and other adjustments page 50 Slide in the direction until you reach the value you want refer to each of the operations Adjusting the position of the digipad When the digipad operation is...

Page 10: ...es AM loop antenna Front speaker Left Front speaker Right FM antenna Rear speaker Right Rear speaker Left Center speaker Sub woofer Connect the To the Front speakers SPEAKER FRONT L white and R red terminals Rear speakers SPEAKER REAR L blue and R gray terminals Center speaker SPEAKER CENTER green terminal Sub woofer SPEAKER WOOFER purple terminal ...

Page 11: ... the TV you may experience video leakage when watching the video signal from this unit Do not connect a video deck between this unit and the TV 4 For models with a voltage selector set VOLTAGE SELECTOR to the position of your local power line voltage Refer to the print on your system s VOLTAGE SELECTOR for available settings 1 Connect the speakers Connecting speaker cords Main unit Speaker Note Be...

Page 12: ...s 1 the system turns on and the demonstration automatically ends If the supplied adaptor on the plug does not fit your wall outlet detach it from the plug only for models equipped with an adaptor 6 Except for Pan American and European models Set the color system according to your TV The color system is factory set to NTSC for region code 3 models and PAL for other region code models Each time you ...

Page 13: ...elease DVD 4 Unplug the AC power cord E E e e E e Speaker support Screw Slot Screw 1 Screw 2 Notes Keep the speaker cords away from the antennas to prevent noise Do not place the rear speakers on top of a TV This may cause color distortion in the TV screen Be sure to connect both left and right rear speakers Otherwise the sound will not be heard To prevent the speakers from falling When you place ...

Page 14: ...t rear speakers distance Rear speaker distance can be set in 0 1 m 1 feet steps from a distance equal to the front speaker distance to a distance 4 5 m 15 feet closer to your listening position Note If each of the front or rear speakers are not placed an equal distance from your listening position set the distance of the closest speaker Setting up your speakers Positioning the speakers For the bes...

Page 15: ... MENU Adjustable menus and parameters are described below 2 Press V or v repeatedly until LEVEL MENU appears 3 Press ENTER 4 Press V or v repeatedly to select the parameter 5 Press B or b repeatedly to select the setting you want 6 Repeat steps 4 to 5 to set other parameters 7 Press ENTER Tips You can use the digipad instead of the cursor buttons V v B b You can use SPEAKER SETUP in the Setup Disp...

Page 16: ...eters so that the volume level of the test tone from each speaker sounds the same using the remote from your listening position Select OFF to turn off the test tone Notes When 2 1CH MULTI is set to 2 1CH page 53 you cannot set rear speaker balance center level rear level Dynamic range compression is possible with Dolby Digital sources only Setting the clock 1 Turn on the system 2 Press CLOCK TIMER...

Page 17: ... ALL DISCS Normal Play 1 DISC Normal Play ALBUM Normal Play ALL DISCS SHUF Shuffle Play 1 DISC SHUF Shuffle Play ALBUM SHUF Shuffle Play PGM Program Play 2 Press DISC SELECT repeatedly to select the disc you want to play 3 Press hH If you press hH when DVD is selected as the function press DVD and the disc tray is closed playback starts Notes You cannot change the play mode during playback You can...

Page 18: ...hange the playback speed 3 Slow motion play Do this Press REPEAT FM MODE on the remote during playback until REP or REP1 appears The repeat range changes according to the play mode ALL For all the tracks or titles on all discs up to 5 times 1 DISC For all the tracks or titles on a single disc ALBUM For all the tracks on a single album MP3 only REP 1 For a single title chapter or track You cannot u...

Page 19: ...tandard technology and format for compressing a sound sequence The track is compressed to about 1 10 of its original size Sounds outside the range of human hearing are compressed while the sounds we can hear are not compressed Notes on discs You can play MP3 audio tracks recorded on CD ROMs CD Rs recordable CDs or CD RWs rewritable CDs The disc must be in the ISO 9660 level 1 level 2 or Joliet for...

Page 20: ...e list using V v 5 Press V or v repeatedly to select a track then press ENTER During playback or pause press to go forward or to go back 1 Press DVD or FUNCTION on the remote repeatedly until DVD appears in the display 2 When playback is stopped press PLAY MODE DIRECTION on the remote repeatedly until the mode you want appears in the display Select ALL DISCS Normal Play 1 DISC Normal Play ALBUM No...

Page 21: ...m number in a disc 99 The maximum number of MP3 audio tracks that can be contained on a album is 250 Tracks and albums are played in the order they are recorded on the disc Only the letters in the alphabet and numbers can be used for album or track names Anything else is displayed as a space ID3 tags cannot be displayed in stop mode The player cannot play audio tracks in MP3PRO format To Play repe...

Page 22: ...ack you want to program x When programming a VIDEO CD or CD For example select track 6 Press V v or the numeric buttons to select 6 then press ENTER x When programming MP3 For example select track 3 of album 2 Press V v to select 2 then press b Next press V v or the numeric buttons to select 3 then press ENTER 6 To program other tracks repeat steps 3 to 5 The programmed tracks are displayed in the...

Page 23: ...sc the system may not resume playback from exactly the same point Resume play is canceled when you open the disc tray you change the play mode To Return to normal play Turn off the program menu Clear the last programmed track Tips You can do Repeat Play of the programmed tracks Press REPEAT FM MODE or set REPEAT to on in the Control Menu display during Program Play The program you made remains in ...

Page 24: ...ll the titles TITLE repeats the current title CHAPTER repeats the current chapter x When playing a VIDEO CD CD Super Audio CD MP3 and when Program Play is set to OFF OFF does not play repeatedly ALL repeats all the tracks TRACK repeats the current track x When Program Play is set to ON OFF does not play repeatedly ALL repeats Program Play When the play mode is set to ALBUM or ALBUM SHUF all the tr...

Page 25: ...urn to PBC playback press x twice then press hH Note Depending on the VIDEO CD Press ENTER in step 3 may appear as Press SELECT in the operating instructions supplied with the disc In this case press hH Playing DVDs using the menu Some DVDs have menus to help you enjoy the DVDs You can play DVDs using these menus Using the DVD top menu A DVD is divided into long sections of a picture or a music fe...

Page 26: ...O CD CD Using the Setup Display By using the Setup Display you can make various adjustments to items such as picture and sound You can also set a language for the subtitles and the Setup Display among other things For details on each Setup Display item see pages 27 29 For an overall list of Setup Display items see page 75 Items displayed on the OSD on screen display vary slightly depending on the ...

Page 27: ...VD MENU DVD only Select the language for the DVD menu x AUDIO DVD only Switches the language of the sound track Select the language from the displayed list x SUBTITLE DVD only Switches the language of the subtitle Select the language from the displayed list If you select OTHERS t in DVD MENU AUDIO or SUBTITLE select and enter the language code from the list using the numeric buttons page 73 After ...

Page 28: ...off the screen saver x BACKGROUND Select the background color or picture on the TV screen when the playback is stopped or while playing a CD JACKET PICTURE The jacket picture still picture appears in the background but only when the jacket picture is already recorded on the disc CD EXTRA etc If the disc does not contain a jacket picture the GRAPHICS picture appears GRAPHICS The preset picture stor...

Page 29: ...en For details see Limiting playback by children Parental Control on page 38 x TRACK SELECTION DVD only Gives the priority to the sound track which contains the highest number of channels when you play a DVD on which multiple audio formats PCM DTS or Dolby Digital format are recorded OFF No priority given AUTO Priority given Notes When you set to AUTO the language setting may change The TRACK SELE...

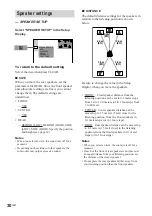
Page 30: ...alue in the Setup Display when you move the speakers FRONT Front speaker distance from the listening position can be set in 0 1 meter steps from 1 0 to 12 0 meters or in 1 foot steps from 3 to 40 feet CENTER Center speaker distance can be moved up to 1 5 meters 5 feet closer to the listening position from the front speakers in 0 1 meter steps or in 1 foot steps REAR Rear speaker distance can be mo...

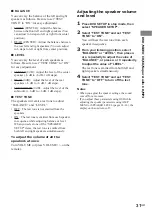
Page 31: ...emitted from the speakers ON The test tone is emitted from each speaker in sequence while adjusting balance or level When you select one of the SPEAKER SETUP items the test tone is emitted from both left and right speakers simultaneously To adjust the volume of all the speakers at once Turn VOLUME or press VOLUME on the remote Adjusting the speaker volume and level 1 Press DVD SETUP in stop mode t...

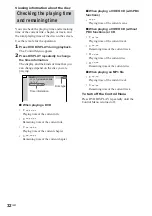
Page 32: ...ng a DVD T Playing time of the current title T Remaining time of the current title C Playing time of the current chapter C Remaining time of the current chapter x When playing a VIDEO CD with PBC functions Playing time of the current scene x When playing a VIDEO CD without PBC functions or CD T Playing time of the current track T Remaining time of the current track D Playing time of the current di...

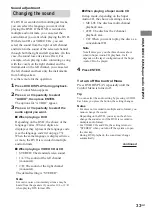
Page 33: ... more the DVD is recorded in multiple audio formats x When playing a VIDEO CD or CD STEREO The standard stereo sound 1 L The sound of the left channel monaural 2 R The sound of the right channel monaural The default setting is STEREO Note Excessive noise or momentary silence may be heard from the speakers if you select 1 L or 2 R when playing DTS format CDs x When playing a Super Audio CD In stop ...

Page 34: ...annels in the playing track are displayed numerically as follows For Dolby Digital 5 1 ch Changing the sound continued Current audio format Rear component 2 Front component 2 Center component 1 LFE Low Frequency Effect component 1 DOLBY DIGITAL 3 2 1 1 DVD 1 2 2 7 MAKING SCENE 1 8 3 4 T 1 3 2 5 5 DOLBY DIGITAL 3 2 1 PROGRAM FORMAT DVD 1 ENGLISH DTS 3 2 1 PROGRAM FORMAT PCM 48kHz 24bit PROGRAM FORM...

Page 35: ...otal number of titles chapters tracks or indexes 4 Press V or v repeatedly or press the numeric buttons to select the title chapter track or index number you want to search If you make a mistake Press CLEAR to cancel the number then select another number 5 Press ENTER The playback starts from the selected number To search for a scene using the time code TIME SEARCH 1 In step 2 select TIME T playin...

Page 36: ...ay not be able to change the angles even if multi angles are recorded on the DVD Displaying the subtitles DVD only With DVDs on which multilingual subtitles are recorded you can change the subtitle language while playing a DVD or turn the subtitles on or off whenever you want For example you can select the language you want to master and turn the subtitles on for better understanding Use the remot...

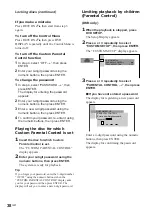
Page 37: ... is stopped press DVD DISPLAY The Control Menu appears 3 Press V or v repeatedly to select CUSTOM PARENTAL CONTROL then press ENTER CUSTOM PARENTAL CONTROL is selected 4 Press V or v repeatedly to select ON t then press ENTER x If you have not entered a password The display for registering a new password appears Enter a 4 digit password using the numeric buttons then press ENTER The display for co...

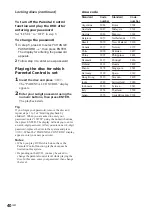
Page 38: ...ntrol is set The CUSTOM PARENTAL CONTROL display appears 2 Enter your 4 digit password using the numeric buttons then press ENTER The system is ready for playback Tip If you forgot your password enter the 6 digit number 199703 using the numeric buttons when the CUSTOM PARENTAL CONTROL display asks you for your password then press ENTER The display will ask you to enter a new 4 digit password Limit...

Page 39: ... on page 40 using the numeric buttons 7 Press ENTER The options for LEVEL appears 8 Press V or v repeatedly to select the level you want then press ENTER The Parental Control setting is completed The lower the value the more strict the limitation If you make a mistake Press RETURN O to go back to the previous screen To turn off the Control Menu Press DVD DISPLAY repeatedly until the Control Menu i...

Page 40: ...pears 2 Follow step 3 to enter a new password Playing the disc for which Parental Control is set 1 Insert the disc and press hH The PARENTAL CONTROL display appears 2 Enter your 4 digit password using the numeric buttons then press ENTER The playback starts Tip If you forgot your password remove the disc and repeat steps 1 to 3 of Limiting playback by children When you are asked to enter your pass...

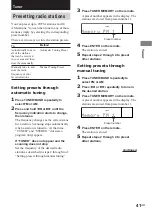
Page 41: ...tune in any of those stations simply by selecting the corresponding preset number There are two ways to store the station presets To Automatically tune in all of the stations that can be received in your area and then store them manually Manually tune in and store the radio frequency of your favorite stations Setting presets through automatic tuning 1 Press TUNER BAND repeatedly to select FM or AM...

Page 42: ... and hold m or M in step 2 above The frequency indication changes and scanning stops when the system tunes in a station Automatic Tuning Other Operations To Tune in a station with a weak signal To set another station to an existing preset number To change the AM tuning interval Except for the European and Middle Eastern models The AM tuning interval is factory preset to 9 kHz or 10 kHz for some ar...

Page 43: ...on from the FM band When you tune in a station that provides RDS services the station name appears in the display To check the RDS information Each time you press DISPLAY on the remote the display changes cyclically as follows Station name t Frequency t Program type t Clock display t Effect status If the RDS broadcast is not properly received the station name may not appear in the display The type...

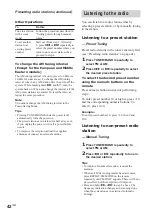
Page 44: ...ss X Press again to resume playback Press M while playing the front side or press m while playing the reverse side Press m while playing the front side or press M while playing the reverse side Loading a tape 1 Press Z A or Z B 2 Insert a tape in deck A or B Note When the cassette deck is open the disc tray does not slide out Playing a tape You can use TYPE I normal tapes 1 Load a tape 2 Press TAP...

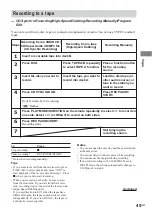
Page 45: ...om a disc tape or connected components or radio You can use TYPE I normal tapes To Press Stop recording x Pause recording REC PAUSE START Only when recording manually Tips If you want to record from the reverse side press TAPE A B to select deck B and press hH to start playback of the reverse side after step 1 Press x where you want to start recording When you record on both sides be sure to start...

Page 46: ...ss V or v repeatedly to select the disc The cursor or moves to the disc in this case DISC1 CD 4 Press b The cursor moves to the album or track in this case ALL TRACKS 5 Select the album or track you want to program x When programming a VIDEO CD or CD For example select track 6 Press V v or the numeric buttons to select 6 then press ENTER x When programming MP3 For example select track 3 of album 2...

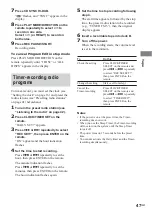
Page 47: ...e remote The minute indication flashes Press or repeatedly to set the minutes then press ENTER on the remote The hour indication flashes again 5 Set the time to stop recording following step 4 The start time appears followed by the stop time the preset radio station to be recorded e g TUNER FM 5 then the original display appears 6 Insert a recordable tape into deck B 7 Turn off the power When the ...

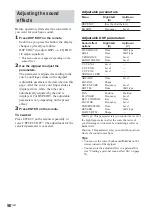
Page 48: ...EFFECT OFF All the parameters become flat Sound effect options You can enjoy surround sound simply by selecting one of the sound effect according to the program you want to listen to DSP Options MODE MUSIC LIVE HOUSE MODE HALL S ENHANCE SOUND ENHANCE RADIO SOUND MOVIE C STUDIO EX A MODE CINEMA STUDIO EX A D C S C STUDIO EX B CINEMA STUDIO EX B D C S C STUDIO EX C CINEMA STUDIO EX C D C S NORMAL SU...

Page 49: ...seems to come from inside the image reflected on the movie screen This element creates the same sensation in your listening room by shifting the sound of the front speakers into the screen Cinema Studio Reverberation Reproduces the reverberations peculiar to a movie theater Cinema Studio EX is the integrated mode which operates these elements simultaneously Note The effects provided by the virtual...

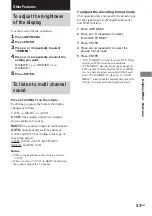
Page 50: ...cted parameter is canceled Adjustable parameters Menu Right Left Up Down X Y DSP EDIT See the chart below EQ EDIT Frequency Level Adjustable DSP parameters Sound effect Right Left Up Down options X Y LIVE HOUSE Time Wall type HALL Time Wall type S ENHANCE Time Level RADIO SOUND Time Level C ST EX A Level C ST EX B Level C ST EX C Level NORMAL SURR ARCADE Time Level RACING Shape ADVENTURE Frequency...

Page 51: ...ILE on the remote The personal file number appears in the display 3 Slide your finger on the digipad to select the file number where you want to store the effect 4 Press ENTER on the remote To call up a personal file Press P FILE on the remote repeatedly to select the file Tip You can use the cursor buttons V v B b on the remote instead of the digipad Note When using personal files the adjustable ...

Page 52: ...in the display Press DISPLAY during playback Each time you press the button the display changes cyclically as follows x When playing a DVD Current title number and the playing time t Current title number and the remaining time t Current chapter number and the playing time t Current chapter number and the remaining time t Title text t Clock display for 8 seconds t Effect status x When playing a VID...

Page 53: ...dts CD SACD MP3 MULTI for DVD VCD Notes When using headphones this setting is fixed to 2 1CH When you select AUTO in DIGITAL function the sound is output in 2 1 channel Other Features Display Other Features To adjust the decoding format mode This operation lets you specify the decode type for the signal input to the digital audio jacks and DVD function 1 Press AMP MENU 2 Press V or v repeatedly to...

Page 54: ...ss TAPE A B repeatedly until TAPE A is selected 3 Press REC PAUSE START Deck B stands by for recording 4 Press PLAY MODE DIRECTION on the remote repeatedly to select g to record on one side Select j or RELAY to record on both sides 5 Press REC PAUSE START Recording starts 6 Press hH to start playing the source to be recorded Start singing along the music To stop recording Press x Singing along Kar...

Page 55: ... channel signals in order to output the center and rear channel signals DIGITAL indicator in the display Lights up when the unit is decoding signals recorded in the Dolby Digital format dts indicator in the display Light up when DTS signals are input Falling asleep to music Sleep Timer You can set the system to turn off at a preset time so you can fall asleep to music Press SLEEP on the remote Eac...

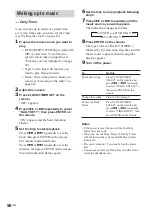
Page 56: ...NTER on the remote Start over from step 1 Press CLOCK TIMER SELECT on the remote and press or repeatedly to select TIMER OFF then press ENTER on the remote Waking up to music Daily Timer You can wake up to music at a preset time every day Make sure you have set the clock see Setting the clock on page 16 1 Prepare the music source you want to play DVD VIDEO CD CD Super Audio CD MP3 Load a disc To s...

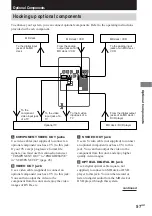
Page 57: ...y the video images of DVDs etc MD deck VCR From the analog output jacks of an MD deck VCR To the analog input jacks of an MD deck VCR C S VIDEO OUT jack Use an S video cable not supplied to connect an optional component such as a TV to this jack You can then output the video to the component from this unit and enjoy higher quality video images D OPTICAL DIGITAL IN jack Use a digital optical cable ...

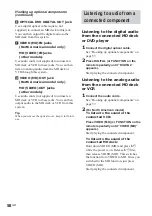
Page 58: ...the power is on Release 1 first then release VIDEO MD This switches the function from VIDEO to MD Once you switched to the MD function just press VIDEO MD Start playing the connected component E OPTICAL DVD DIGITAL OUT jack Use a digital optical cable square not supplied to connect an MD deck to this jack You can then output the digital audio to the MD deck from this system F VIDEO MD IN jacks Nor...

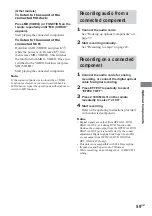
Page 59: ... Connect the audio cords See Hooking up optional components on page 57 2 Start recording manually See Recording to a tape on page 45 Recording on a connected component 1 Connect the audio cords for analog recording or connect the digital optical cable for digital recording 2 Press EFFECT repeatedly to select EFFECT OFF 3 Press 2 1CH MULTI on the remote repeatedly to select 2 1CH 4 Start recording ...

Page 60: ...PEAKER jack Inserting the vinyl portion of the speaker cord will obstruct the speaker connections The protective device on the amplifier has been activated because of a short circuit PROTECT and PUSH POWER flash alternately Turn off the power eliminate the short circuit problem and turn on the power again There is no audio output during Timer recording There is severe hum or noise A TV or VCR is p...

Page 61: ... CD CD Super Audio CD MP3 Player The disc tray does not open and LOCKED appears on the front panel display Contact your Sony dealer or local authorized Sony service facility The disc tray does not close Place the disc correctly in the center of the tray Always close the tray by pressing Z Trying to press the tray closed with your fingers may cause problems with the player The disc does not eject Y...

Page 62: ...ayback stops at the auto pause signal Refer to the operating instructions supplied with the disc You cannot perform some functions such as Stop Scan Slow motion Play Repeat Play Shuffle Play or Program Play Depending on the disc you may not be able to do some of the operations described above Refer to the operating instructions supplied with the disc Messages do not appear on the screen in the lan...

Page 63: ...curely The video cable is damaged Replace it with a new one Make sure you connect the system to the video input jack of your TV page 11 Make sure you turn on the TV Make sure you select the video input on the TV so that you can view the pictures from the system The picture noise appears Clean the disc If video from this system has to go through your VCR to get to your TV the copy protection applie...

Page 64: ...nd press ENTER select YES then press ENTER to reset the settings it takes a few seconds to complete Do not press 1 when resetting the system Self diagnosis function When letters numbers appear in the display When the self diagnosis function is activated to prevent the system from malfunctioning a five character service number e g C 13 00 with a combination of a letter and digits appears on the scr...

Page 65: ...e B Side A Break off the cassette tab of side A Tab of side A Additional Information Precautions On operating voltage Before operating the unit check that the operating voltage of your unit is identical with the voltage of your local power supply On safety The unit is not disconnected from the AC power source mains as long as it is connected to the wall outlet even if the unit itself has been turn...

Page 66: ...magnetizing cassette For details refer to the instructions of the demagnetizing cassette In case color irregularity is observed on nearby a TV screen With the magnetically shielded type of speaker system the speakers can be installed near a TV set However color irregularity may still be observed on the TV screen depending on the type of your TV set If color irregularity is observed Turn off the TV...

Page 67: ...watts 8 ohms at 1 kHz 10 THD Center speaker 60 watts 16 ohms at 1 kHz 10 THD Rear speaker 60 60 watts 8 ohms at 1 kHz 10 THD Sub woofer 120 watts 8 ohms at 100 Hz 10 THD Total harmonic distortion less than 0 07 8 ohms at 1 kHz 35 watts European model DHC FL7D DIN power output at stereo mode rated 45 45 watts 8 ohms at 1 kHz DIN Continuous RMS power output reference Front speaker 60 60 watts 8 ohms...

Page 68: ... model only or MD VIDEO OUT other models phono jacks voltage 250 mV impedance 1 kilohms VIDEO OUT 1 Vp p 75 ohms S VIDEO OUT Y 1 Vp p 75 ohms C 0 286Vp p 75 ohms COMPONENT OUT Y 1 Vp p 75 ohm PB 0 7 Vp p 75 ohms PR 0 7 Vp p 75 ohms PHONES accepts headphones of stereo mini jack 8 ohms or more FRONT L R Use only the supplied speaker SS FL7 REAR L R Use only the supplied speaker SS RS7 CENTER Use onl...

Page 69: ...e 16 ohms Dimensions w h d Approx 100 250 145 mm Mass Approx 1 2 kg net Sub woofer SS WG7 Speaker system Passive sub woofer magnetically shielded Speaker units Woofer 18 cm cone type Nominal impedance 8 ohms Dimensions w h d Approx 245 410 420 mm Mass Approx 9 5 kg net General Power requirements North American model 120 V AC 60 Hz European model 230 V AC 50 60 Hz Saudi Arabian model 120 127 V 220 ...

Page 70: ...o be allocated according to the status of the picture The audio data is recorded in Dolby Digital as well as in PCM allowing you to enjoy more real audio presence Furthermore various advanced functions such as the multi angle multilingual and Parental Control functions are provided with the DVD Glossary Album Section of a music piece on a data CD containing MP3 audio tracks Bit Rate Value indicati...

Page 71: ...ngle frame This means that while the Interlace format can show 30 frames 60 fields in one second the Progressive format can show 60 frames in one second The overall picture quality increases and still images text and horizontal lines appear sharper This player is compatible with the 480 progressive format Region Code This system is used to protect copyrights A region number is allocated on each DV...

Page 72: ...ving pictures VIDEO CDs also contain compact audio data Sounds outside the range of human hearing are compressed while the sounds we can hear are not compressed VIDEO CDs can hold 6 times the audio information of conventional audio CDs There are 2 versions of VIDEO CDs Version 1 1 You can play only moving pictures and sounds Version 2 0 You can play high resolution still pictures and enjoy PBC fun...

Page 73: ...Bangla 1253 Icelandic 1408 Oriya 1535 Tonga 1067 Tibetan 1254 Italian 1417 Punjabi 1538 Turkish 1070 Breton 1257 Hebrew 1428 Polish 1539 Tsonga 1079 Catalan 1261 Japanese 1435 Pashto Pushto 1540 Tatar 1093 Corsican 1269 Yiddish 1436 Portuguese 1543 Twi 1097 Czech 1283 Javanese 1463 Quechua 1557 Ukrainian 1103 Welsh 1287 Georgian 1481 Rhaeto Romance 1564 Urdu 1105 Danish 1297 Kazakh 1482 Kirundi 15...

Page 74: ...MP3 to be played Selects the track to be played Selects the index to be played Checks the elapsed time and the remaining playback time Input the time code for picture and music searching Changes the audio setting Displays the subtitles Changes the subtitle language Changes the angle Selects the play mode Plays the entire disc all titles all tracks repeatedly or one title chapter track repeatedly S...

Page 75: ...UTO SYSTEM PAL NTSC PARENTAL LEVEL OFF CONTROL 8 7 NC17 6 R 5 4 PG13 3 PG 2 1 G STANDARD USA OTHERSt CHANGE PASSWORD TRACK OFF SELECTION AUTO LANGUAGE SETUP OSD Select the language you want to use from the displayed language list DVD MENU Select the language you want to use from the displayed language list AUDIO Select the language you want to use from the displayed language list SUBTITLE Select t...

Page 76: ...76GB Sony Corporation Printed in Malaysia ...

Reviews: