background image

Using the Magnetic Charging Dock

Selecting an attachment for your phone

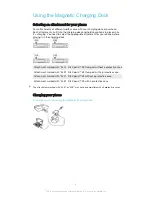
Four attachments of different widths come with your charging dock at purchase.

Each attachment can fit into the charging dock and hold your phone in place while

it’s charging. You need to select the appropriate attachment for your phone before

placing it in the charging dock.

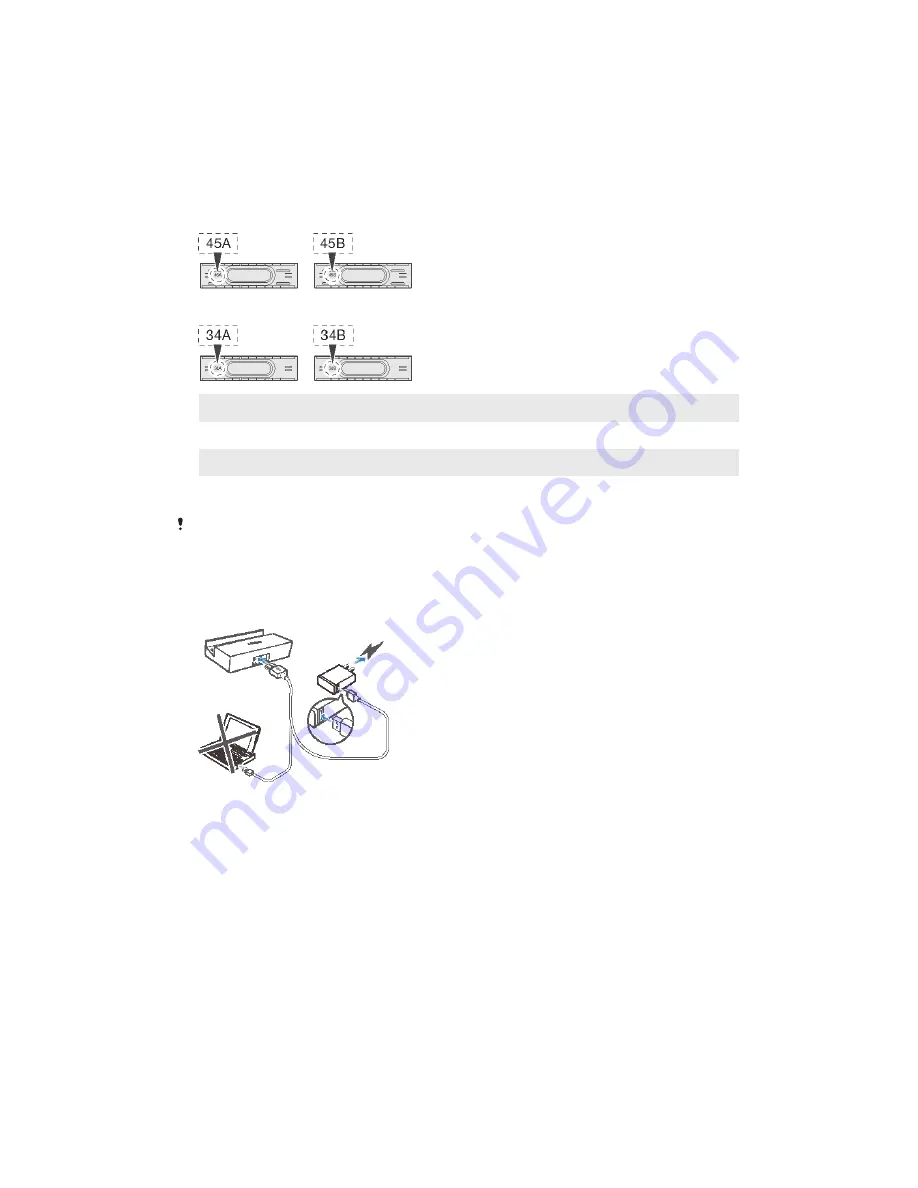
Attachment marked with “34A” Fits Xperia™ Z3 Compact without a protective case

Attachment marked with “34B” Fits Xperia™ Z3 Compact with a protective case

Attachment marked with “45A” Fits Xperia™ Z3 without a protective case

Attachment marked with “45B” Fits Xperia™ Z3 with a protective case

The attachment marked with “34B” or “45B” may not be compatible with all protective cases.

Charging your phone

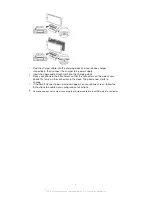
To charge your phone using the Magnetic Charging Dock

4

This is an Internet version of this publication. © Print only for private use.

Summary of Contents for DK48

Page 1: ...User guide Magnetic Charging Dock DK48 ...

Page 2: ...harging Dock 3 Using the Magnetic Charging Dock 4 Selecting an attachment for your phone 4 Charging your phone 4 Legal information 6 Declaration of Conformity for DK48 6 2 This is an Internet version of this publication Print only for private use ...

Page 3: ...ed for Xperia Z3 and Xperia Z3 Compact The charging dock positions your phone at a comfortable viewing angle so that you can easily browse content while your phone is charging 1 Charging dock 2 Attachments for holding your phone in place 3 This is an Internet version of this publication Print only for private use ...

Page 4: ... charging dock Attachment marked with 34A Fits Xperia Z3 Compact without a protective case Attachment marked with 34B Fits Xperia Z3 Compact with a protective case Attachment marked with 45A Fits Xperia Z3 without a protective case Attachment marked with 45B Fits Xperia Z3 with a protective case The attachment marked with 34B or 45B may not be compatible with all protective cases Charging your pho...

Page 5: ...nt so that the connectors on the side of your phone fits firmly on the connectors in the dock The phone now starts to charge 4 If the Smart Connect pop up window appears on your phone screen follow the instructions to enable a pre configured set of actions Your phone does not charge if you plug the charger cable into the USB port of a computer 5 This is an Internet version of this publication Prin...

Page 6: ...onditions 1 This device may not cause harmful interference and 2 This device must accept any interference received including interference that may cause undesired operation Any change or modification not expressly approved by Sony may void the user s authority to operate the equipment This equipment has been tested and found to comply with the limits for a Class B digital device pursuant to Part 1...

Page 7: ...ploitation est autorisée aux deux conditions suivantes 1 l appareil ne doit pas produire de brouillage et and 2 l utilisateur de l appareil doit accepter tout brouillage radioélectrique subi même si le brouillage est susceptible d en compromettre le fonctionnement 7 This is an Internet version of this publication Print only for private use ...

Reviews: