


4-174-749-
11
(2)
Digital Photo
Frame
DPF-A73/E73
© 2010 Sony Corporation
For your safety
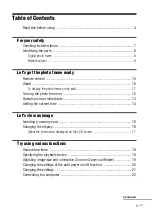
Let’s get the photo
frame ready
Let’s view an image
Try using various functions
Troubleshooting
Additional information
D:\DPF series\2010models\DPF-A73.E73
series\IM\4174749112DPFA73.E72IM_GB\4174749112\4174749112DPFA73.E72IM_GB\01GB-
DPFA73.E73.UC.CED_IM\010COV.fm
Master:
Right
DPF-A73/E73 4-174-749-
11
(2)
Operating Instructions
Before operating this unit, please read this manual thoroughly and
retain it for future reference.
Owner’s Record
The model and serial numbers are located at the rear.
Record the serial number in the space provided below. Refer to
these numbers whenever you call upon your Sony dealer
regarding this product.
Model No. DPF-A73/E73
Serial No. ________________________
010COV.fm Page 1 Sunday, December 27, 2009 7:00 PM


