background image

Chapter 4

Editing

70

Chapter 4

Editing

Notes on video output to the monitor

In E-E mode, the video output of the unit is delayed by the time for video
circuit processing with respect to the input video signal (8H).
Unlike the playback operations described in Chapter 3, for playback to be
carried out in edit mode with both the player and recorder specified, you
can use extended menu item 701 to delay the V-SYNC phase by 8H.

Button/Switch Settings for Editing

Before beginning editing, set buttons and switches on the recorder and
player as follows.

For details of the settings of each of the buttons/switches, see the pages indicated
in parenthesis.

Recorder settings

MONITOR SELECT buttons 

(page 17): select the audio channels to be monitored.

POWER switch: I side

REC controls 

(page 16):

adjust the audio recording
levels.

Input selection section 

(page 14): select the input video and

audio signals.

REMOTE button 

(page 15):

unlit 9PIN (when using
REMOTE-IN/-OUT) or i.LINK
(when using i.LINK) button: lit

COUNTER SEL button 

(page

18): select the data to be
displayed (counter value or
time code value)

REC INHIBIT switch 

(page 26): OFF

TC SELECT switch 

(page 26): TC or VITC, when displaying time code

INT/EXT–PRESET/REGEN switch 

(page 26): select the time code to be recorded.

Automatic Editing

Summary of Contents for DSR-2000

Page 1: ...igital Videocassette Recorder 3 867 754 11 1 DSR 2000 2000P Operating Instructions Before operating the unit please read this manual thoroughly and retain it for future reference 1999 by Sony Corporation ...

Page 2: ...rding of such material may be contrary to the provisions of the copyright laws For the customers in Europe DSR 2000P only This product with the CE marking complies with both the EMC Directive 89 336 EEC and the Low Voltage Directive 73 23 EEC issued by the Commission of the European Community Compliance with these directives implies conformity to the following European standards EN60065 Product Sa...

Page 3: ...a and Unit s Operating Status Superimposing Text Information 35 Setting Time Code and User Bits 39 Synchronizing the Internal Time Code Generator With an External Signal External Lock 42 Chapter3 Recording and Playback Recording 45 Preparations for Recording 45 Recording Time Code and User Bit Values 47 Recording Operation 48 Playback 49 Preparations for Playback 49 Playback Operation 50 Dynamic M...

Page 4: ...it Points 72 Checking Edit Points 75 Modifying Edit Points 76 Cuing Up to Edit Points 78 Checking Edit Results Preview 80 Executing Automatic Editing 81 DMC Editing 84 Overview of DMC Editing 84 Carrying Out DMC Editing 85 Preread Editing 87 Special Editing Methods 89 Quick Editing 90 Continuous Editing 91 Standalone Editing 93 Manual Editing 94 Adding a Narration Sound on Sound 95 ...

Page 5: ...ng ClipLink Log Data 100 Changing the Reel Number 100 Changing Mark IN OUT Points 100 Changing the OK NG Status 101 Adding to Deleting From ClipLink Log Data 103 Adding Mark IN OUT Points 103 Deleting Mark IN OUT Points 103 Automatically Creating New ClipLink Log Data 105 Chapter6 Setup Menu Menu System Configuration 107 Basic Menu 107 Items in the Basic Menu 107 Basic Menu Operations 110 Extended...

Page 6: ...ime Code Settings on This Unit 130 Settings on Editing Control Units 130 Connections for Component Analog Recording 131 Connections for Two Unit Synchronous Playback 132 Connections for Digitally Dubbing Signals in DVCAM Format Optional DSBK 190 Required When Using i LINK Interface 133 Chapter8 Maintenance and Troubleshooting Condensation 135 Head Cleaning 135 Periodic Maintenance 136 Troubleshoot...

Page 7: ...or DSR 2000P High image quality and high stability The luminance and chrominance signals are encoded separately with a 1 5 compression giving a stable high quality video image Since this is a digital system nth generation copies created by repeated dubbing show virtually no loss in picture quality Wide track The recording track width is 15 µm 50 wider than the 10 µm of the DV format This ensures a...

Page 8: ...ovided Analog audio There are four input channels and four output channels There is also support for microphone input Connection to external control devices It is possible to connect a PVE 500 RM 450 450CE FXE 100 100P 120 120P BVE 900 910 2000 9000 9000P 9100 9100P or other editor equipped with an RS 422A interface or a UVR 60 60P remote controller for the built in digital video processor and so ...

Page 9: ...timecode LTC to or from an external device is also possible using the TIME CODE IN OUT connectors The unit is also compatible with VITC High speed search function You can carry out a picture search while playing back in color within the range 60 to 60 times normal speed1 When controlling the unit in shuttle mode from an editor or remote control unit you can search at any speed in the range 60 to 6...

Page 10: ... rotation time the tape transport time and the number of tape threadings and unthreadings and displays them in the control panal display section Compatible with wide screen aspect ratio 16 9 The unit can record and play back aspect ratio information When video accompanied by wide screen aspect ratio information is recorded or played back the unit can output the video signal also containing the asp...

Page 11: ... VIDEO IN OUT ANALOG VIDEO I O S VIDEO IN OUT SDTI QSDI INPUT OUTPUT SDTI QSDI INPUT OUTPUT DVCAM camcorder DVCAM cassette DV camcorder DV cassette DSR 500WS 500WSP SVO 5800 5800P Microphone Headphones DSR 2000 2000P this unit DNW A75 A75P DSR 60 60P 80 80P 85 85P Digital VCR ES 7 ES 3 Edit Station Analog Betacam VCR Video monitor Audio monitor system DV camcorder a The DSBK 190 is an optional boa...

Page 12: ...le Lock knob Release lever Raise the panel by holding both ends or both handles When the panel is at the desired angle turn both lock knobs to fix in position If you raise the panel to the horizontal it automatically locks in position To lower the panel press both release levers To fix the panel at an angle where the lock knobs are inaccessible 1 First position the panel at the desired angle then ...

Page 13: ...upper and lower control panels light To power the unit off press the side of the switch 2 Audio level meters These show the audio levels of channels 1 to 4 recording levels in recording mode or E E mode1 and playback level in playback mode There are two modes for audio level indications FULL and FINE selected by the METER FULL FINE button on the lower control panel 1 E E mode Abbreviation of Elect...

Page 14: ...ng mode 2CH or 4CH selected with extended menu item 817 2 Input selection section 1 SDTI i LINK SDTI QSDI interface i LINK selection button Each press of this button cycles through the following input signal selection options Digital video signal in SDTI QSDI format input to the SDTI QSDI INPUT connector When this is selected use the CH1 1 2 button and CH2 3 4 button to select the required input a...

Page 15: ...audio signal selection options corresponding to those for the CH1 1 2 button described above are available In the input selection audio mode display section the AUDIO CH2 CH3 4 display shows the selection made with this button 5 MIXING mixing setting on off button This enables ON or disables OFF the setting for audio input mixing made with extended menu item 819 If the selected signal except for a...

Page 16: ...This switches the display mode of the audio level meters in the upper control panel as follows FULL In this mode the segment of the display corresponding to the current audio level and all lower segments light A marker indicating the reference level set with extended menu item 811 also appears FINE The display is enlarged with a step of 0 25 dB with respect to the reference level of 0 dB In this m...

Page 17: ...ing The PHONE LEVEL control knob adjusts the volume 6 PLAYER button and RECORDER button When you carry out editing using a VCR connected to the REMOTE IN or REMOTE OUT connector as the player and this unit as the recorder these buttons select which VCR the editing control buttons and tape transport buttons on this unit control PLAYER The editing control buttons and tape transport buttons on this u...

Page 18: ...er bit value in the time counter display that is to hold the display press this button turning it on To set a time code or user bit value first press this button to hold the value 8 COUNTER SEL select button This switches the value shown in the time counter display in the following sequence COUNTER TC U BIT Time counter display selection a The selection of TC or VITC is made by the TC SELECT switc...

Page 19: ...ng INHIBIT indicator This indicator is on or off according to the combination of the setting of the REC INHIBIT switch on the subsidiary control panel and the REC SAVE switch on the loaded cassette as shown in the following table When this indicator is on recording on tape is prohibited REC INHIBIT indicator indications a It is possible to make a setting extended menu item 107 so that in this case...

Page 20: ...lit the recordings contained in the tape can be used as source material for editing but editing operations such as insert editing and assemble editing cannot be performed This indicator also lights when the audio recording mode selected on this unit does not coincides with that of the loaded tape 3 Edit mode setting section 1 INSERT buttons Use these buttons to select the signals for insert editin...

Page 21: ... If the IN point is not set the preview is carried out with the point where you pressed this button as the IN point During the preview the button is lit and when the preview ends it flashes 5 AUTO automatic EDIT button After setting edit points to carry out automatic editing recording press this button turning it on If the IN point is not set the automatic editing is carried out with the point whe...

Page 22: ...rning it on In standby mode the drum is rotating and the tape is in contact with the drum As a result recording or playback can start immediately To end standby mode press the STANDBY button turning it off If eight minutes value can be varied using extended menu item 501 elapse in standby mode the unit automatically switches out of standby mode to protect the tape 2 PREROLL button Press this butto...

Page 23: ...al For details of capstan override mode see 3 Search dial on this page 9 F FWD fast forward button To fast forward the tape press this button turning it on 6 Search control section 1 SEARCH button To use the search dial for playback in shuttle or jog mode press this button turning it on Pressing the dial toggles between shuttle and jog modes In shuttle mode the SHUTTLE indicator in the display sec...

Page 24: ... that the JOG indicator in the display section lights then turn the search dial Playback is carried out at a speed determined by the speed of rotation of the search dial The playback speed range is 1 times normal speed The search dial has no detents Variable speed Press the VARIABLE button turning it on then turn the search dial You can control the playback speed finely 61 steps in the range of 1 ...

Page 25: ...ECT switch VIDEO knob and PRESET MANUAL switch CHROMA knob and PRESET MANUAL switch SET UP DSR 2000 BLACK LEVEL DSR 2000P knob and PRESET MANUAL switch Y C DELAY knob and PRESET MANUAL switch CHROMA PHASE HUE DSR 2000 CHROMA PHASE DSR 2000P knob and PRESET MANUAL switch SYNC knob SC knob 1 CHARACTER switch Select whether or not to superimpose text information such as time code menu settings and al...

Page 26: ...CT switch is set to TC The external time code input to the TIME CODE IN connector When the TC SELECT switch is set to VITC The VITC time code included in the input video signal In this case for the internal time code generator REGEN is always selected see the next table Selection relating to the internal time code generator 7 FREE RUN REC RUN switch This switch selects the time code run mode of th...

Page 27: ... A unit for representing a video level laid down by the IRE Institute of Radio Engineers The IRE is now the IEEE Institute of Electrical and Electronic Engineers Y C DELAY knob and PRESET MANUAL switch The switch makes the selection described below When it is set to MANUAL you can use the knob to adjust the Y C delay PRESET Regardless of the position of the knob the Y C delay is set to the referen...

Page 28: ... IN VIDEO OUT COMPONENT VIDEO CH 1 2 CH 1 2 CH 3 4 CH 3 4 OFF ON 75Ω Y R Y B Y 0dBm 6dBm 4dBm 0dBm 6dBm 4dBm 0dBm 6dBm 4dBm ON 600Ω LEVEL HIGH LOW OFF ON 600Ω LEVEL HIGH LOW OFF ON 600Ω LEVEL HIGH LOW OFF ON 600Ω 1 AC IN connector 2 Ground terminal 1 Analog video input output section see page 29 2 Digital input output section see page 30 3 External device connectors see page 31 4 Analog audio inpu...

Page 29: ...in the input selection section see page 14 3 TIME CODE IN connector BNC type Input SMPTE time code DSR 2000 or EBU time code DSR 2000P externally generated to this connector 4 TIME CODE OUT connector BNC type This connector outputs a time code according to the operating state of the unit as follows During playback the playback time code During recording the time code generated by the internal time...

Page 30: ... Input digital audio signals in AES EBU format to these connectors The left hand connector CH 1 2 is for audio channels 1 and 2 and the right hand connector CH 3 4 is for audio channels 3 and 4 2 SDTI QSDI Serial Data Transport Interface QSDI INPUT connector BNC type Input digital video and audio signals in SDTI QSDI format to this connector 3 SDTI QSDI Serial Data Transport Interface QSDI OUTPUT ...

Page 31: ...EMOTE IN VIDEO CONTROL CONTROL PANEL 2 CONTROL PANEL connector 3 REMOTE IN connector 4 REMOTE OUT connector 2 CONTROL PANEL connector D sub 15 pin When using the optional DSBK 200 Control Panel to remotely control this unit connect the DSBK 200 to this connector 3 REMOTE IN connector D sub 9 pin When controlling this unit from an editing controller such as the ES 7 PVE 500 BVE 600 800 910 or RM 45...

Page 32: ...connectors XLR 3 pin female Use these connectors to connect separate channels of audio input from a player VCR or other external audio equipment 5 AUDIO OUT CH 1 channel 1 to CH 4 connectors XLR 3 pin male These connectors output channel 1 to channel 4 audio signals respectively In 2 channel audio recording mode selected with extended menu item 818 it is possible to use the AUDIO OUT CH 3 and AUDI...

Page 33: ...rd size PDVM 12ME 22ME 32ME 40ME Mini size Mini size Cassette memory This memory is used to store ClipLink log data For details of ClipLink log data see the appendix ClipLink Guide page 147 REC SAVE switch For details of this switch see Preventing accidental erasure page 34 Standard size Notes on using cassettes Before storing the cassette rewind the tape to the beginning and be sure to put the ca...

Page 34: ...rting a cassette This unit accepts three sizes of cassette L standard size M medium size DVCPRO and S mini size When inserting a cassette in the unit make sure its tape window faces upward as shown in the following figure Set to SAVE REC SAVE switch REC SAVE Ejecting a cassette Press the EJECT button Outer guides Mini size Insert the cassette into the middle of the cassette compartment Standard si...

Page 35: ...n Todisplaysuperimposedtimedataandtextinformationaboutthe operatingstatusoftheunitonthemonitor settheCHARACTERswitch onthesubsidiarycontrolpaneltoON WhentheCHARACTERswitchissettoON thetextinformationis superimposedontheoutputoftheVIDEOOUT3 SUPER connectorand alsooftheSDIOUTPUT3 SUPER connector To adjust the displayed text Youcanadjusttheposition size andtypeofsuperimposedinformation using setup me...

Page 36: ... IN point time data AO Audio OUT point time data DUR The duration between any two of the four edit points IN OUT AUDIO IN AUDIO OUT T Ra Time code data from time code reader The asterisk indicates an interpolation by the time code reader to make up for the time code data not correctly read from the tape U Ra User bit data from the time code reader The asterisk indicates that last data is retained ...

Page 37: ... depending on the status of the RECORDER PLAYER buttons No display Neither of the RECORDER and PLAYER buttons is lit P The PLAYER button is lit R The RECORDER button is lit 6 Operation mode The field is divided into three blocks A B and C Block A displays the operation mode Block B displays the servo lock status or tape speed Block C displays a p mark to indicate an edit section during automatic e...

Page 38: ...d mode servo locked EDIT Edit mode servo unlocked EDIT LOCK Edit mode servo locked JOG STILL A still picture in jog mode JOG FWD Jog mode in forward direction JOG REV Jog mode in reverse direction SHUTTLE Speed Shuttle mode VAR Speed Variable mode AUTO EDIT Automatic editing mode PREVIEW Preview mode REVIEW Review mode DMC Speed a DMC playback speed D PREV Speed a DMC editing preview mode D EDIT S...

Page 39: ...asshownbelow Button switch settings Tosetaninitialtimecodevalue usethefollowingprocedure REMOTE button CHARACTER switch FREE RUN REC RUN switch INT EXT PRESET REGEN switch Buttons switches Settings REMOTE button Off CHARACTER switch ON INT EXT PRESET REGEN switch INT PRESET FREE RUN REC RUN switch As required DF NDF switch As required RESET button 1 2 7 5 3 4 Display section FREE RUN REC RUN switc...

Page 40: ... on the right when you rotate the search dial clockwise and to the digit on the left when you rotate it counterclockwise 5 Set the value for the flashing digit by rotating the search dial while pressing the SEARCH button 6 Repeat steps 4 and 5 until you finish setting all digits 7 Press the SET button If the FREE RUN REC RUN switch is set to FREE RUN the time code starts to advance immediately To ...

Page 41: ...ucanrecordupto8hexadecimaldigitsofinformation date time eventnumber etc inthetimecodetrack Proceedasfollows 1 Watchingthetimedatatypeindicatorinthedisplaysection pressthe COUNTERSELbuttonandselectU BIT 2 Carryoutsteps 2to 7ofthesection Settinganinitialtimecode value page 39 Settings are made in hexadecimal 0 1 2 8 9 A B E F Display section 1 ...

Page 42: ...altimecodegeneratortooneofthe followingexternaltimecodes Thetimecode TC outputofanexternaltimecodegeneratororexternal VCRconnectedtotheTIMECODEINconnector Thetimecode VITC presentinavideosignalinputtotheunit Thetimecode TC inputtotheSDTI QSDI INPUTconnectoror i LINKconnector whenfittedwiththeoptionalDSBK 190 oftheunit To synchronize to an external time code signal Proceedasfollows 1 Whensynchroniz...

Page 43: ...ut mode is V SDTI SDTI or i LINK the V SDTI SDTI or i LINK indicator is lit in the input selection audio mode display section then setting the INT EXT PRESET REGEN switch to EXT REGEN automatically synchronizes the internal time code generator to the time code transferred through the SDTI QSDI INPUT connector or i LINK connector when fitted with the optional DSBK 190 Note that when the INT EXT PRE...

Page 44: ......

Page 45: ... MONITOR SELECT buttons page 17 select the audio channels to be monitored POWER switch 1 side REC controls page 16 adjust the audio recording levels Input selection section page 14 select the input video and audio signals REMOTE button page 15 unlit COUNTER SEL button page 18 select the data to be displayed counter s count time code value or user bit value PB EE button page 18 lit INT EXT PRESET R...

Page 46: ...ication is 0 dB for an average volume Carry out the adjustment in E E mode For details of selecting the E E mode see the description of the REC button in the tape transport control section page 22 and the PB EE button in the monitor menu display setting section page 17 To change the display range of the audio level meters Press the METER FULL FINE button see page 16 Setting the reference level The...

Page 47: ...g the output of the internal time code generator synchronized to an external time code generator To set an initial value then record the time code Use the procedure described in the section Setting an Initial Time Code Value page 39 then carry out the recording operation see page 48 Setting the time code value to the current time See page 40 Setting a user bit value See page 41 To synchronize the ...

Page 48: ...n the REC button and press the PLAY button Recording starts the servo locks and the SERVO indicator in the display section lights 3 To stop recording press the STOP button If you record to the end of the tape The tape is automatically rewound and stops You can change the setting of extended menu item 125 so that the tape just stops without being automatically rewound when it is recorded to the end...

Page 49: ...er bit values U BIT When you select time code the data displayed is determined by the setting TC VITC of the TC SELECT switch on the subsidiary control panel as follows MONITOR SELECT buttons page 17 select the audio channels to be monitored POWER switch 1 side PB controls page 17 adjust the audio playback levels REMOTE button page 15 unlit COUNTER SEL button page 18 select the data to be displaye...

Page 50: ...eed playback with the speed finely determined by the angular position of the search dial Playback using the capstan override function The playback speed is adjusted temporarily according to the angular position of the search dial to align the playback phase with that of another VCR Normal playback First insert a cassette For details of how to insert a cassette see the section Inserting and Ejectin...

Page 51: ...y the speed of turning the search dial The playback speed range is 1 times normal speed can be changed using extended menu item 116 To carry out playback in jog mode use the following procedure 1 Press the SEARCH button or search dial so that the JOG indicator in the display section is lit Pressing the search dial toggles between jog mode and shuttle mode 2 Turn the search dial in the desired dire...

Page 52: ...ssing the search dial toggles between jog mode and shuttle mode 2 Turn the search dial to the desired angle corresponding to the desired playback speed Playback in shuttle mode starts 3 To stop playback in shuttle mode return the search dial to the center position or press the STOP button To return to normal speed playback Press the PLAY button To alternate between normal speed playback and shuttl...

Page 53: ...ator in the display section is lit 2 If the SEARCH button is lit press the VARIABLE button turning it on 3 Turn the search dial to the desired angle corresponding to the desired playback speed Playback in variable mode starts 4 To stop playback in variable mode return the search dial to the center position or press the STOP button To return to normal speed playback Press the PLAY button To alterna...

Page 54: ...LAY button and turn the search dial in the desired direction to adjust the playback speed The range of speed adjustment is 15 in steps of 1 B Hold down the PLAY button and press the TRIM buttons to adjust the playback speed The playback speed can be adjusted to 8 only The SERVO indicator in the display section goes off 2 When the adjustment is completed release the PLAY button The tape transport r...

Page 55: ...art and end points of highlights while recording and then provide immediate DMC playba of those highlights During DMC playback the tape moves as shown in the following figure On air start point Preroll point Speed variation start point Speed variation end point On air end point Waiting for the on air cue before starting DMC playback Stop Press the REVIEW button Normal speed playback DMC playback N...

Page 56: ...onding button on 3 Press the SEARCH button or search dial so that the SHUTTLE indicator in the display section is lit 4 If you want to use the variable mode to set the varying playback speed press the VAIRABLE button turning it on 5 Holding down the DMC EDIT button turn the search dial to set the initial speed at the speed variation start point The speed you set appears in the display section Duri...

Page 57: ...pacity is a duration of 120 seconds To amend the stored speed variation Press the PREVIEW button The interval between the speed variation start and end points is automatically played back at the stored speed Operate the search dial as required to adjust the playback speed Setting the initial speed to normal speed In step 5 press the PLAY button Executing DMC Playback There are two methods of start...

Page 58: ...re The REVIEW button lights and playback starts at normal speed Between the speed variation start and end points DMC playback is carried out at the stored speed and then playback continues at normal speed and the tape stops at the on air end point Starting playback immediately after preroll Press the PREVIEW button The PREVIEW button lights and after preroll DMC playback is carried out for the sec...

Page 59: ...32 Use the following procedure In the following the controlling unit is referred to as the recorder this unit and the controlled unit as the player 1 Press the PLAYER button turning it on 2 Cue up to the player tape position where to start playback 3 Hold down the ENTRY SHIFT button and press the IN button The player IN point is set 4 Press the RECORDER button turning it on 5 Cue up to the recorde...

Page 60: ...by synchronous playback by the two units When setup menu item 004 is set to ON and 305 set to ACCUR on the recorder side the recorder and player tape transports are synchronized during the preroll allowing two unit synchronous playback with 0 frame accuracy to start at the player and recorder IN points To end synchronous playback while it is in progress Press the STOP button Playback ...

Page 61: ...t A tape recorded in DV format cannot be used as a source tape for dubbing through an SDTI QSDI or i LINK interface Regardless of the audio channel settings made in the input selection section of this unit dubbing is performed with the original audio recording mode unchanged two channel mode 48 kHz or four channel mode 32 kHz Approximately the last 2 minutes of the tape may not be copied because o...

Page 62: ... subsequent operating procedure illustrations of screens shown when performing SDTI dubbing are used You can follow the same operating procedure also when performing i LINK dubbing A V Audio and video A V TC Audio video and timecode A V TC CM Audio video timecode and cassette memroy ClipLink log data SYSTEM MENU SDTI DUBBING i LINK DUBBING SYSTEM MENU SDTI DUBBING A V A V TC A V TC CM Digitally Du...

Page 63: ...e dubbing may be started appears If the cassette memory capacity is not sufficient A message urging you to replace the recording tape by a tape with a larger cassette memory capacity appears For more information about this see the section If the cassette memory of the recording tape is not large enough page 65 To cancel the dubbing operation Press the MENU button SDTI DUBBING A V TC CM INSERT RECO...

Page 64: ...r more information about this see the section If you end dubbing while it is in progress page 65 When dubbing is completed 1 A message COMPLETED appears on the monitor 2 The source tape and recording tape are both automatically rewound to the beginning and the cassettes ejected 3 The unit returns to the state in step 3 6 To continue by dubbing another tape repeat steps 4 and 5 7 To end the dubbing...

Page 65: ...e recording tape by a tape with a larger cassette memory capacity If you end dubbing while it is in progress If you end dubbing while it is in progress with A V TC CM selected as the items for dubbing the following message appears To copy the contents of the cassette memory press the SET button If you do not wish to copy the contents of the cassette memory press the RESET button If you press the R...

Page 66: ......

Page 67: ... these two modes are also referred to simply as assemble mode and insert mode respectively Assemble edit mode In assemble editing you record video and audio materials in order from the start of the tape In addition to video and audio time code is also recorded This edit mode is convenient when you are recording on a new tape Note Before you begin assemble editing for the first time with a new tape...

Page 68: ...n use a test signal generated by the internal signal generator of the unit An example procedure follows 1 Insert an unrecorded cassette in the unit and rewind it 2 Using the VIDEO IN button in the input selection section see page 14 select the video test signal SG as the input video signal 3 Set switches on the subsidiary control panel see page 25 as follow INT EXT PRESET REGEN switch INT PRESET r...

Page 69: ...Insert the cassette on which material to be edited has been recorded in the player Select an edit mode Determine edit points Preview the editing results Modify edit points as necessary Execute automatic editing Review the editing results as necessary Button Switch Settings for Editing page 70 Usable Cassettes page 33 Selecting an Edit Mode page 71 Setting Edit Points page 72 Checking Editing Resul...

Page 70: ...player as follows For details of the settings of each of the buttons switches see the pages indicated in parenthesis Recorder settings MONITOR SELECT buttons page 17 select the audio channels to be monitored POWER switch I side REC controls page 16 adjust the audio recording levels Input selection section page 14 select the input video and audio signals REMOTE button page 15 unlit 9PIN when using ...

Page 71: ... desired INSERT buttons VIDEO CH 1 to CH 4 TIME CODE When you select an edit mode the IN and OUT buttons begin to flash indicating that the edit points require setting POWER switch I side PB controls page 17 adjust the audio playback levels REMOTE button page 15 lit 9PIN when using REMOTE IN OUT or i LINK when using i LINK button lit COUNTER SEL button page 18 select the data to be displayed count...

Page 72: ...og or shuttle mode and position the tape at the required edit point For details of playback in jog or shuttle mode see the sections Playback in jog mode page 51 and Playback in shuttle mode page 52 3 At the point at which you wish to set the IN point or OUT point hold down the ENTRY SHIFT button and press the IN button or OUT button as the case may be When the IN point or OUT point is set the IN b...

Page 73: ...o independently Set the audio edit points with the AUDIO IN OUT buttons and the video edit points with the IN OUT buttons Note that split editing is only possible when the recorder is set for insert editing 1 Press the appropriate INSERT button VIDEO CH 1 to CH 4 or TC The IN and OUT buttons flash 2 Press the RECORDER or PLAYER button to select the VCR for which edit points are to be set The butto...

Page 74: ... audio IN and OUT and recorder audio IN and OUT However as soon as you set five points the system automatically calculates and sets the remaining three points Specifically once you have set three of the four video edit points and two audio edit points the remaining three edit points are set automatically regardless of whether these points are for the recorder or player In the figure below the edit...

Page 75: ...N and OUT points on the recorder this unit then setting three video edit points split editing is possible Checking Edit Points You can check the time value for an edit point and the duration between two edit points by displaying them in the display section To display the time value for an edit point Use the following procedure 1 Press the RECORDER button or PLAYER button to select the VCR on which...

Page 76: ...ape position is displayed When neither of the two selected edit points is set The duration between the most recently set corresponding edit points is displayed Modifying Edit Points Once you set edit points you can modify or delete them as required When edit points have been set incorrectly for example when an OUT point is located before an IN point or when the duration of editing segments on the ...

Page 77: ...UT button corresponding to the edit point you wish to modify and press the TRIM buttons or While you hold down the button the time value for the edit point appears in the display section pressing the button increases the value by one frame and pressing the button decreases it by one frame To delete an edit point To delete an edit point use the following procedure You can use the same procedure whe...

Page 78: ...es off Cuing Up to Edit Points You can cue up to any edit point or cue up to a position located a specified amount of time before the edit start point preroll To cue up to an edit point Use the following procedure 1 Press the RECORDER button or PLAYER button to select the VCR on which you wish to cue up to an edit point The button you have pressed lights 2 Hold down the IN OUT AUDIO IN or AUDIO OU...

Page 79: ... a position 5 seconds factory default setting before the edit IN point and stops To change the preroll time The factory default setting for the preroll time is 5 seconds but you can use basic menu item 001 to change this to any value from 0 to 30 seconds If you change the preroll time make sure that the setting is not longer than the recording length before the edit IN point Note that for automati...

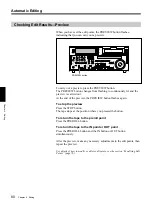
Page 80: ...the PREVIEW button flashes again To stop the preview Press the STOP button The tape stops at the position where you pressed the button To return the tape to the preroll point Press the PREROLL button To return the tape to the IN point or OUT point Press the PREROLL button and the IN button or OUT button simultaneously After the preview make any necessary adjustments to the edit points then repeat ...

Page 81: ...gh the recorder in E E mode From the OUT point to the postroll point you can monitor the playback from the recorder The following figure illustrates this Executing Automatic Editing Overview of editing operations The figure below shows how the recorder and player operate during editing IN point OUT point Playback recorder E E mode player Playback recorder Tape transport Preroll point IN point OUT ...

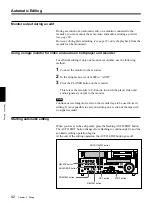
Page 82: ...item 008 to AUTO 3 Press the PLAYER button on the recorder This forces the recorder to E E mode in which the player video and audio signals are output to the monitor Note Continuous recording must exist on the recorder tape to be used in issert editing It is not possible to carry out editing on a section of the tape with no signal recorded Starting automatic editing When you have set the edit poin...

Page 83: ... a preview or automatic editing operation again by pressing the PREVIEW button or AUTO EDIT button Reviewing the editing results After carrying out an editing operation you can carry out a review to check the editing results on the monitor To carry out a review after carrying out the edit and before you set any new edit points or make other settings press the REVIEW button The REVIEW button lights...

Page 84: ...ow the tapes move on both the player and recorder during DMC editing DMC editing can be used for insert or assemble editing but cannot be used for audio split editing Preroll Recorder IN point OUT point Postroll Playback DMC editing Playback Stop Preroll time initial speed Player IN point Postroll time final speed Tape moves at initial speed Playback at stored varying speed Tape moves at final spe...

Page 85: ...IN or OUT button to set an edit point 5 Press the PLAYER button to set the player IN point Note It is not possible to set the player OUT point 6 Press the SEARCH button or search dial so that the SHUTTLE indicator in the display section is lit 7 Holding down the DMC EDIT button turn the search dial to set the initial speed To select normal speed as the initial speed press the PLAY button The speed...

Page 86: ...sly lit and the variable speed storing ends If the MEMORY indicator lights continuously before the speed variation end point This indicates that the memory became full at that point Thus even before the OUT point is reached it is not possible to record more speed variation The maximum capacity is a duration of 120 seconds To quit the DMC edit mode Hold down the DELETE button and press the DMC EDIT...

Page 87: ...io signals read out by the preread heads can be sent to an audio mixer for mixing with audio signals from the player for recording and can be recorded either on the original channels or on other audio channels Player Y R Y B Y AUDIO OUT DIGITAL AUDIO AES EBU OUT AUDIO IN DIGITAL AUDIO AES EBU IN ANALOG VIDEO OUT COMPONENT VIDEO OUT S VIDEO OUT SDI OUTPUT ANALOG VIDEO IN COMPONENT VIDEO IN S VIDEO ...

Page 88: ...tput and feedback will occur To prevent this select PB mode as in step 1 of the following procedure To carry out preread editing use the following procedure 1 Press the PB button turning it on 2 Press the PREREAD button turning it on 3 Make the necessary connections for the preread editing See the illustrations on the previous page and on page 129 4 After selecting the desired insert edit mode car...

Page 89: ...it from the second time on by setting the player IN and OUT points only Standalone editing You can carry out editing using as the player an external device for example a signal generator which cannot be controlled remotely through the REMOTE IN or REMOTE OUT connector Manual editing Without setting edit points in advance you can carry out editing manually while watching the monitor screen Adding a...

Page 90: ...on you wish to make the IN point 5 Press the PREVIEW button A preview starts The tape positions determined in steps 2 and 4 are set as the player IN point and recorder IN point respectively 6 Watching the editing on the monitor at the position you wish to make the OUT point hold down the ENTRY SHIFT button and press the OUT button Both the player OUT point and recorder OUT point are set 7 Carry ou...

Page 91: ...the position you wish to make the OUT point hold down the ENTRY SHIFT button and press the OUT button The edit ends The point where the edit started is set as the IN point and the point where the edit ended is set as the OUT point Continuous Editing When you execute multiple edits in succession you can edit from the second time on by setting the player IN and OUT points only After execution of an ...

Page 92: ...a preview 4 Press the AUTO EDIT button The edit starts When the edit finishes the recorder stops at the OUT point and the player stops about 2 seconds after the OUT point To stop the edit Press the ENTRY SHIFT button together with the OUT button The edit ends and the point where you pressed the buttons becomes the OUT point To abort the edit Press the STOP button By repeating this process you can ...

Page 93: ...leted tape For standalone editing use the following procedure 1 In the input selection section select the signal being generated by the signal generator connected to the unit For details of the input selection section see page 14 2 Press both the PLAYER button and RECORDER button turning them off 3 Set the IN point and if necessary also OUT point The AUTO EDIT button flashes For details of how to ...

Page 94: ...it mode see the section Selecting an Edit Mode page 71 4 Press the PLAY button The recorder begins playback Note It takes about two seconds until the playback video stabilizes For this reason start the playback from before the segment of video you wish to use 5 At the edit start point the recorder IN point press the EDIT button and PLAY button simultaneously The edit starts 6 At the edit end point...

Page 95: ...e to the AUDIO IN CH 1 connector and set the audio input and editing mode as follows In the input selection section see page 14 with the CH1 1 2 button select an analog audio signal In the edit mode setting section see page 20 press the INSERT CH 1 and CH 2 buttons turning them on After checking the above settings use the following procedure 1 Set extension menu item 819 as follows Extension menu ...

Page 96: ......

Page 97: ...are created the scene number and take number for them are fixed at 000 and 00 respectively The above operations other than automatic creation of new ClipLink log data require the ClipLink log data list display Notes For a tape on which index pictures are already recorded you cannot change any ClipLink log data other than the reel numbes and OK NG status When index pictures are recorded on a tape t...

Page 98: ...al move the selection mark asterisk to the data item for which you wish to display details 2 Press the SEARCH button While you hold the search button down the detailed data display appears ENTRY SHIFT button LIST button 003 196 REEL NO XXXXXXXX 1 M 00 01 23 00 OK 2 M 00 02 35 00 OK 3 M 00 03 50 00 OK 4 M 00 04 03 00 OK 5 M 00 04 48 00 NG 6 M 00 04 53 00 OK 7 M 00 05 08 00 OK 8 I 00 06 13 00 IP CLI...

Page 99: ...as follows To cue up to the mark IN point or cue point Holding down the IN button press the PREROLL button To cue up to the mark OUT point Holding down the OUT button press the PREROLL button This exits from the ClipLink log data list and cues up to the selected position Cuing Up to Adjacent Mark IN Cue Points Once you select data on a ClipLink log data list you can cue up to the point preceding o...

Page 100: ... by an arrow µ 5 Repeat steps 3 and 4 until the settings for all digits are complete 6 When all digits have been set hold down the ENTRY SHIFT button and press the MARK button The reel number changes 7 Hold down the STOP button and press the SET button This returns to the original ClipLink log data list Note If you carry out step 7 skipping step 6 the original ClipLink log data list appears again ...

Page 101: ... OUT point address changes 7 Holding down the ENTRY SHIFT button press the LIST button to display the ClipLink log data list then make sure the selection mark asterisk is kept at the position of the desired data item selected in step 1 If the selection mark asterisk is at a wrong position Using the search dial return the selection mark to the desired data item 8 Holding down the ENTRY SHIFT button...

Page 102: ... STOP button and press the SET button This returns to the original ClipLink log data list Note If you carry out step 5 skipping step 4 the original ClipLink log data list appears again on the monitor and in this case the OK NG status is not rewritten Rewriting ClipLink Log Data ...

Page 103: ... SHIFT button The OUT button and ENTRY SHIFT button light and the Mark OUT point address is set 1 3 4 2 5 5 Holding down the ENTRY SHIFT button press the MARK button The ENTRY SHIFT button goes out and the Mark IN point and Mark OUT point data is added to the end of the existing ClipLink log data Note The volume of ClipLink log data that can be stored in a cassette memory depends on the cassette m...

Page 104: ...ing down the DELETE button press the MARK button The specified data disappears from the ClipLink log data list 3 Holding down the ENTRY SHIFT button press the MARK button Note If you exit from the ClipLink log data list skipping step 3 the previous data is restored The data specified for deletion is not deleted ...

Page 105: ...tomatically create new Mark IN OUT points during recording or editing operation For information about how to operate the setup menu see Chapter 6 Setup Menu on page 107 New Mark IN OUT points are created as follows Notes If recording or editing is carried out when the setup menu item 129 CLIPLINK is set to OFF the existing ClipLink log data is erased If you carry out recording or editing on a tape...

Page 106: ......

Page 107: ...or retaining menu settings For detailed information about menu operation relating to the digital hours meter see Digital hours meter page 136 Extended menu This menu is used to make a wide range of settings relating to the functions of this unit for example the control panel functions video and audio control and digital data processing Basic Menu Items in the Basic Menu The basic menu items exclud...

Page 108: ...sidiary control panel is set to ON T STA Time data and the units status T UB Time data and user bit data When U BIT is selected with the COUNTER SEL button the user bit data and time data arranged in that order are displayed T CNT Time data and counter count When COUNTER is selected with the COUNTER SEL button the counter count and time data arranged in that order are displayed T T Time data and t...

Page 109: ...to display alarm messages OFF No alarm messages LIMIT Display alarm messages only during recording or editing ON Display alarm messages 099 MENU GRADE For setup menu operations select whether to display the basic menu information only or both the basic menu information and the extended menu information BASIC Display the basic menu information only ENHAN Display both the basic menu information and ...

Page 110: ... button Display section VARIABLE button F FWD button Item number flashing Setting Item name To display the item group name Items in the menu are arranged in groups by the 100 s digit of the item number To display the name of the group to which the currently selected item belongs hold down the VARIABLE button To display menus on the monitor Set the CHARACTER switch on the subsidiary control panel t...

Page 111: ...the SEARCH button and turn the search dial Search dial SHUTTLE JOG SHUTTLE JOG indicator VARIABLE button 1 2 The setting value changes at a rate depending on the search dial position when the SHUTTLE indicator is lit or on the search dial rotation rate when the JOG indicator is lit 2 When the desired setting value is displayed press the SET button This saves the new setting value and the menu disp...

Page 112: ... SEL button you can jump directly to menu item B1 o r H01 The recalled menu item toggles between B01 and H01 every time you press the COUNTER SEL button Saving the current active menu settings Set one of menu items B11 SAVE BANK 1 to B14 SAVE BANK 4 to ON depending on which of the menu banks you wish to save in then press the SET button Recalling settings from a menu bank Set one of menu items B01...

Page 113: ...utton as a warning 107 REC INHIBIT LAMP FLASHING Select whether or not to flash the REC INHIBIT indicator when recording is prevented with the REC INHIBIT switch on the subsidiary control panel set to OFF OFF Light the REC INHI indicator ON Flash the REC INHI indicator 108 AUTO EE SELECT When a cassette is inserted and the PB EE button is lit select the operation modes in which input video and aud...

Page 114: ...OL Select whether to rewind the tape automatically when recording or playback reaches the end of a tape DIS Do not rewind the tape automatically ENA Rewind the tape automatically 125 AUTO REW Select the playback speed range when carrying out playback in variable mode from the control panel of this unit OFF 1 to 2 times normal speed ON 0 to 1 times normal speed 117 CONTROL PANEL SELECTION Select th...

Page 115: ...or not to use synchronized operation for two or more VCRs DIS No synchronized operation ENA Use synchronized operation Note To use synchronized operation for two or more VCRs set this item to ENA on all of the VCRs Menu items in the 200s relating to the remote control interface Item number Item name Settings Menu items in the 300s relating to editing operations 305 SYNC GRADE When editing in phase...

Page 116: ...th a composite video or S video input STD The STD mode is always used forced STD mode N STD Use this setting when the input video signal is unstable forced NON STD mode When using a VCR with no built in time base corrector e g a home use VHS system VCR select N STD 311 ANALOG AUDIO EDIT PRESET REPLACE FOR CH1 312 ANALOG AUDIO EDIT PRESET REPLACE FOR CH2 313 ANALOG AUDIO EDIT PRESET REPLACE FOR CH3...

Page 117: ...g this unit from the BVE 800 editor set this item to STOP Menu items in the 400s relating to preroll Menu items in the 300s relating to editing operations continued 319 PREREAD SELECT Specify the preread editing operation A V Preread for both audio and video AUDIO Preread for audio only VIDEO Preread for video only The preread operation can be controlled with the PREREAD button on the control pane...

Page 118: ... not on standby Item number Item name Settings Menu items in the 600s relating to the time code generator 601 VITC POSITION SEL 1 For DSR 2000 Select a line to insert the VITC in 12H 16H 20H Select any line from 12 to 20 Note You can insert the VITC signal in two places To insert it in two places set both items 601 and 602 For DSR 2000P Select a line to insert the VITC in 9H 19H 22H Select any lin...

Page 119: ...ape MANU Regardless of whether this unit is the recorder or player the time code generator operates in accordance with the PRESET REGEN setting of the INT EXT PRESET REGEN switch FULL Regardless of the REMOTE button setting when any of the ASSEMBLE VIDEO CH 1 to CH 4 and TC buttons is lit the time code generator regenerates according to the time code played back from the tape 611 TC OUTPUT PHASE I...

Page 120: ...bcarrier reducer ESR ON Enable OFF Do not enable When playing back a composite signal set this to ON 708 CHROMA PHASE ROTATION MODE Select the phase rotation mode for chroma phase control The effect of this setting applies to the output levels of all of the composite video S video SDI and component video signals U V Select this setting when observing the unit s composite video output level using a...

Page 121: ...OFF Not muted CUEUP Muted during cue up or preroll operations FULL Muted in shuttle mode 807 AUDIO OUTPUT PHASE Select the output timing of an audio playback signal The reference position corresponds to a setting of 80H when the setting is less than 80H the output timing is advanced and when it is higher than 80H the output timing is delayed 80H 128 samples approx 2 7 ms 1 sample approx 20 µs 0 80...

Page 122: ...nnectors as they are MONI Output the monitor audio L channel CH 1 and monitor audio R channel CH 2 signals from the AUDIO OUT CH 3 and AUDIO OUT CH 4 connectors respectively Item number Item name Settings 902 SYSTEM EE MODE Select the bypass E E mode or system E E mode OFF Bypass E E ordinary setting ON System E E Menu items in the 900s relating to digital process 812 AUDIO OUTPUT LEVEL Select the...

Page 123: ...o change the value for the selected sub item 3 1 2 Making settings for mixing an audio input signal extension menu item 819 Using extension menu item 819 you can mix audio input signals dub an input audio signal over a channel previously recorded on the tape or mix an audio input signal with an audio channel recorded on the tape sound on sound To carry out the extension menu item 819 settings use ...

Page 124: ...e recording channels 6 Press the SET button This saves the settings Cursor shows the item selected for menu operations ITEM 819 AUDIO INPUT SOURCE ARRANGE ch1 ch2 ch3 ch4 in1 in2 in3 in4 tape on on on on on Recording channel numbers Input channel numbers To enable the setting of extension menu item 819 Press the MIXING button in the upper control panel turning it on When the MIXING button is off t...

Page 125: ...F VIDEO IN 75 Ω termination switch to ON Connections for Cut Editing Using i LINK Interface Optional DSBK 190 Required Using two DSR 2000 2000P units each fitted with the optional DSBK 190 board as a pair of player and recorder you can configure a cut editing system You can use the same system also to digitally dub signals in DVCAM format through an i LINK interface see page 61 REF VIDEO IN connec...

Page 126: ...INK DSBK 190 1 DSR 2000 2000P recorder DSR 2000 2000P player 1 6 pin to 6 pin i LINK cable supplied with the DSBK 190 Control Setting recorder Setting player REMOTE button Unlit Lit i LINK button Lit Lit SDTI i LINK button i LINK i LINK input selection section Connections for Cut Editing Using i LINK Interface Optional DSBK 190 Required ...

Page 127: ...an instant For an overview of the ClipLink function see the appendix ClipLink Guide page 147 The following is a connection diagram for digital non linear editing system in which this unit serves as the recorder For connections of the EditStation s peripheral devices the control panel the disk unit etc and the player refer to your ES 7 Operating Instructions 1 1 1 2 REF VIDEO IN REMOTE IN SDTI QSDI...

Page 128: ...s In this example the DNW A75 A75P is used as the recorder and this unit is used as the player DNW A75 A75P recorder settings DNW A75 A75P recorder SDI OUTPUT REF VIDEO OUT 1 1 2 REMOTE IN REMOTE1 OUT 9P SDI INPUT REF VIDEO INPUT 1 75 Ω coaxial cable not supplied 2 RCC 5G remote control cable supplied DSR 2000 2000P player DSR 2000 2000P player settings Control Setting REMOTE button Lit 9PIN butto...

Page 129: ...IDEO OUT REF VIDEO IN REMOTE IN IN 2 PGM OUT REF OUT REF OUT REF OUT IN 1 RS 422A IN MASTER OUT IN RS 422 GPI REMOTE RS 422 RS 422 REF IN REF VIDEO IN 1 1 4 1 1 1 1 2 2 3 3 3 2 REMOTE IN AUDIO IN CH 1 CH 2 AUDIO OUT CH 1 CH 2 AUDIO OUT CH 1 CH 2 DSR 2000 2000P recorder and player settings DSR 2000 2000P player Video switcher BVS 3200C DVS 2000C etc Audio mixer SRP V200 etc Editing control unit BVE...

Page 130: ...witch Right DIP switch For RM 450CE PAL Set the VCR constants as follows Left DIP switch Right DIP switch For BVE 800 Set the VCR constants as follows When using the DSR 2000 NTSC SW2 SW3 When using the DSR 2000P PAL SW2 SW3 For PVE 500 Use the factory settings as they are Switch No 7 6 5 4 3 2 1 0 Setting OFF OFF Switch No 1 2 3 4 5 6 7 8 Setting ON OFF ON ON ON ON Switch No 7 6 5 4 3 2 1 0 Setti...

Page 131: ...P In this system the video signals are analog component signals and the audio signals are recorded from audio channels 1 and 2 Note In this case the DSBK 170 Analog Component Iuput Output Board is required DSR 2000 2000P recorder settings Control Setting Videocassette recorder player such as UVW 1600 1600P DSR 2000 2000P recorder 1 Cable with XLR connectors not supplied 2 75 Ω coaxial cable not su...

Page 132: ...ck see the section Synchronous Playback on page 59 REF VIDEO OUT REMOTE IN REMOTE OUT REF VIDEO IN 1 2 DSR 2000 2000P player settings Control Setting REMOTE button Lit 9PIN button Lit DSR 2000 2000P recorder settings Control Setting REMOTE button Unlit Setup menu item 004 ON Synchronize OFF Do not synchronize Setup menu item 305 When synchronizing synchronization accuracy ACCUR 0 frame ROUGH 1 fra...

Page 133: ... for Cut Editing Using i LINK Interface page 125 DSR 2000 2000P player settings Control Setting REMOTE button Lit 9PIN button Lit DSR 2000 2000P recorder settings Control Setting REMOTE button Unlit 9PIN button Lit SDTI i LINK button SDTI input selection section SDTI QSDI OUTPUT SDTI QSDI INPUT REMOTE IN REMOTE OUT 1 2 DSR 2000 2000P player 1 75 Ω coaxial cable not supplied 2 RCC 5G 9 pin remote c...

Page 134: ......

Page 135: ...atically If this happens leave the unit s power on and wait until the alarm messages disappear If the condensation alarm messages appear immediately after powering on Leave the unit powered on and wait until the alarm messages disappear You cannot load a cassette into the unit while the alarm messages are being displayed Once the alarm messages disappear the unit is ready for use Head Cleaning Alw...

Page 136: ...mode in units of 1 hour H04 THREADING mode Display the total number of times tape has been threaded in the unit H12 DRUM RUNNING mode resettable Same as H02 except that the count is resettable This can be used as a guide in determining when to replace the drum H13 TAPE RUNNING mode resettable Same as H03 except that the count is resettable This can be used as a guide in determining when to replace...

Page 137: ...ntrol panel is set to ON Set the REC INHIBIT switch on the subsidiary control panel to OFF The NOT EDITABLE indication appears in the display section The recording mode selected on this unit does not coincide with that of the loaded tape a Set the unit for the same recording mode as with the tape When your current purpose is recording you can use the tape currently loaded in the unit The recording...

Page 138: ... is in the OFF position or a 75 Ω terminator is not fitted to its video input connector Set the 75 Ω termination switch to ON or connect a terminator The image on the monitor screen is too dark In a video signal loop through connection of video monitors 75 Ω termination switches for video input on monitors other than the loop end monitor are in the ON position Set the 75 Ω termination switches to ...

Page 139: ...O EJECT TAPE Error code Error message Error code Direction Monitor screen Display section An alarm message for example like the one shown below may appear on the monitor screen during operation of the unit REMOTE ALARM REMOTE MODE IS SELECTED SET REMOTE LOCAL SWITCH TO LOCAL Cause of alarm Direction Monitor screen Display section If an alarm message appears follow the direction indicated under the...

Page 140: ...ignal does not conform to DVCAM DV format Unknown Sig Input signal is 625 50 For DSR 2000 625 50 sig For DSR 2000 Input signal is 525 60 For DSR 2000P 525 60 sig For DSR 2000P Input video is not detected Check the INPUT VIDEO indication in the input selection audio mode display section and supply an appropriate video signal No INPUT Moisture has been detected Keep the power on and wait until this ...

Page 141: ...a tape recorded in DVCAM format Not DVCAM Use a tape recorded in 525 60 format For DSR 2000 625 50 Tape For DSR 2000 Use a tape recorded in 625 50 format For DSR 2000P 525 60 Tape For DSR 2000P Tape not usable Use DVCAM DV DVCPRO 25 tape TC EXTERNAL is selected ILL Tape Set the INT EXT switch on the subsidiary contol panel to INT TC EXT TCG REGEN mode is selected Set the PRESET REGEN switch on the...

Page 142: ......

Page 143: ...operated in a horizontal position Do not operate it on its side or tilted through an excessive angle exceeding 20 Avoid violent impacts Dropping the unit or otherwise imparting a violent shock to it is likely to cause it to malfunction Do not obstruct ventilation openings To prevent the unit from overheating do not obstruct ventilation openings by for example wrapping the unit in a cloth while it ...

Page 144: ...ME standard size cassette 184 minutes or less Using PDVM 40ME mini size cassette 40 minutes or less Fast forward rewind time Using PDV 184ME standard size cassette 3 minutes or less Using PDVM 40ME mini size cassette 1 minute or less Search speed Up to 60 times normal in both directions Video performance Band width Composite DSR 2000 30 Hz to 4 2 MHz 1 0 dB Y Composite DSR 2000P 25 Hz to 4 8 MHz 1...

Page 145: ... negative S VIDEO IN DIN 4 pin 1 Y 1 0 Vp p 75 Ω sync negative C 0 286 Vp p DSR 2000 or 0 3 Vp p DSR 2000P 75 Ω burst level COMPONENT VIDEO IN Y R Y B Y BNC type 3 component video Y 1 0 Vp p 75 Ω sync negative R Y 0 7 Vp p 75 Ω 75 for DSR 2000 or 100 for DSR 2000P B Y 0 7Vp p 75 Ω 75 for DSR 2000 or 100 for DSR 2000P Analog audio input AUDIO IN XLR 3 pin female 4 6 0 4 dBu 600 Ω ON OFF 60 dBu high...

Page 146: ... 2 Vp p 3 0 dB 600 Ω unbalanced Control connectors VIDEO CONTROL D sub 15 pin male for connection of optional UVR 60 60P or BVR 50 50P CONTROL PANEL D sub 15 pin female for connection of optional DSBK 200 REMOTE IN D sub 9 pin female for connection of another DSR 2000 2000P unit or other editing controller complying with RS 422A REMOTE OUT D sub 9 pin female for loop through output of signals from...

Page 147: ...x Pictures and the ClipLink log data to the EditStation s hard disk You can also transfer OK scenes only NG scenes are skipped Next begin rough editing by viewing the Index Pictures on the EditStation s GUI display and rearranging them as you wish This eliminates the difficult work of matching up a handwritten shot list with recorded scenes After you have completed this rough editing you can then ...

Page 148: ...pLink log data tranfer ES 7 EditStation non linear editing system DSR 2000 85 80 60a or DSR 2000P 85P 80P 60Pa Digital Videocassette Recorder Video output QSDI Index Pictures ClipLink log data RS 422A interface Editing Actual AV data QSDI input output ES 7 EditStation non linear editing system DSR 2000 85b 80 60a or DSR 2000P 85Pb 80P 60Pa Digital Videocassette Recorder a The DSR 60 60P is a video...

Page 149: ... Picture 720 dots 480 lines NTSC or 576 lines PAL ClipLink log data ClipLink log data can be recorded automatically or manually into the cassette memory for use as a convenient alternative to the conventional shot list ClipLink log data includes the following items This cannot be changed set to 1 at shipping ClipLink log data Reel number cassette number Description Data maximum length 8 digits con...

Page 150: ... IN automatic recording Rec OUT automatic recording Cue point time code manual recording Cue point time code manual recording Cue point time code manual recording ClipLink Guide The following describes how to record the various ClipLink log data items OK NG status To designate a scene as NG press the NG button on the camera while shooting the scene or at any time before you begin shooting the next...

Page 151: ... Index Picture is the image around 12 23 15 10 Mark IN or Rec IN Mark OUT or Rec OUT Frame digit incremented Frame digit decremented Cue Time code recorded in the cassette memory Recording capacity for Mark IN OUT time codes and Cue point time codes When in MARK mode up to 198 pairs of Mark IN and Mark OUT points can be recorded if using a cassette with 16 Kbits of cassette memory When in CUE mode...

Page 152: ... frequencies During playback it is de emphasized This suppresses noise without affecting the original signal External lock Gen lock Synchronizing one equipment controlled or slave unit to another controlling or master unit The signal and tape run of the VCRs used for editing player and recorder are usually synchronized Gen lock generator lock See External lock Head drum A metal cylinder to which a...

Page 153: ...n mode One of the stop modes In this mode the head drum continues rotating and the tape remains wound onto the drum This mode enables instantaneous switching to recording or playback mode To prevent damage to the tape or heads the device automatically switches from standby on mode to standby off mode after a certain period of time Subcarrier Color information contained in a composite video signal ...

Page 154: ...f one field and the beginning of the next During this time the electron beams in monitors are turned off so that they can return from the bottom of the screen to the top without showing tracks of movement on the screen When the position of v blanking is not adjusted correctly a horizontal black bar appears on the screen Video gain Amount of amplification for video signals expressed in decibels dB ...

Page 155: ...Editing adding a narration 95 automatic editing 67 button switch settings 70 continuous editing 91 DMC editing 84 manual editing 94 preread editing 87 quick editing 90 sequence of operations 69 standalone editing 93 Editing control section 21 E E mode 13 22 23 EJECT button 23 ENTRY SHIFT button 22 Error messages 139 Extended menu 113 items in the menu 113 menu operations 123 External device connec...

Page 156: ...tton 15 NOT EDITABLE indicator 20 Notes on use 143 O OK NG status 101 Operating status display 35 Operation mode 37 OUT button 22 P PB button 18 controls 17 PB FS display 14 PB EE button 18 PCM digital audio 7 PHONE LEVEL control 17 PLAY button 23 Playback 49 button switch settings 49 capstan override 54 DMC playback 55 jog mode playback 51 normal playback 50 shuttle mode playback 52 synchronous p...

Page 157: ...on 23 fault display function 23 Subsidiary control panel 25 Superimposing text information 35 SYNC knob 27 Synchronizing time code generator 42 Synchronous playback 59 132 System configuration 11 T Tape end alarm indicator 20 Tape transport control section 22 TC SELECT switch 26 Text information 35 Time code generator reader 9 42 recording 47 setting 39 TIME CODE IN connector 29 OUT connector 29 T...

Page 158: ......

Page 159: ......

Page 160: ...Sony Corporation Printed in Japan ...

Reviews: