12
EN
Recording Operations
3-856-761-11(2)
RESET
MODE
MARGIN
OPEN/CLOSE
RESET
RESET
MODE
REW
PREVIOUS
FF
NEXT
AMS
TIMER
START ID
PHONES
SBM
INPUT
REC MODE
REC
REC MUTE
PAUSE
PLAY
STOP
PHONE LEVEL
REC LEVEL
RENUMBER
REHEARSAL
AUTO
WRITE
ERASE
g
§
5
4
6
0
3
7
2
8
1
9
10
10
0
ON
48 kHz
44.1kHz
LONG
ANALOG
OPTICAL
COAXIAL
STANDARD
OFF
REC
OFF
POWER
PLAY
=
p
P
R
r
(
+
0
)
L
R
TIMER
STOP
p
MARGIN
OPEN/CLOSE
RESET
RESET
MODE
REW
PREVIOUS
FF
NEXT
AMS
TIMER
START ID
PHONES
SBM
INPUT
REC MODE
REC
REC MUTE
PAUSE
PLAY
STOP
PHONE LEVEL
REC LEVEL
RENUMBER
REHEARSAL
AUTO
WRITE
ERASE
g
§
5
4
6
0
3
7
2
8
1
9
10
10
0
ON
48 kHz
44.1kHz
LONG
ANALOG
OPTICAL
COAXIAL
STANDARD
OFF
REC
OFF
POWER
PLAY
=
p
P
R
r
(
+
0
)
L
R
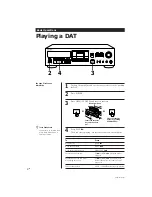
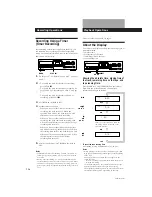
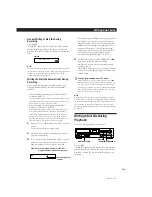
For basic playback operations, see page 8.
About the Display
You can use the display to show the following types of
time information:
• absolute time
• playing time of the track
• remaining time on the tape
• tape running time
Playback Operations
Showing the absolute time, playing time of
the track, remaining time on the tape, and
tape running time.
Press MODE (or COUNTER MODE on the remote).
Each time you press the button, the displayed
information changes as follows.
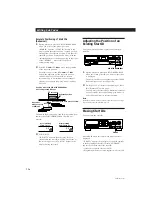
Recording Using a Timer
(Timer Recording)
By connecting a timer (not supplied) to the deck, you
can start and stop recording operations at specified
times. For further information, refer to the instructions
that came with the timer.
1
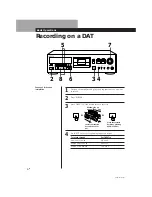
Do Steps 1 to 7 of “Recording on a DAT” on pages
6 and 7.
2
• To specify the time for the start of recording,
press STOP
p
.
• To specify the time for the end of recording, do
Steps 8 and 9 of “Recording on a DAT” on page
7.
• To specify the time for the start and end of
recording, press STOP
p
.
3
Set TIMER on the deck to REC.
4
Set the timer as required.
• When you have set the time for the start of
recording, the deck turns off. When the
specified time arrives, the deck turns on and
after about 10 seconds starts recording.
• When you have set the time for the end of
recording, the deck continues recording, then
when the specified time arrives, the deck stops
recording and turns off.
• When you have set the time for both the start
and end of recording, the deck turns off. When
the starting time arrives, the deck turns on and
after about 10 seconds, recording starts. When
the ending time arrives, the deck stops
recording and turns off.
5
After using the timer, set TIMER on the deck to
OFF.
Notes
• If TIMER switch is left at the REC position, the deck will
automatically start recording when you turn on the deck
next time.
• During Timer Recording (i.e., when the TIMER switch is
set to the REC position), Auto Rewind (see page 7) will not
function even if the tape ends during recording. This is to
prevent previously recorded material from being recorded
over.
√
P
r
e
s
s
A
b
s
o
l
u
t
e
t
i
m
e
P
l
a
y
i
n
g
t
i
m
e
o
f
t
h
e
t
r
a
c
k
P
r
e
s
s
√
PGM TIME
3 15
m
s
ABS TIME
8 20
m
s
REMAINING
1 00
h
m
R
e
m
a
i
n
i
n
g
ti
me
on
t
h
e
t
a
p
e
In the case of premastered DAT, the
remaining time is to the end of the
recorded portion.
P
r
e
s
s
√
5 19
m
s
T
a
p
e
r
u
n
n
i
n
g
t
i
m
e
P
r
e
s
s
To reset the tape running time
Press RESET (or COUNTER RESET on the remote).
Notes
• When playing certain types of premastered tapes, “BB”
may appear momentarily in the display at the beginning
of the tape.
• The playing time of the track does not appear in the
following cases:
— When you start playing from the middle of the track
— During rewinding
• In standard-play mode, the remaining time on the tape
appears about 16 seconds after you start playing.
• The displayed remaining time may vary somewhat from
the actual remaining time, depending on the tape.


