background image

Editing

50

 EN

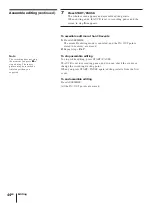
Connecting other
equipment

For usage, connections, etc., refer to the instruction manual of the
equipment to be connected.

Connecting an editing controller

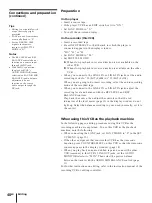
• When using this VCR as a recorder or as a player, set the LANC

MODE on this VCR to “S.”

• If the controller has a shuttle mode, set it to “B.”
• When you edit tapes using video/audio code and connecting an

editing controller RM-E1000T to this VCR (recorder), set the
“SEARCH” in the menu of RM-E1000T to “FF/REW.”

Connecting a titler and a digital SEG

• When using this VCR as a player, set “AUTO DISPLAY” on the SET

UP MENU to “OFF.”

• When connecting a titler and a digital SEG equipped with the S

VIDEO jack, use the S VIDEO connection.

Connecting a still picture capture board kit

• Set the LANC MODE on this VCR to  “S.”

Connecting a Video Printer equipped with a LANC
jack.

• Set the LANC MODE on this VCR to “S.”

Making a tape duplication system by connecting a
number of DSR-30/30P units

• Make sure to use an audio/video distributor. If you make a loop

connection, picture and sound may deteriorate.

• When using a CONTROL S  jack, you can make a loop-through

connection. Check the commander mode of the wired remote
commander  and set the same mode on this VCR. (page 17)

• For details on a wired remote commander, consult the shop where

you purchased it.
You cannot use the following remote commanders with this VCR:
SVRM-100, RM-250, RM-S18 and RM-S52A.

Summary of Contents for DVCAM DSR-30

Page 1: ...3 858 739 15 1 Operating Instructions page 2 EN Mode d emploi page 2 F Digital Video Cassette Recorder 1996 by Sony Corporation DSR 30 DSR 30P EN F ...

Page 2: ... unit from the wall outlet if you do not intend to use it for an extended period of time To disconnect the cord pull it out by the plug never by the cord Installing Allow adequate air circulation to prevent internal heat buildup Do not place the unit on surfaces rugs blankets etc or near materials curtains draperies that may block the ventilation slots Do not install the unit near heat sources suc...

Page 3: ...uch as radiators or air ducts or in a place subject to direct sunlight excessive dust mechanical vibration or shock Do not install the unit in an inclined position It is designed to be operated in a horizontal position only Keep the unit and cassettes away from equipment with strong magnets such as microwave ovens or large loudspeakers Do not place heavy objects on the unit If the unit is brought ...

Page 4: ...Introduction 4EN ...

Page 5: ...unction 29 Displaying tape information 30 Watching wide pictures 31 Auto Repeat 32 One Program Play Recording 33 AC timer recording 34 Setting the timer DSR 30P only 35 Checking changing cancelling timer settings DSR 30P only Editing 36 Editing methods 39 Connections and preparation 41 Synchronized editing 42 Duplicate 43 Assemble editing 45 Video audio insert 50 Connecting other equipment Additio...

Page 6: ...CAM cassettes and Mini DVCAM cassettes When you record a program the recording date and time and the programs position on the tape are stored in the cassette memory so that you can quickly locate the program later on indicates that you can use the cassettes 16 kbits of data can be stored on On this VCR you can use the cassettes up to 16 kbits of data can be mounted on To save a recording To preven...

Page 7: ...nals on this VCR you may not be able to copy it onto other equipment Limitations caused by the difference in format This VCR can record play back and edit the tapes recorded in DVCAM format It can also play back the tapes recorded in DV format SP mode However due to the difference in format you may not be able to record or edit some tapes affected by recording conditions of the tape e g A tape ori...

Page 8: ...n To set the VCR to recording pause mode press r while keeping P pressed You cannot set it to recording pause mode by pressing r on the operation panel or the Remote Commander 9 FF button º P PAUSE button p STOP button See section A on page 9 OPERATION PANEL OPEN CLOSE button 10 See section B on page 9 Operation panel Display window DF indicator DSR 30 only Lights when the VCR plays back a tape wh...

Page 9: ...PHONES LEVEL headphones volume level control B 1 H function lock indicator Lights when the FUNCTION LOCK switch at the rear is set to ON 2 EXT TIMER REC indicator 33 Lights when the EXTERNAL TIMER switch at the rear is set to REC 3 STEREO indicator Lights when the VCR is in the stereo mode 4 MAIN L main left indicator Lights when the VCR is set to listen to the main sound of a bilingual mode or L ...

Page 10: ...y back the picture at various speeds Select the speed you want from among 1 5 slow 1 2 10 and 15 18 for DSR 30P Jog dial 25 During pause use this dial to play back or search the picture at various speeds The playback speed changes according to the speed you turn the dial at MARK button 43 r REC button See section G on page 11 COMMAND MODE selector 17 Detaching the control panel 1 Press OPERATION P...

Page 11: ... and sub sound STEREO MAIN L Main sound Left channel only SUB R Sub sound Right channel only 6 DATA CODE button See Displaying tape information on page 29 7 COUNTER RESET button 14 8 COUNTER SELECT button 14 D 1 MENU button 20 2 EXECUTE button 20 3 CURSOR M Â µ m buttons 20 E 1 AUDIO MONITOR selector 40 Use to select the audio track you want to hear stereo 1 stereo 2 or mix when playing pack a tap...

Page 12: ...To prevent an accidental operation set the switch to ON The buttons on the front panel and operation panel of the main unit will not work To lock the buttons on the remote commander and the CONTROL S IN OUT jacks slide the COMMAND MODE selector on the operation panel of the main unit to OFF You cannot lock the LANC jack 9 EXTERNAL TIMER selector Use to select External Timer Recording or Auto Repea...

Page 13: ... 40 1 TIME CODE indicator Lights when displaying the time code 2 REMAIN remaining time indicator Lights when displaying the remaining time 3 REC recording indicator Lights during recording recording pause or external timer recording DSR 30P only TIMER and REC light up during internal timer recording TIMER lights up in the internal timer recording standby mode 4 DV OUT IN indicator When you select ...

Page 14: ... automatically adjusts to the remaining amount of tape In these cases the counter or time code indication may stop momentarily Use the remaining time display as an approximate indication The indication may be inaccurate depending on the tape type Indicating the remaining time The beginning of the tape The end of the tape Indicating tape tranport direction and speed How to check the display window ...

Page 15: ...buttons for monitor or TV operation INPUT SELECT button Power button VOL volume buttons CHANNEL buttons You can use these buttons for aSony monitor TV with g mark 5 r REC button 6 FF button 7 P PAUSE button 8 p STOP button 9 Shuttle ring 25 º Jog dial 25 PLAY button 0 REW button SEARCH 3 buttons 25 CHANNEL buttons Use to select input jack AUDIO MONITOR buttons 11 TV VCR buttons Use to operate a VC...

Page 16: ...s PRINT button set the LANC MODE in the SET UP MENU to S 4 SEARCH SELECT button 27 5 SEARCH button 27 6 Buttons for MENU operation 20 MENU button CURSOR buttons EXECUTE button 7 FRAME 7 buttons 26 8 SLOW button 26 9 2 button 26 º DISPLAY button 14 DATA CODE button 29 Notes With normal use the batteries should last for approximately three to six months If you will not use the remote commander for a...

Page 17: ...ith the other Sony VCR Set COMMAND MODE on the remote commander supplied with the other VCR to the same position as that on this VCR Tips If you set the COMMAND MODE on the operation panel to OFF you can no longer control this VCR from any other Sony remote commander If the other Sony VCR does not have a COMMAND MODE switch use the following settings VTR 1 For Sony Betamax format VCRs VTR 2 For So...

Page 18: ...ASE EXECUTE SELECT MENU CLOCK SET Y C DELAY SET UP MENU SET µ CASSETTE MEMORY ERASE ALL DATA INDEX DATA DATE DATA PHOTO DATA SELECT SET CANCEL YES YES YES YES NO NO NO NO µ Mm EXECUTE MENU CLOCK SET 0 00 SELECT SET END µ Mm EXECUTE Y C DELAY SET PLAY OR DV INPUT AND Mm SET UP MENU PAGE 1 L1 IN VIDEO AUDIO MODE TIME CODE CM SEARCH SELECT S 16 DF ON NORM 12 NDF OFF LANC MODE M S SHUTTLE MODE A B ...

Page 19: ... For DSR 30 Set the month first The date is shown on the screen in the order of month day year 4 Press CURSOR to highlight the month and set the month using the CURSOR buttons For DSR 30 Set the day 5 Repeat step 4 to set the year and then the hour and the minutes 6 Press EXECUTE to start the clock The CLOCK SET menu disappears from the screen DSR 30P CLOCK SET 0 00 SELECT SET END µ Mm EXECUTE 1 ...

Page 20: ...ET UP MENU PAGE 1 3 Press the CURSOR buttons to move the cursor to the option you want to change and press CURSOR buttons to change the setting The contents of each menu are shown on pages 21 and 22 4 Press EXECUTE The menu disappears from the monitor screen CASSETTE MEMORY ERASE EXECUTE SELECT MENU CLOCK SET Y C DELAY SET UP MENU SET µ SET UP MENU PAGE 1 DSR 30 SET UP MENU PAGE 2 WIDE PB AUDIO D...

Page 21: ...ing mode as the source tape DF to set the time code to Drop Frame NDF to set the time code to Non Drop Frame ON to search recordings with the cassette memory If the tape does not have a cassette memory the VCR will search recordings using index signals recorded on the tape itself OFF to search recordings using the index signals recorded on the tape M to control another VCR from this VCR using the ...

Page 22: ... 16 9 on a wide screen TV 16 9 ON to display the tape transport indicators etc on the monitor screen The indicators disappear from the screen automatically after about 3 seconds OFF not to display the tape transport indicators of the VCR on the screen When you use this VCR as a player during editing set to OFF so that you can prevent the tape transport indicators from being recorded on the recorde...

Page 23: ...elay function is for adjusting the picture delay between luminance and chrominance 1 During playback or pause or when the DV input picture is displayed press MENU 2 Press the CURSOR buttons to move the cursor to Y C DELAY then press EXECUTE 3 Press the CURSOR buttons to correct the color shift of the picture 4 Press EXECUTE The menu disappears from the monitor screen Tips Video signals are compose...

Page 24: ...ORY ERASE then press EXECUTE 3 Press the CURSOR buttons to select the data to erase then press CURSOR to set it to YES Select To erase ALL DATA The entire memory INDEX DATA Signals for INDEX SEARCH DATE DATA Signals for DATE SEARCH PHOTO DATA Signals for PHOTO SEARCH 4 Press EXECUTE A message appears to confirm the operation 5 Press EXECUTE The data you selected is erased then the VCR returns to t...

Page 25: ...and release Turn the shuttle ring to 0 or again to view the picture during fast forward or rewind Using shuttle ring Playback options Play at various speeds Fast forward rewind This feature is not available when using a remote commander or when controlling another VCR from this VCR Using jog dial During pause turn the jog dial to play the picture at a speed slower than normal speed This feature is...

Page 26: ...press FRAME or 7 During pause press FRAME or 7 Using buttons on the remote commander Playback options Play at twice the normal speed Viewing a high speed picture Play in slow motion Play frame by frame To resume normal playback Press PLAY To hear the sound during slow motion and frame by frame If you want to hear the sound during slow motion and frame by frame set JOG WITH SOUND in the SET UP MENU...

Page 27: ... When you use a tape with a cassette memory set CM SEARCH in the SET UP MENU to OFF 1 Press SEARCH SELECT to select the search type The indicator of the search type you selected lights 2 Press or repeatedly to locate the recording you want The VCR starts searching backwards or forwards until the index number comes to zero then plays back the recording During Photo search the VCR pauses Continued S...

Page 28: ...ory On tape Index search Yes Yes Date search No Yes Photo search No No The signals for Index search are recorded when you start recording for the first time in stop mode About the index signal Each program is indexed at its beginning If you record another program over the beginning of the first program you will not be able to locatethe original program You cannot add indexes only after recording T...

Page 29: ...ration DSP 30P 31 12 1996 21 45 CAM AUTO 50 MANUAL F 1 6 0 dB If you record a tape using a Sony digital camcorder DSR 200 200P camcorder data the shutter speed program AE mode white balance iris and gain can be recorded on the tape You can check these data during playback on this VCR Press DATA CODE during playback Each time you press DATA CODE the display changes as follows Data display off Recor...

Page 30: ...een Set WIDE PB to ON on the SET UP MENU of this VCR Black bands appear at the top and the bottom for DSR 30P bottom only of the screen and the screen looks wide CINEMA mode To watch on a wide screen TV Set WIDE PB to OFF on the SET UP MENU of this VCR and set the wide screen TV to 16 9 FULL mode In the case of a wide screen TV compatible with the Video ID on the wide screen system it enters into ...

Page 31: ...upplied to this VCR you can repeat playback automatically at the preset time 1 Connect an external AC timer not supplied to this VCR 2 Set the EXTERNAL TIMER switch at the rear of the main unit to PB AUTO REPEAT The AUTO REPEAT indicator on the front panel lights 3 Set the timer on time on the external AC timer At the preset time the power turns on and after a few 30 seconds no more than 30 Auto R...

Page 32: ...k starts After playback stops the tape rewinds to the beginning automatically and stops The point where the tape stops playback The VCR plays back the tape from the beginning to the first index if there is no index on the tape to the unrecorded portion if none to the tape end and stops Then the tape rewinds to the beginning The point where the tape stops is the same as the turning point of the Aut...

Page 33: ... to REC You need not press r REC If the tape ends before the recording source stops operation The tape stops without rewinding To stop recording durng the timer recording Press p STOP To release AC timer recording Set the EXTERNAL TIMER switch to OFF Caution While a tape is running do not turn off the power using an AC timer The VCR and a tape may be damaged When turning off the power of the VCR m...

Page 34: ...ding To stop the VCR while recording press p STOP Daily weekly recording When you set the date to start recording in step 2 press CURSOR to select the recording pattern Each time you press the button the indication changes as shown on the left Setting the timer DSR 30P only Tip To change or correct a setting before confirming it press CURSOR to highlight the item you want to change and reset it No...

Page 35: ...ghlight the item you want to change and reset it using the CURSOR buttons Then press CURSOR to move the cursor to the leftmost column To cancel the setting press the CURSOR buttons to highlight the start time of the item you want to cancel and reset it to any time before the current time using the CURSOR buttons 5 Press EXECUTE If any settings remain turn off the VCR to return to recording standby...

Page 36: ... and you make DV connections If you copy a source tape using this function you can make a work tape having the same time codes as the source tape The contents of the cassette memory are not copied You need a DVCAM VCR equipped with a DV output jack and LANC jack Assemble editing You can edit up to 10 events at a time automatically To use this function you need a VCR equipped with a LANC jack Video...

Page 37: ...recording from the LINE IN connectors you can select the audio mode by setting AUDIO MODE in the SET UP MENU page 21 About DV connection etc DV connection The DV jack transmits video and audio signals in digital form The video and audio signals are sent with hardly any degradation enabling high quality editing The signal flow is automatically detected so you need not make separate connections for ...

Page 38: ...two frames from the time code value at the beginning of each minute except every tenth minute Non drop frame mode Non drop frame mode ignores the difference between the time code and the actual clock time This mode is also called Full frame mode or Normal frame mode Since it does not drop the frames a length of 1 day as indicated by time code is longer than the actual clock time by about 86 second...

Page 39: ...NE 1 LINE 1 R L R L R L LINE 2 LINE 1 LINE 1 LINE 2 LINE 1 LINE 2 ID 2 AUDIO LINE OUT R AUDIO L VIDEO S VIDEO Another VCR etc Monitor This VCR ç Signal flow continued Notes When you connect output jacks of the recorder to input jacks of the player VCR select the input correctly to prevent a humming noise If you connect cables to both audio video jacks and S VIDEO connector of LINE 1 IN LINE 2 IN s...

Page 40: ...s the playback machine In the following pages editing procedures using this VCR as the recording machine are explained To use this VCR as the playback machine note the following When connecting the LANC jack set LANC MODE to S in the SET UP MENU page 21 If the other equipment that controls this VCR has the time code function press COUNTER SELECT on this VCR so that the time code counter appears in...

Page 41: ...to pause If the tape passes the point to stop editing press RECORDER and rewind the tape to that point with the shuttle ring or jog dial 5 To edit another scene repeat steps 1 to 4 6 To finish editing press EDIT STANDBY Both VCRs stop Synchronized editing Notes The recording does not stop the moment you press p to stop editing The source picture may be recorded a little longer than you expect If y...

Page 42: ...el recording press EDIT STANDBY again 4 Press START PAUSE To stop duplicate Press p STOP Duplicate Notes When you start copying the first part of the source tape may be dropped on the copied tape You may not be able to copy the first part or an unrecorded portion of the source tape Locate the recorded portion on the source tape then start copying When you record on a new or fully rewound tape do a...

Page 43: ...SE so that this VCR is set to recording pause Assemble editing Notes If the remaining time appears in the display window of the main unit You cannot execute assemble editing Do not select another input while assemble editing is being executed Editing may not be done correctly This VCR may malfunction if the IN OUT points are not separated by more than two seconds If an event you want to record is ...

Page 44: ... points stored in memory are erased 2 Repeat steps 2 to 7 To stop assemble editing To stop while editing press START PAUSE This VCR is set to recording pause and you can check the events or change the recording starting point When you press START PAUSE again editing restarts from the first event To end assemble editing Press ASSEMBLE All the IN OUT points are erased Note The recording does not sto...

Page 45: ...NSERT or STEREO 2 INSERT as follows When you record from DV input Press both STEREO 1 INSERT and STEREO 2 INSERT You cannot replace stereo 1 track or stereo 2 track only When you record from LINE inputs To record in 16bit audio Fs48k press both STEREO 1 INSERT and STEREO 2 INSERT To record in 12bit audio Fs32k on the stereo 1 track press STEREO 1 INSERT To record in 12bit audio Fs32k on the stereo...

Page 46: ...r lights 6 Press START PAUSE Video insert audio insert or both video and audio insert editing starts When the tape counter reaches 0H00M00S the recording on this VCR stops automatically the other VCR continues playing To stop the other VCR press PLAYER then press p To stop recording manually press START PAUSE Video audio insert continued Tip If you do not want to stop insert editing when the count...

Page 47: ...record from DV input Press both STEREO 1 INSERT and STEREO 2 INSERT You cannot replace stereo 1 track or stereo 2 track only When you record from LINE inputs To record in 16bit audio Fs48k press both STEREO 1 INSERT and STEREO 2 INSERT To record in 12bit audio Fs32k on the stereo 1 track press STEREO 1 INSERT To record in 12bit audio Fs32k on the stereo 2 track press STEREO 2 INSERT In the case of...

Page 48: ...player to start playback At the beginning of the scene you want to replace press P on this VCR to start recording Video insert audio insert or both video and audio insert editing starts When the tape counter reaches 0H00M00S the recording tape stops automatically 7 Press the stop button on the player Tip If you do not want to stop insert editing when the counter comes to 0H00M00S change the counte...

Page 49: ...cording mode as the source tape regardless of the AUDIO MODE setting in the SET UP MENU For this connection press both STEREO 1 INSERT and STEREO 2 INSERT buttons When you record from LINE inputs The sound is recorded in the audio recording mode selected in AUDIO MODE of the SET UP MENU Usually choose the original audio recording mode of the tape to be edited Select the track to be replaced accord...

Page 50: ...ecting a titler and a digital SEG equipped with the S VIDEO jack use the S VIDEO connection Connecting a still picture capture board kit Set the LANC MODE on this VCR to S Connecting a Video Printer equipped with a LANC jack Set the LANC MODE on this VCR to S Making a tape duplication system by connecting a number of DSR 30 30P units Make sure to use an audio video distributor If you make a loop c...

Page 51: ...s often used for the surface finishing of the recorder Do not spray a volatile solvent such as an insecticide toward the cabinet or place rubber or vinyl products on the cabinet for a long time If you do the finish of the cabinet may be damaged or the coating may come off Do not clean the cabinet with thinner or benzine The cabinet may be damaged or its coating may come off When you use a chemical...

Page 52: ...with the cleaning cassette the video heads may have worn out In that case you have to replace the video heads with new ones Please consult your Sony dealer Notes on the video cassettes Usable cassettes We recommend to use the Standard DVCAM Mini DVCAM cassettes to get the most out of high reliability of DVCAM format Cleaning the terminal If the terminal of the Standard DVCAM or Mini DVCAM cassette...

Page 53: ...indoor location The unit is brought from the air conditoned indoors to the hot outdoors The unit is used in a place subject to cold currents from an air conditioner When bringing the unit from a cold place to a warm place or vice versa put it in a plastic bag and seal the bag tightly After bringing it into the new place leave the bag on for about an hour and remove the bag when the air temperature...

Page 54: ...ert the cassette with the tape window upward Another tape is already in the tape compartment Moisture condensation has occurred With the power left on leave the VCR to dry for at least one hour A cassette is inserted at an angle Insert it properly The menu appears on the screen Press MENU to make it disappear No recording on the tape The video heads are dirty Clean the video heads Disconnect the D...

Page 55: ... 14 The VCR stops automatically when the tape counter reaches 0 00 00 Set the editing end point to 0 00 00 There is an unrecorded portion on the source tape The portion to be replaced is recorded in both 12bit and 16bit audio modes The counter is set to the remaining time display Press COUNTER SELECT so that the tape counter or time code appears in the display window pages 14 43 The counter displa...

Page 56: ...tteries are inserted in the battery compartment Turn on the power of the main unit Make sure you are pointing the remote commander at the remote sensor on the VCR Select the same COMMAND MODE on the VCR and the remote commander The COMMAND MODE selector on the unit is set to OFF COMMAND MODE selectors of this VCR and other Sony video equipment are set to the same number Change the setting of the C...

Page 57: ... VIDEO output LINE 1 LINE 2 OUT Mini DIN 4 pin Luminance signal 1 Vp p 75 ohms unbalanced Chrominance signal 0 286 Vp p 75 ohms unbalanced Audio input LINE 1 LINE 2 IN phono jack L R Input level 2 Vrms full bit Input impedance more than 47 kohms Audio output ID 2 LINE 1 LINE 2 OUT phono jack L R Output level 2 Vrms full bit Output impedance less than 10 kohms Control S input output Minijack Contro...

Page 58: ...ding mode1 Time mode 1 There are two modes for audio recording Lock mode and Unlock mode In Lock mode the sampling frequencies of audio and video are synchronized In Unlock mode which consumer DV format adopts the two sampling frequencies are independent Therefore lock mode is more effective than unlock mode in digital processing and smooth transition during audio editing DVCAM and DV cassettes Bo...

Page 59: ...tape produced will be in DVCAM format as follows Audio recording mode will be unlock mode The time code format will be partly maladjusted 3 Depending on signal conditions of the source tape you may not be able to edit the tape using the DV connectors 4 Audio recording mode of the edited tape is lock mode 5 Some DV video equipment may be able to play back a DVCAM formatted tape Even if the tape is ...

Page 60: ...tch You try to start playback or recording at the tape end n Rewind the tape or insert a new cassette You press a certain operation button during recording or editing During recording you try to change input sources PRESS 0 during at the beginning of the tape Turn off the VCR to make it enter timer standby mode When you insert into STEREO 1 or STEREO 2 track of the tape recorded in 12bit mode Fs32...

Page 61: ...nes 41 methods 36 video insert 45 I ID 1 30 ID 2 30 Insert editing audio insert 45 video insert 45 video on sound 49 Index search 27 J K Jog dial 25 L L1 L2 40 LANC jack 38 mode 38 Lock mode 58 M Menu changing options 20 chart 18 Mini DV cassette 13 Mini DVCAM cassette 7 N Non Drop Frame 38 O One PGM Program Play 32 Operation panel 10 P Q Photo search 27 Playback at various speeds 25 Print 16 50 R...

Page 62: ...on mécaniques ou à des chocs Ne placez pas l appareil en position inclinée Il est conçu pour fonctionner en position horizontale uniquement Gardez l appareil et les cassettes à l écart d appareils avec des aimants puissants comme les fours à micro ondes ou de grands haut parleurs Ne placez pas d objets lourds sur l appareil Si l appareil est amené sans transition d un endroit froid à un endroit ch...

Page 63: ...il à proximité de sources de chaleur telles que des radiateurs ou des bouches d air chaud ou dans un endroit exposé au rayonnement direct du soleil à de la poussière à des vibrations mécaniques ou à des chocs Ne placez pas l appareil en position inclinée Il est conçu pour fonctionner en position horizontale uniquement Gardez l appareil et les cassettes à l écart d appareils avec des aimants puissa...

Page 64: ...Introduction 4 F ...

Page 65: ...0 Visualisation d images élargies 31 Fonction de répétition automatique Auto Repeat 32 Lecture de programme unique One Program Play Enregistrement 33 Enregistrement par programmateur 34 Réglage du programmateur DSR 30P uniquement 35 Vérification modification annulation des réglages du programmateur DSR 30P uniquement Montage 36 Méthodes de montage 39 Raccordements et mise en route 41 Montage synch...

Page 66: ... DVCAM Lorsque vous enregistrez un programme la date et l heure d enregistrement ainsi que la position du programme sur la cassette sont mémorisés dans la cassette de sorte que vous puissiez localiser rapidement le programme ultérieurement indique que vous pouvez utiliser des cassettes pouvant enregistrer jusqu à 16 kbits de données Ce magnétoscope vous permet d utiliser des cassettes allant jusqu...

Page 67: ... que vous ne puissiez pas les copier sur d autres appareils Restrictions dues à la différence de format Ce magnétoscope peut enregistrer reproduire et effectuer le montage de cassettes enregistrées dans le format DVCAM Il peut également reproduire les cassettes enregistrées dans le format DV mode SP Toutefois en raison de la différence de format il se peut que vous ne puissiez pas enregistrer ou e...

Page 68: ...n mode de pause d enregistrement appuyez sur r tout en maintenant P enfoncé Vous ne pouvez pas le mettre en mode de pause d enregistrement en appuyant sur r du panneau de commande ou de la télécommande 9 Touche FF 0 Touche P PAUSE Touche p STOP Voir la section A à la page 9 Touche OPERATION PANEL OPEN CLOSE 10 Voir la section B à la page 9 Panneau de commande Fenêtre d affichage Indicateur DF DSR ...

Page 69: ...e des écouteurs B 1 Indicateur H fonction de verrouillage S allume lorsque le commutateur FUNCTION LOCK à l arrière est mis sur ON 2 Indicateur EXT TIMER REC 33 S allume lorsque le commutateur EXTERNAL TIMER à l arrière est mis sur REC 3 Indicateur STEREO S allume lorsque le magnétoscope est en mode stéréo 4 Indicateur MAIN L principal gauche S allume lorsque le magnétoscope est réglé pour écouter...

Page 70: ...ire l image à différentes vitesses Sélectionnez la vitesse souhaitée entre 1 5 lente 1 2 10 et 15 18 pour le DSR 30P Molette Jog 25 En cours de pause utilisez cette molette pour reproduire ou rechercher l image à différentes vitesses La vitesse de lecture change en fonction de la vitesse sur laquelle vous réglez la molette Touche MARK 43 Touche r REC Voir la section G à la page 11 Sélecteur COMMAN...

Page 71: ... secondaire MAIN L Son principal Canal gauche uniquement SUB R Son secondaire Canal droit uniquement 6 Touche DATA CODE Voir Affichage des informations de la cassette à la page 29 7 Touche COUNTER RESET 14 8 Touche COUNTER SELECT 14 1 2 3 1 2 3 4 D 1 Touche MENU 20 2 Touche EXECUTE 20 3 Touches CURSOR M Â µ m 20 E 1 Sélecteur AUDIO MONITOR 40 Permet de sélectionner la plage audio que vous désirez ...

Page 72: ... touches du panneau avant et le panneau de commande de l appareil principal sont alors inopérantes Pour verrouiller les touches de la télécommande et les prises CONTROL S IN OUT faites coulisser le sélecteur COMMAND MODE du panneau de commande de l appareil principal sur OFF Vous ne pouvez pas verrouiller la prise LANC 9 Sélecteur EXTERNAL TIMER Permet de sélectionner la fonction d enregistrement ...

Page 73: ... allume lors de l affichage du code temporel 2 Indicateur REMAIN temps restant S allume lors de l affichage du temps restant 3 Indicateur REC enregistrement S allume en cours d enregistrement de pause d enregistrement ou d enregistrement par programmateur externe DSR 30P uniquement TIMER et REC s allument en cours d enregistrement par programmateur interne TIMER s allume en mode de veille d enregi...

Page 74: ...ment Il est possible que l indication du compteur soit imprécise si une cassette comportant des portions vierges est rembobinée ou avancée plusieurs fois de suite En cours d avance rapide de rembobinage ou de recherche la vitesse de la cassette se règle automatiquement sur la quantité restante de la cassette Dans ces cas l indication de compteur ou de code temporel peut s arrêter momentanément Uti...

Page 75: ...éléviseur Touche INPUT SELECT Touche marche arrêt Touches VOL volume Touches CHANNEL Vous pouvez utiliser ces touches pour un moniteur téléviseur Sony avec indication g 5 Touche r REC 6 Touche FF 7 Touche P PAUSE 8 Touche p STOP 9 Bague Shuttle 25 0 Molette Jog 25 Touche PLAY Touche 0 REW Touches SEARCH 3 25 Touches CHANNEL Servent à sélectionner la prise d entrée Touches AUDIO MONITOR 11 Touches ...

Page 76: ...s ensemble Respectez l agencement des polarités et indiquées sur le dessin à l intérieur du compartiment à piles 1 Touche COUNTER SELECT 14 2 Touche COUNTER RESET 14 3 Touche PRINT Lorsque vous raccordez les connecteurs LANC de ce magnétoscope et d une imprimante vidéo vous pouvez lancer l impression en appuyant sur cette touche Pour plus de détails reportez vous au mode d emploi de l imprimante v...

Page 77: ... avec l autre magnétoscope sur la même position que celle de ce magnétoscope Conseils Si vous mettez COMMAND MODE du panneau de commande sur OFF vous ne pouvez plus contrôler ce magnétoscope à partir d une autre télécommande Sony Si l autre magnétoscope Sony ne possède pas de commutateur COMMAND MODE utilisez les réglages suivants VTR 1 Pour les magnétoscopes Sony au format Betamax VTR 2 Pour les ...

Page 78: ...T UP MENU PAGE 2 22 DSR 30 CASSETTE MEMORY ERASE EXECUTE SELECT MENU CLOCK SET Y C DELAY SET UP MENU SET µ CASSETTE MEMORY ERASE ALL DATA INDEX DATA DATE DATA PHOTO DATA SELECT SET CANCEL YES YES YES YES NO NO NO NO µ Mm EXECUTE MENU CLOCK SET 0 00 SELECT SET END µ Mm EXECUTE Y C DELAY SET PLAY OR DV INPUT AND Mm SET UP MENU PAGE 1 L1 IN VIDEO AUDIO MODE TIME CODE CM SEARCH SELECT S 16 DF ON NO...

Page 79: ...SR 30 Réglez d abord le mois La date s affiche à l écran suivant le modèle mois jour année 4 Appuyez sur les touches CURSOR pour mettre en évidence le mois et réglez le mois à l aide des touches CURSOR DSR 30 Réglez le jour 5 Répétez l étape 4 pour régler l année et puis l heure et les minutes 6 Appuyez sur EXECUTE pour mettre l horloge en marche Le menu CLOCK SET disparaît de l écran DSR 30P CLOC...

Page 80: ...ge TIME CODE dans SET UP MENU PAGE 1 3 Appuyez sur les touches CURSOR pour déplacer le curseur I sur l option que vous désirez modifier et appuyez sur les touches CURSOR pour modifier le réglage Le contenu de chaque menu est affiché aux pages 21 et 22 4 Appuyez sur EXECUTE Le menu disparaît de l écran du moniteur CASSETTE MEMORY ERASE EXECUTE SELECT MENU CLOCK SET Y C DELAY SET UP MENU SET µ SET ...

Page 81: ...mporel sur Drop Frame NDF pour régler le code temporel sur Non Drop Frame ON pour rechercher les enregistrements avec la mémoire de la cassette Si la cassette ne possède pas de mémoire de cassette le magnétoscope recherchera les enregistrements au moyen des signaux d index enregistrés sur la cassette même OFF pour rechercher les enregistrements au moyen des signaux d index enregistrés sur la casse...

Page 82: ...des OFF pour ne pas afficher les indicateurs de défilement de la bande du magnétoscope à l écran Lorsque vous utilisez ce magnétoscope comme lecteur en cours de montage mettez cette option sur OFF de manière à éviter que les indicateurs de défilement de la bande ne soient enregistrés sur le magnétoscope enregistreur ON pour écouter le son lors de la lecture d une cassette image par image ou à une ...

Page 83: ...lorsque l image d entrée DV est affichée appuyez sur MENU 2 Appuyez sur les touches CURSOR pour déplacer le curseur I sur Y C DELAY puis appuyez sur EXECUTE 3 Appuyez sur les touches CURSOR pour corriger le décalage de couleur de l image 4 Appuyez sur EXECUTE Le menu disparaît de l écran du moniteur Y C DELAY SET PLAY OR DV INPUT AND Mm CASSETTE MEMORY ERASE EXECUTE SELECT MENU CLOCK SET Y C DELAY...

Page 84: ...onnez Pour supprimer ALL DATA L intégralité de la mémoire INDEX DATA Les signaux de recherche indexée DATE DATA Les signaux de recherche par date PHOTO DATA Les signaux de recherche photographique 4 Appuyez sur EXECUTE Un message apparaît pour confirmer l opération 5 Appuyez sur EXECUTE Les données sélectionnées sont supprimées ensuite le magnétoscope revient à l écran d origine CASSETTE MEMORY ER...

Page 85: ...rs d avance rapide ou de rembobinage Lecture à différentes vitesses suite page suivante Utilisation de la bague Shuttle Options de lecture Lecture à différentes vitesses Avance rapide rembobinage Cette caractéristique n est pas disponible lors de l utilisation d une télécommande ou lors du contrôle d un autre magnétoscope à partir de ce magnétoscope Utilisation du disque Jog En mode de pause tourn...

Page 86: ... sur FRAME ou 7 Utilisation des touches de la télécommande Options de lecture Lecture en double vitesse Visualisation d une image à vitesse élevée Lecture au ralenti Lecture image par image Pour revenir à la lecture normale Appuyez sur PLAY Pour entendre le son en lecture au ralenti et image par image Si vous désirez entendre le son en lecture au ralenti et image par image mettez JOG WITH SOUND du...

Page 87: ...r SEARCH SELECT pour sélectionner le type de recherche INDEX DATE ou PHOTO SEARCH L indicateur du type de recherche sélectionné s allume La liste chronologique apparaît sur l écran du moniteur 2 Appuyez sur ou pour sélectionner un enregistrement Le magnétoscope commence la recherche et lorsqu il localise l enregistrement la lecture commence En cours de recherche de photo le magnétoscope se met en ...

Page 88: ...cope Signaux de Dans la mémoire de cassette Sur la cassette Recherche indexée Oui Oui Recherche par date Non Oui Recherche de photo Non Non Les signaux de recherche indexée sont enregistrés lorsque vous commencez l enregistrement pour la première fois en mode d arrêt A propos du signal d index Chaque programme est indexé à son début Si vous enregistrez un autre programme sur le début du premier pr...

Page 89: ... fois que vous appuyez sur DATA CODE l affichage change comme suit Conseil Lorsque les informations n ont pas été enregistrées apparaît à la place Remarques Les données du caméscope affichées sur l écran du moniteur par ce magnétoscope sont partiellement différentes de celles affichées par un caméscope numérique Vous ne pouvez pas consulter les informations CLIP LINK sur ce magnétoscope Illustrati...

Page 90: ...ur ON dans le SET UP MENU de ce magnétoscope Des bandes noires apparaissent en haut et en bas de l écran en bas uniquement sur le DSR 30P ce qui donne l impression d un grand écran mode CINEMA Visualisation sur un téléviseur grand écran Mettez WIDE PB sur OFF dans le SET UP MENU de ce magnétoscope et mettez le téléviseur grand écran sur 16 9 FULL mode Dans le cas d un téléviseur grand écran compat...

Page 91: ...NAL TIMER situé à l arrière de l appareil principal sur PB AUTO REPEAT L indicateur AUTO REPEAT sur le panneau avant s allume 3 Définissez l heure d activation du programmateur externe A l heure prédéfinie l appareil se met sous tension et après environ 30 secondes pas plus de 30 la lecture Auto Repeat débute automatiquement Pour arrêter la répétition automatique Appuyez sur p Pour sortir du mode ...

Page 92: ...ure de la cassette s interrompt Le magnétoscope reproduit la cassette à partir du début jusqu au premier index s il n y a pas d index sur la cassette elle se poursuit jusqu à la portion non enregistrée et s il n y a pas de portion non enregistrée elle va jusqu à la fin de la bande et s arrête Ensuite la cassette est rembobinée jusqu au début L endroit où la cassette s arrête est identique au point...

Page 93: ...ource d enregistrement n ait terminé La cassette s arrête sans rembobiner Pour arrêter l enregistrement en cours d enregistrement par programmation Appuyez sur p STOP Pour annuler la fonction d enregistrement par programmateur externe Mettez le commutateur EXTERNAL TIMER sur OFF Attention Lorsqu une cassette défile n éteignez pas l appareil au moyen du programmateur externe Le magnétoscope et la c...

Page 94: ...rêter l enregistrement Pour arrêter le magnétoscope en cours d enregistrement appuyez sur p STOP Enregistrement quotidien hebdomadaire Lorsque vous réglez la date de début d enregistrement à l étape 2 appuyez sur CURSOR pour sélectionner le type d enregistrement Chaque fois que vous appuyez sur la touche l indication change comme illustré ci contre Réglage du programmateur DSR 30P uniquement Conse...

Page 95: ...appuyez sur les touches CURSOR pour mettre en évidence le paramètre que vous désirez modifier et redéfinissez le à l aide des touches CURSOR Ensuite appuyez sur CURSOR pour déplacer le curseur dans la colonne la plus à gauche Pour annuler le réglage appuyez sur les touches CURSOR pour mettre en évidence l heure de début du paramètre que vous désirez annuler et définissez une heure avant l heure ac...

Page 96: ... vous copiez une cassette source à l aide de cette fonction vous pouvez réaliser une cassette de travail possédant les mêmes codes temporels que la cassette source Le contenu de la mémoire de cassette n est pas copié Vous avez besoin d un magnétoscope DVCAM muni d une prise de sortie DV et d une prise LANC Montage par assemblage Vous pouvez effectuer le montage d un maximum de 10 événements simult...

Page 97: ...ue celui de la cassette source Pour enregistrer dans un mode d enregistrement audio différent que celui de la cassette source utilisez la connexion LINE à la place Avec la connexion DV les informations de la cassette date d enregistrement données du caméscope etc enregistrées sur la cassette source sont transmises par l autre magnétoscope lecteur Par conséquent lorsque vous reproduisez une cassett...

Page 98: ...de la valeur du code temporel au début de chaque minute à l exception de la dixième minute Mode d image non désynchronisée Le mode d image non désynchronisée ignore l écart entre le code temporel et l heure réelle de l horloge Ce mode est également appelé Mode d image intégrale ou Mode d image normale Etant donné qu il n omet pas les images une longueur d un jour comme indiqué sur le code temporel...

Page 99: ... VIDEO du SET UP MENU sur NORM Pour donner priorité aux signaux de la prise vidéo LINE 2 IN débranchez les câbles de la prise S VIDEO du magnétoscope Les signaux déformés p ex lorsqu ils sont reproduits à une vitesse autre que la normale ne seront pas enregistrés convenablement Conseil Pour raccorder un magnétoscope monaural utilisez la prise LINE 2 IN et branchez la à la prise L blanche laissez l...

Page 100: ...rsque vous utilisez ce magnétoscope comme lecteur Dans les pages suivantes les procédures de montage concernent ce magnétoscope en tant qu enregistreur Pour utiliser ce magnétoscope comme lecteur retenez ce qui suit Lors du raccordement de la prise LANC mettez LANC MODE sur S dans le SET UP MENU page 21 Si l autre appareil qui contrôle ce magnétoscope possède la fonction de code temporel appuyez s...

Page 101: ...rrêt du montage appuyez sur RECORDER et rebobinez la bande jusqu à cet endroit au moyen de la bague Shuttle ou du disque Jog 5 Pour effectuer le montage d une autre scène répétez les étapes 1 à 4 6 Pour terminer le montage appuyez sur EDIT STANDBY Les deux magnétoscopes s arrêtent Montage synchronisé Remarques L enregistrement ne s arrête pas dès que vous appuyez sur p pour arrêter le montage Il s...

Page 102: ...NDBY 4 Appuyez sur START PAUSE Pour arrêter la duplication Appuyez sur p STOP Duplication Remarques Lorsque vous démarrez la copie il se peut que le niveau de la première partie de la cassette source diminue sur la cassette de copiee Il se peut que vous ne puissiez pas copier la première partie ou un passage non enregistré de la cassette source Recherchez le passage enregistré sur la cassette sour...

Page 103: ...ge Ne sélectionnez pas une autre entrée en cours de montage par assemblage Il se peut que le montage ne s effectue pas correctement Il se peut que ce magnétoscope ne fonctionne pas normalement si les points IN OUT ne sont pas séparés par plus de deux secondes Si un événement que vous désirez enregistrer possède un repère de code temporel de moins de 0 01 00 00 le montage de l événement ne sera pas...

Page 104: ...uyez sur ASSEMBLE Le mode de montage par assemblage est annulé et les points IN OUT conservés en mémoire sont supprimés 2 Répétez les étapes 2 à 7 Pour arrêter le montage par assemblage Pour arrêter en cours d assemblage appuyez sur START PAUSE Ce magnétoscope se met en pause d enregistrement et vous pouvez vérifier les événements ou modifier le point de départ d enregistrement Lorsque vous appuye...

Page 105: ...que vous enregistrez à partir d une entrée DV Appuyez sur STEREO 1 INSERT et STEREO 2 INSERT Vous ne pouvez pas remplacer uniquement la piste stéréo 1 ou stéréo 2 Lorsque vous enregistrez à partir des entrées LINE Pour enregistrer en audio 16 bits Fs48k appuyez sur STEREO 1 INSERT et STEREO 2 INSERT Pour enregistrer en audio 12 bits Fs32k sur la piste stéréo 1 appuyez sur STEREO 1 INSERT Pour enre...

Page 106: ... montage par insertion vidéo insertion audio ou insertion vidéo et audio commence Lorsque le compteur de bande atteint 0H00M00S l enregistrement sur ce magnétoscope s arrête automatiquement l autre magnétoscope continue la lecture Pour arrêter l autre magnétoscope appuyez sur PLAYER puis appuyez sur p Pour arrêter l enregistrement manuellement appuyez sur START PAUSE Insertion vidéo audio suite Co...

Page 107: ...uyez sur STEREO 1 INSERT et STEREO 2 INSERT Vous ne pouvez pas remplacer uniquement la piste stéréo 1 ou stéréo 2 Lorsque vous enregistrez à partir des entrées LINE Pour enregistrer en audio 16 bits Fs48k appuyez sur STEREO 1 INSERT et STEREO 2 INSERT Pour enregistrer en audio 12 bits Fs32k sur la piste stéréo 1 appuyez sur STEREO 1 INSERT Pour enregistrer en audio 12 bits Fs32k sur la piste stéré...

Page 108: ...désirez remplacer appuyez sur P sur ce magnétoscope pour commencer l enregistrement Le montage par insertion vidéo insertion audio ou insertion vidéo et audio commence Lorsque le compteur de bande atteint 0H00M00S la cassette d enregistrement s arrête automatiquement 7 Appuyez sur la touche d arrêt du lecteur Conseil Si vous ne désirez pas arrêter le montage par insertion lorsque le compteur arriv...

Page 109: ...de d enregistrement audio que la cassette source quel que soit le réglage AUDIO MODE du SET UP MENU Pour cette connexion appuyez sur les touches STEREO 1 INSERT et STEREO 2 INSERT Lorsque vous enregistrez à partir des entrées LINE Le son est enregistré dans le mode d enregistrement audio sélectionné dans AUDIO MODE de SET UP MENU Habituellement choisissez le mode d enregistrement audio d origine d...

Page 110: ...dez une titreuse et un SEG numérique équipé d une prise S VIDEO utilisez la connexion S VIDEO Raccordement d une carte d acquisition d image fixe Mettez LANC MODE de ce magnétoscope sur S Raccordement d une imprimante vidéo équipée d une prise LANC Mettez LANC MODE de ce magnétoscope sur S Réalisation d un système de duplication de cassette en raccordant un nombre de modules DSR 30 30P Veillez à u...

Page 111: ... finition de l appareil Ne vaporisez pas de solvant volatile comme un insecticide en direction du châssis et ne placez pas de produits en caoutchouc ou en vinyle sur le châssis pendant trop longtemps car cela peut endommager la surface de finition du châssis ou faire disparaître son revêtement Ne nettoyez pas le châssis avec du diluant ou du benzène Cela peut endommager la surface de finition du c...

Page 112: ...Dans ce cas vous devez remplacer les têtes vidéo par des neuves Adressez vous à votre revendeur Sony Remarques à propos des cassettes vidéo Cassettes utilisables Nous recommandons l utilisation de cassettes DVCAM standard minicassettes DVCAM pour tirer le meilleur parti de la haute fiabilité du format DVCAM Nettoyage de la borne Si la borne de la cassette DVCAM standard ou de la minicassette DVCAM...

Page 113: ...ièce chauffée L appareil est transporté d une pièce climatisée vers l extérieur où il fait chaud L appareil est utilisé dans un endroit exposé au courant d air froid d un climatiseur Lorsque vous transportez l appareil d un endroit froid dans un endroit chaud ou vice versa mettez le dans un sac en plastique et refermez le sac hermétiquement Une fois dans l endroit de destination laissez le sac pen...

Page 114: ...rouve déjà dans le compartiment à cassette De la condensation s est formée Laissez le magnétoscope sous tension et attendez qu il sèche pendant au moins une heure Une cassette est insérée en oblique Insérez la correctement Le menu apparaît à l écran Appuyez sur MENU pour le faire disparaître Il n y a pas d enregistrement sur la cassette Les têtes vidéo sont sales Nettoyez les têtes vidéo Débranche...

Page 115: ...MER est mis sur REC page 33 Le commutateur EXTERNAL TIMER est mis sur PB AUTO REPEAT page 31 Vérifiez que le sélecteur de protection est mis en position d enregistrement page 6 DSR 30 uniquement En mode DF Image désynchronisée il se peut que le code temporel passe de 29 images à 02 images page 38 Il y a une portion vierge blanc entre les portions enregistrées page 14 Les codes temporels ne sont pa...

Page 116: ...par des neuves Aucune pile n est insérée dans le compartiment à piles Mettez l appareil principal sous tension Veillez à orienter la télécommande en direction du capteur du magnétoscope Sélectionnez le même COMMAND MODE sur le magnétoscope et sur la télécommande Le sélecteur COMMAND MODE de l appareil est mis sur OFF Les sélecteurs COMMAND MODE de ce magnétoscope et de l autre appareil vidéo Sony ...

Page 117: ...trement Format DVCAM Signal vidéo DSR 30 EIA STANDARD système couleur NTSC DSR 30P CCIR STANDARD système couleur PAL Cassettes utilisables Cassettes DVCAM standard et minicassettes DVCAM Durée d enregistrement 184 minutes avec des cassettes PDV 184ME 40 minutes avec des cassettes PDVM 40ME Horloge A quartz DSP 30 affichage au format 12 heures DSP 30P affichage au format 24 heures Réserve d aliment...

Page 118: ...enregistrement audio le mode de verrouillage et le mode de déverrouillage En mode de verrouillage les fréquences d échantillonnage des pistes audio et vidéo sont synchronisées En mode de déverrouillage qui est le mode adopté par le format grand public DV les deux fréquences d échantillonnage sont indépendantes Par conséquent le mode de verrouillage est plus efficace que le mode de déverrouillage l...

Page 119: ...a pas verrouillé le code de temps sera partiellement mal ajusté 3 Selon l état du signal de la cassette source vous ne pourrez peut être pas copier la cassette quand vous utilisez les prises DV 4 Le mode d enregistrement du son de la cassette copiée est le mode verrouillé 5 Certains appareils DV peuvent reproduire les cassettes formatées en DVCAM mais il n est pas possible de garantir la qualité d...

Page 120: ...émoire de la cassette Vous essayez d effacer INDEX DATA DATE DATA ou PHOTO DATA sur une cassette ayant plus de 16 kbits de capacité de mémoire n Supprimez ALL DATA sur la cassette Vous effectuez certaines opérations pendant que le magnétoscope écrit dans la mémoire de la cassette n Effectuez ces opérations lorsque l inscription dans la mémoire de la cassette est terminée En cours de montage le câb...

Page 121: ...3 Minicassette DVCAM 7 Mode audio 12 bits 16 bits 21 37 45 47 49 Mode de commande 17 Mode de déverrouillage 58 Mode de duplication 42 Mode d enregistrement audio 37 Mode de verrouillage 58 Montage insertion audio 45 par assemblage 43 connexions 39 suppression de scènes 41 méthodes 36 insertion vidéo 45 Montage par insertion insertion audio 45 insertion vidéo 45 vidéo sur son 49 N O Nettoyage 51 P ...

Page 122: ......

Page 123: ......

Page 124: ...Sony Corporation Printed in Japan ...

Reviews: