background image

Ajustes

32

ES

Ajustes

3

Seleccione el elemento que desee mediante 

>

/

.

 y

presione 

/

 o ENTER.

4

Seleccione el ajuste que desee mediante 

>

/

.

 y

presione ENTER.

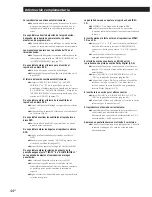
Para cancelar mediante la pantalla de ajustes durante el
proceso

Presione SET UP.

Nota

Ciertos elementos de la pantalla de ajustes requieren
operaciones diferentes a la selección del ajuste. Para más
información sobre estos elementos, consulte las páginas
correspondientes.

SET UP

ENTER

?

/

>

/

.

/

/

ENTER

1

2

1

2

S A L I R

A J U S T E     I N I C I A L     1

T I P O     T V :

N O

R E P R O D U C C I O N     A U T O :

A T E N U A D O R :
F O N D O :

A Z U L

S I

N O

SETUP

B R I L L O

L E T T E R   B O X

4 : 3

P R O T E C T O R     P A N T A L L A :
C O N T R O L     D E     B L O Q U E O

ENTER

1

2

1

2

S A L I R

A J U S T E     I N I C I A L     1

T I P O     T V :

N O

R E P R O D U C C I O N     A U T O :

A T E N U A D O R :
F O N D O :

A Z U L

S I

SETUP

B R I L L O

L E T T E R   B O X

4 : 3

P R O T E C T O R     P A N T A L L A :
C O N T R O L     D E     B L O Q U E O

ENTER

1

2

1

2

S A L I R

A J U S T E     I N I C I A L     1

T I P O     T V :

N O

R E P R O D U C C I O N     A U T O :

A T E N U A D O R :
F O N D O :

A Z U L

N O

SETUP

B R I L L O

L E T T E R   B O X

4 : 3

P R O T E C T O R     P A N T A L L A :
C O N T R O L     D E     B L O Q U E O

ENTER

1

2

1

2

S A L I R

A J U S T E     I N I C I A L     1

T I P O     T V :

N O

R E P R O D U C C I O N     A U T O :

A T E N U A D O R :
F O N D O :

A Z U L

S I

SETUP

B R I L L O

L E T T E R   B O X

4 : 3

P R O T E C T O R     P A N T A L L A :
C O N T R O L     D E     B L O Q U E O

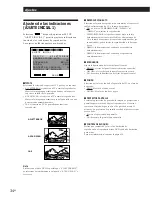
Elemento principal

Uso de la pantalla de ajustes 

Z

Mediante esta pantalla, es posible realizar el ajuste
inicial, ajustes de la calidad de imagen y sonido, ajustes
de las distintas salidas, etc. También es posible definir
un idioma para los subtítulos y la pantalla de ajustes,
limitar la reproducción para niños, etc.
Para obtener información detallada sobre cada
elemento de la pantalla de ajustes, consulte las páginas
33 a 35. Si desea cambiar los ajustes del canal 5.1,
consulte las páginas 36 a 41.
Los elementos del visor de configuración aparecen en
la página 51.

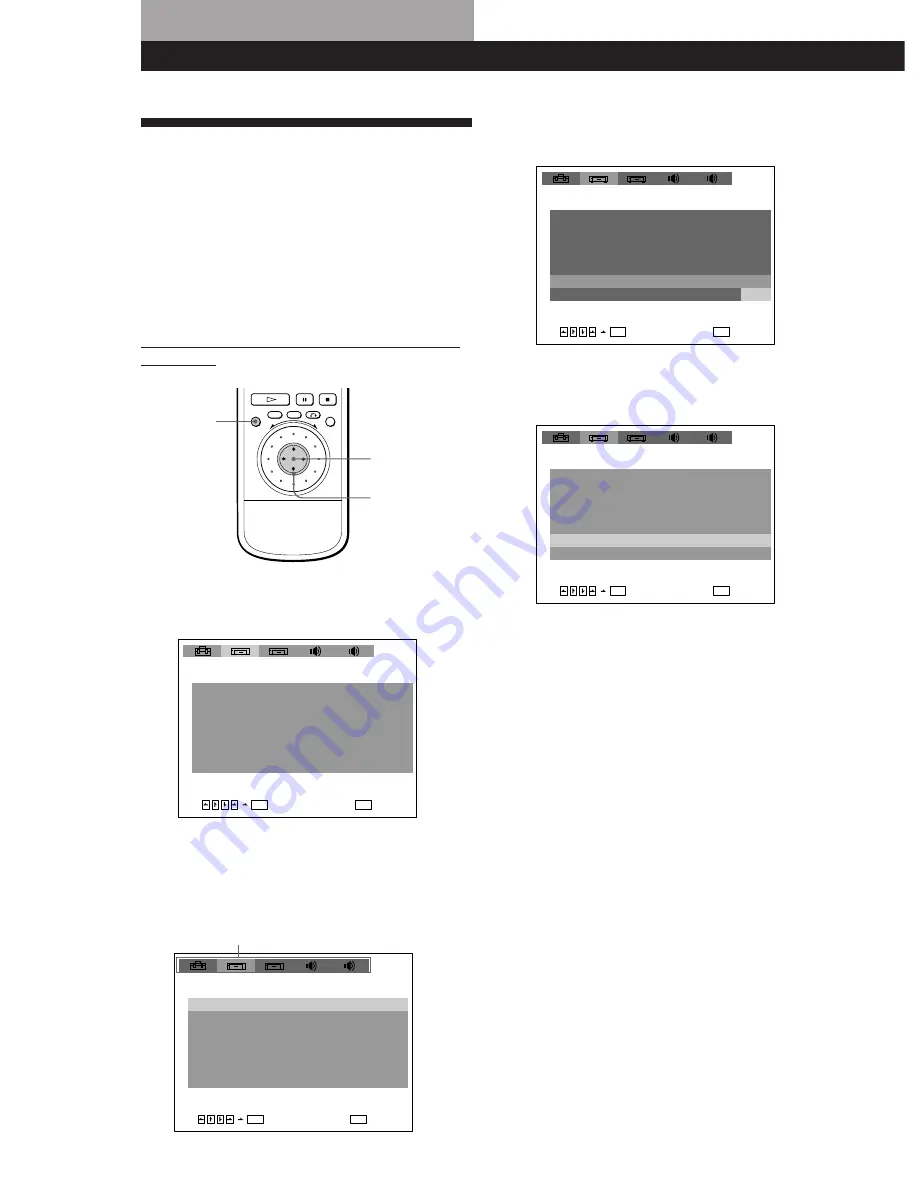
1

Presione SET UP para que la pantalla del TV
muestre la pantalla de ajustes.

2

Seleccione el elemento principal que desee
mediante 

?

/

/

 y, a continuación, presione

ENTER.
El elemento principal seleccionado aparece
resaltado.

Summary of Contents for DVP-S500D

Page 1: ...3 862 097 23 1 CD DVD Player Operating Instructions Manual de instrucciones EN ES C2 C2 1998 by Sony Corporation DVP S500D ...

Page 2: ...ontal position only Keep the unit and discs away from equipment with strong magnets such as microwave ovens or large loudspeakers Do not place heavy objects on the unit If the unit is brought directly from a cold to a warm location moisture may condense inside the CD DVD player and cause damage to the lenses When you first install the unit or when you move it from a cold to a warm location wait fo...

Page 3: ... Parental Control 28 Controlling the TV or the AV receiver with the Supplied Remote 30 Settings and Adjustments Using the Setup display 32 Setting the Language for Display and Sound LANGUAGE SETUP 33 Settings for Display INITIAL SETUP 1 34 Settings for Sound INITIAL SETUP 2 35 Dolby Digital Surround What is Dolby Digital Surround 36 Speaker System Hookups 36 Speaker Setup 38 Setting for Dolby Digi...

Page 4: ...de printed on the back of the unit and will only play DVDs that are labeled with identical region codes DVDs labeled ALL will also play on this unit If you try to play any other DVD the message Playing this disc prohibited by area limits will appear on the TV screen Depending on the DVD no region code indication may be labeled even though playing the DVD is prohibited by the area limits Note on pl...

Page 5: ...CD A number that divides a track some sections to easily locate the point you want on a VIDEO CD or a CD Depending on the disc no indexes may be recorded Scene On a VIDEO CD with PBC functions the menu screens moving pictures and still pictures are divided into sections called scenes Each scene is assigned a scene number enabling you to locate the scene you want Note on PBC Playback Control VIDEO ...

Page 6: ...l flow To an AC outlet To an AC outlet Amplifier Receiver Unpacking Check that you have the following items Audio video connecting cord 1 S video cable 1 Remote commander remote RMT D102A 1 Size AA R6 batteries 2 Inserting batteries into the remote You can control the player using the supplied remote Insert two R6 size AA batteries by matching the and on the batteries When using the remote point i...

Page 7: ... high In this case set AUDIO ATT in INITIAL SETUP 2 to ON in the setup display For details see page 35 z If your TV has an S video input connector Connect the component via the S VIDEO OUT connector using the S video cable supplied instead of the video connecting cord You will get a better picture z If you connect the player to a monitor or projector with component video input connectors that conf...

Page 8: ...he component to be connected You cannot make digital audio recordings of discs recorded in Dolby Digital AC 3 format directly using an MD deck or DAT deck When you make the connections above do not set DIGITAL OUT in INITIAL SETUP 2 to DOLBY DIGITAL PCM If you do a loud noise will suddenly come out from the speakers affecting your ears or causing the speakers to be damaged Optical digital connecti...

Page 9: ...ker system and page 38 to set each speaker position or distance etc pTo connect the player to an audio component with a built in Dolby Digital decoder In the setup display set DIGITAL OUT in INITIAL SETUP 2 to DOLBY DIGITAL PCM Use the setup display to change the various settings for the picture and sound For details see page 32 To enjoy surround sound with front speakers only set MODE in 5 1 OUTP...

Page 10: ...VD 1 The operating procedure of CDs or VIDEO CDs is different from that of DVDs For details see pages 14 to 17 z You can turn on the player using the remote Press POWER when the indicator above the POWER button on the front panel is lit in red The DOLBY DIGITAL indicator lights up except for the case as follows you insert a CD or a VIDEO CD the current audio format is PCM or MPEG Audio Note If you...

Page 11: ...HAPTER SEARCH TITLE SEARCH and TIME SEARCH appear on the TV screen z When RESUME appears on the front panel display You can resume playback from the point where you stopped the DVD For details on playing from the beginning of the disc see page 25 Note You may not be able to do Resume Play depending on the DVD p P Press p P P or 1 SEARCH MODE repeatedly until CHAPTER SEARCH appears on the TV screen...

Page 12: ...or you can playback a DVD with various speed or frame by frame Each time you press JOG it changes between shuttle mode and jog mode pTo change the playback speed Shuttle mode Turn the click shuttle The playback speed changes depending on the turning direction and angle as follows FF2 about 30 times the normal speed FF1 about 10 times the normal speed 2 about twice the normal speed PLAY Normal spee...

Page 13: ...e language for the subtitles the language for the sound etc using the DVD menu Press DVD MENU The DVD menu appears on the TV screen The contents of the menu vary from disc to disc Press to select the item you want to change Depending on the disc you can use the number buttons to select the item To change other items repeat Step 2 Press ENTER 1 2 3 TITLE ENTER ENTER TITLE Notes Depending on the DVD...

Page 14: ...hat of CDs or VIDEO CDs For details see pages 10 to 13 z You can turn on the player using the remote Press POWER when the indicator above the POWER button on the front panel is lit in red 2 Connect headphones Adjust the headphone volume 2 4 3 3 4 With the label side facing up z After following Step 4 The menu screen may appear on the TV screen depending on the VIDEO CD You can play the disc intera...

Page 15: ...hat is an index See page 5 z What is a scene See page 5 z If you want to change the search mode Press SEARCH MODE Each time you press in case of a VIDEO CD SCENE SEARCH TRACK SEARCH and V VIDEO INDEX SEARCH appear on the TV screen In case of a CD only TRACK SEARCH appears Note Some discs do not allow you to start playing from a particular scene In this case if you do Scene Search before you start ...

Page 16: ... changes between shuttle mode and jog mode pTo change the playback speed Shuttle mode Turn the click shuttle The playback speed changes depending on the turning direction and angle as follows FF2 Faster than FF1 FF1 2 about twice the normal speed PLAY Normal speed SLOW1 playback direction VIDEO CD Only SLOW2 playback direction Slower than SLOW1 VIDEO CD Only PAUSEP FR10 FR20 Faster than FR10 If yo...

Page 17: ...tive operations Refer to the instructions supplied with the disc as the operating procedure may differ according to the VIDEO CD Going back to the menu screen Press ˆ or z When playing VIDEO CDs with PBC functions PBC playback starts automatically z To cancel PBC playback of a VIDEO CD with PBC functions and play the disc in Continuous Play mode There are two ways Before you start playing select t...

Page 18: ...mation of the on screen display 3 mode While playing a disc the approximate bit rate of the playback picture is always displayed by Mbps Mega bit per second z What is bit rate Bit rate refers to the amount of video data per second in a disc The higher the bit rate is the larger the amount of data However this does not always mean that you can get higher quality pictures Current title number total ...

Page 19: ...track Remaining time of the current track Playing time of the disc Remaining time of the disc While you are doing Shuffle Play Program Play or PBC Playback the playing time of the disc and the remaining time of the disc are not displayed pDisplay information of the on screen display off mode No information is displayed Messages etc will be displayed Current index number TRACK 11 12 07 TRACK REPEAT...

Page 20: ...ng time Press TIME Each time you press TIME while playing the disc the display changes as shown in the following chart The time information in the on screen display 1 or 2 mode also changes each time you press TIME TIME Remaining time of the current title Press TIME Press TIME Playing time and number of the current title Press TIME Press TIME Remaining time of the current chapter Playing time and ...

Page 21: ...information in the on screen display 1 and 2 mode also changes each time you press TIME Note While you are doing Shuffle Play Program Play or PBC playback the playing time of the disc and the remaining time of the disc are not displayed Playing time and number of the current track Remaining time of the current track Remaining time of the disc Press TIME Press TIME Press TIME Playing time of the di...

Page 22: ... You may not be able to do Repeat Play depending on the DVD pRepeating the current title While the title you want is being played press REPEAT repeatedly until TITLE REPEAT appears on the TV screen The player repeats the current title pRepeating the current chapter While the chapter you want is being played press REPEAT repeatedly until CHAPTER REPEAT appears on the TV screen The player repeats th...

Page 23: ...and the player starts repeating this specific portion REPEAT A B appears on the front panel display during A B repeat play To cancel A B Repeat Press CLEAR To cancel setting halfway Press CLEAR Notes A B Repeat is canceled when you open or close the disc tray you turn the power off When you set A B Repeat the settings for Shuffle Play and Program Play are canceled You may not be able to set A B Re...

Page 24: ...M CLEAR ENTER PROGRAM PLAY ENTER A L L CLEAR 1 T T L E I 2 T T L E I 3 T T L E I 4 T T L E I 5 T T L E I 6 T T L E I 7 T T L E I 8 T T L E I 9 T T L E I PROGRAM T 0 1 0 2 0 3 0 4 0 5 0 6 0 7 PROGRAM PLAY ENTER A L L CLEAR 1 T T L E 0 2 I 2 T T L E I 3 T T L E I 4 T T L E I 5 T T L E I 6 T T L E I 7 T T L E I 8 T T L E I 9 T T L E I PROGRAM C T 0 1 A L L 0 1 0 2 0 2 0 3 0 3 0 4 0 4 0 5 0 6 0 7 PROG...

Page 25: ...T T L E 1 5 I 3 T T L E 0 3 I 4 T T L E 0 5 I 5 T T L E 0 7 1 4 I 6 T T L E I 7 T T L E I 8 T T L E I 9 T T L E I PROGRAM T 0 1 0 2 0 3 0 4 0 5 0 6 0 7 Resuming Playback from the Point Where You Stopped a Disc Resume Play The player stores the point where you stopped a disc if RESUME appears on the front panel display In this case you can resume playback from that point As long as you do not open ...

Page 26: ...d when you open or close the disc tray you change the title If the language is displayed as 4 digits number refer to the language code list in page 52 SUBTITLE CHANGE SUBTITLE ON OFF AUDIO 3 PORTUGUESE Displaying the SubtitlesZ With DVDs on which subtitles are recorded you can turn the subtitles on and off whenever you want while playing the DVD With DVDs on which multilingual subtitles are record...

Page 27: ...you can change the angles whenever you want while playing the DVD When ANGLE appears on the front panel display while playing a DVD press ANGLE CHANGE repeatedly until you get the angle you want ANGLE 1 n ANGLE 2 n z You can specify the angle beforehand Specify the angle when ANGLE is not displayed on the front panel display When a scene on which multi angles are recorded comes the angle is automa...

Page 28: ...CREEN SAVER ON PARENTAL CONTROL 1 2 INITIAL SETUP 1 TV TYPE LETTER BOX OFF AUTO PLAY DIMMER BACKGROUND BRIGHT BLUE ENTER QUIT SETUP 1 2 4 3 SCREEN SAVER ON PARENTAL CONTROL 1 1 2 INITIAL SETUP 1 Enter password then 1 2 PARENTAL CONTROL press ENTER 1 2 INITIAL SETUP 1 Entry password Enter 1 2 PARENTAL CONTROL a number in 4 figures then press ENTER Number buttons 2 Select INITIAL SETUP 1 using then ...

Page 29: ...itation To return to the normal screen Press SET UP To turn off the Parental Control function and play the DVD after entering your password Set LEVEL to OFF in Step 9 then press 1 2 1 2 INITIAL SETUP 1 PARENTAL CONTROL OFF LEVEL STANDARD CHANGE PASSWORD ENTER QUIT SETUP USA INITIAL SETUP 1 PARENTAL CONTROL OFF LEVEL STANDARD CHANGE PASSWORD NC17 ENTER QUIT SETUP R PG13 PG 7 6 5 4 3 2 1 2 1 2 8 4 E...

Page 30: ...buttons TV DVD switch 1 2 3 4 5 6 7 8 9 0 To change the password 1 In Step 5 select CHANGE PASSWORD using then press or ENTER The display for changing the password appears 2 Follow Steps 4 and 5 to enter a new password z If you have forgot your password Enter 6 digits number 199703 in Step 4 to clear the current password To enter a new password follow the procedure from Step 4 again Notes When you...

Page 31: ...the SONY Mini Hi Fi Component system press AV RECVR repeatedly to change the input of the system Note Depending on the AV receiver you may not be able to control your AV receiver AV RECVR Receiver AV VOL 1 2 3 4 5 6 7 8 9 0 TV VIDEO CH VOL POWER Number buttons TV DVD switch 1 2 3 4 5 6 7 8 9 0 ENTER Manufacturer Panasonic Philco Philips Pioneer Portland Quasar Radio Shack RCA Sampo Sanyo Scott Sea...

Page 32: ...nt using then press or ENTER 4 Select the setting you want using then press ENTER To cancel using the setup display on the way Press SET UP Note Some setup display items require operations other than selecting the setting For details on these items see the relevant pages SET UP ENTER INITIAL SETUP 1 TV TYPE LETTER BOX OFF AUTO PLAY DIMMER BACKGROUND BRIGHT BLUE ENTER QUIT SETUP 4 3 SCREEN SAVER OF...

Page 33: ...ORTUGUESE CHINESE JAPANESE OTHERS When you select OTHERS select and enter the language code from the list using the number buttons page 52 LANGUAGE SETUP OSD ENGLISH ENGLISH DVD MENU AUDIO SUBTITLE ORIGINAL AUDIO FOLLOW ENTER QUIT SETUP 1 2 1 2 pAUDIO Switches the language for the sounds ORIGINAL the language given the priority in the disc SPANISH ENGLISH FRENCH ITALIAN GERMAN DUTCH PORTUGUESE CHI...

Page 34: ...connect the AC power cord to the AC outlet By connecting a timer not supplied you can start playing at any time you want DEMO1 starts playing the demonstration 1 automatically DEMO2 starts playing the demonstration 2 automatically pDIMMER Adjusts the lighting of the front panel display BRIGHT makes the front panel display bright DARK makes the front panel display dark OFF turns off the lighting of...

Page 35: ...the player is connected to audio component with a built in Dolby Digital AC 3 decoder D PCM Downmix PCM when you play the Dolby Digital AC 3 sound tracks the output audio signals are mixed down to 2 channels By the settings of the item SURROUND you can select whether the signals contain the surround component or not The output audio signals from the 5 1 OUTPUT connectors are also mixed down in the...

Page 36: ...r white cables to connect the center speaker and sub woofer Dolby Digital Surround What is Dolby Digital Surround Some DVDs have up to 5 1 channel soundtrack recorded in Dolby Digital AC 3 format Using an amplifier with 5 1 channel inputs and the 5 1 speakers you can enjoy more real audio presence in the comfort of your own home Even if you have fewer than 5 1 speakers the player distributes the o...

Page 37: ...T CENTER REAR SIGNAL GND WOOFER AUDIO IN L R L R AUDIO OUT AUDIO IN AUDIO OUT AUDIO IN y PHONO TAPE MD MONITOR VIDEO 1 VIDEO 2 TV LD L L CENTER TUNER CD COMPONENT VIDEO OUT Y B Y FRONT REAR R WOOFER CENTER R AUDIO 2 L VIDEO 2 R AUDIO 1 L VIDEO 1 1 2 OPTICAL COAXIAL DOLBY DIGITAL AC 3 PCM L INPUT 5 1 INPUT MONITOR OUTPUT 5 1 OUTPUT LINE OUT S VIDEO OUT DIGITAL OUT R Y S VIDEO IN TV CD DVD Player AV...

Page 38: ...Rear speaker Normally select this symbol This is default setting When the sound cracks or the effects of the surround is difficult to hear select this symbol This activates the Dolby Digital AC 3 bass redirection circuitry and outputs the bass frequencies of the speaker from some other speakers If you will not connect the speaker select this symbol You cannot select this symbol for the front speak...

Page 39: ...es not be output from the subwoofer To adjust the volume of all the speakers at one time Use the amplifier s volume control To return to the default setting Select the sybol or the item then press CLEAR Specifying the speaker distance 1 Press SET UP and select 1 then press ENTER 2 Select the speaker you want to adjust in DISTANCE and press ENTER 3 Adjust the value using then press ENTER Note When ...

Page 40: ...al rear speakers The virtual speakers are reproduced as shown in Ill 2 SET UP ENTER These settings also affect the output from the LINE OUT AUDIO 1 2 connectors Notes When you select an item the sound cuts off for a moment When you select PRO LOGIC the sound may only come from the center speaker depending on the disc When the playing signal does not contain the surround component the effects may b...

Page 41: ...r monaural the rear component of the Pro Logic processed stereo signal LFE displayed only when the LFE Low Frequency Effects signal is playing If S is displayed in gray you can enjoy the surround effect when you set MODE under 5 1 OUTPUT SETUP 2 to PRO LOGIC VES A or VES B in the setup display This affects only when the current audio format is DOLBY DIGITAL 2 0 The display examples are as follows ...

Page 42: ...lead need to be changed have it done at a qualified service shop only On placement Place the player in a location with adequate ventilation to prevent heat build up in the player Do not place the player on a soft surface such as a rug that might block the ventilation holes on the bottom Do not place the player in a location near heat sources or in a place subject to direct sunlight excessive dust ...

Page 43: ...e auto pause signal is recorded While playing such a disc the player stops playback at the signal Troubleshooting If you experience any of the following difficulties while using the player use this troubleshooting guide to help you remedy the problem Should any problem persist consult your nearest Sony dealer The power is not turned on If the indicator above the POWER button is not lit check that ...

Page 44: ...etup display select the language for the on screen display in OSD under LANGUAGE SETUP page 33 The language for the sound cannot be changed when you play a DVD Multilingual sound is not recorded on the DVD Changing the language for the sound is prohibited on the DVD The language for the sound changes automatically When you set the TRACK SELECTION in INITIAL SETUP 2 to ON in the setup display the l...

Page 45: ... the following table First three digits C13 C31 Exx xx is any number Cause and or Corrective Action The disc is dirty Clean the disc with a cleaning cloth page 42 The disc is not inserted correctly Open the disc tray and insert the disc correctly To prevent the player from operating malfunctioning the self diagnosis function has worked When you contact your Sony dealer or local authorized Sony ser...

Page 46: ...ture 41 F to 95 F 5 C to 35 C Operating humidity 5 to 90 Supplied accessories See page 6 The signals from LINE OUT AUDIO 1 2 connectors are measured When you play the PCM sound tracks with 96 kHz sampling frequency the output signals from the DIGITAL OUT OPTICAL COAXIAL and 5 1 OUTPUT connectors are converted to 48 kHz sampling frequency 16 bits quantization bits Design and specifications are subj...

Page 47: ...el is stereo and there is discrete subwoofer channel in this format The good channel separation is realized because the all channel data is recorded discrete and processed in digital Dolby Pro Logic page 40 Audio signal processing technology that Dolby Laboratories Corporation developed for surround sound When the input signal has the surround component the Pro Logic process outputs the front cent...

Page 48: ...shuttle 12 16 Changes the playback speed º ENTER button Selects and executes the items or settings JOG button indicator 12 16 Press to play a disc frame by frame PHONES connector 10 14 Connect the headphones to this connector PHONE LEVEL control 10 14 Adjusts the headphone volume PROGRAM button 24 Press to execute the program play CLEAR button 11 15 22 23 24 Press to return to the continuous play ...

Page 49: ...5 1 channel input connectors 3 LINE OUT AUDIO 1 2 connectors 7 Connects to the audio input connector on the TV or amplifier 4 LINE OUT VIDEO 1 2 connectors 7 Connects to the video input connector on the TV or monitor 5 S VIDEO OUT 1 2 connectors 7 Connects to the S video input connector on the TV or VCR 6 DIGITAL OUT OPTICAL connector 8 Connects to an audio component using the optical digital conn...

Page 50: ... the disc etc on the front panel display SET UP button 32 Displays the setup display on the TV screen to set or adjust the items TITLE button 13 Displays the title menu on the TV screen DVD MENU button 13 Displays the DVD menu on the TV screen Click shuttle 12 16 Changes the playback speed ENTER button Selects and executes the items or settings ª DISPLAY button 18 41 Displays the current playing s...

Page 51: ...U INITIAL SETUP 1 page 34 TV TYPE 4 3 LETTER BOX 4 3 PAN SCAN 16 9 AUTO PLAY OFF TIMER DEMO1 DEMO2 DIMMER BRIGHT DARK OFF BACKGROUND BLUE BLACK SCREEN SAVER ON OFF PARENTAL CONTROL page 28 1 TRACK SELECTION OFF AUTO SURROUND ON OFF DIGITAL OUT PCM AUDIO DRC OFF ON AUDIO ATT OFF ON AUDIO FILTER SHARP SLOW ENGLISH FRENCH ITALIAN GERMAN DUTCH PORTUGUESE CHINESE JAPANESE ENGLISH DOLBY DIGITAL PCM SPAN...

Page 52: ...ish 1283 Javanese 1287 Georgian 1297 Kazakh 1298 Greenlandic 1299 Cambodian 1300 Kannada 1301 Korean 1305 Kashmiri 1307 Kurdish 1311 Kirghiz 1313 Latin 1326 Lingala 1327 Laothian 1332 Lithuanian 1334 Latvian Lettish 1345 Malagasy 1347 Maori 1349 Macedonian 1350 Malayalam 1352 Mongolian 1353 Moldavian 1356 Marathi 1357 Malay 1358 Maltese 1363 Burmese 1365 Nauru 1369 Nepali 1376 Dutch 1379 Norwegian...

Page 53: ...AL SETUP 2 35 L LANGUAGE SETUP 33 Locating a specific point 11 15 by observing the TV screen 12 16 M N O On screen display usage 18 language 9 33 P Q Parental control 28 PBC functions 17 PBC Playback 17 47 Playback at various speeds 12 16 Continuous Play 10 14 frame by frame 12 16 Program Play 24 Repeat Play 22 Shuffle Play 23 PRO LOGIC 40 Program Play 24 R Remote 6 30 Repeating a specific portion...

Page 54: ...oma mural Para desconectar el cable tire del enchufe nunca del propio cable Instalación Con el fin de evitar el recalentamiento interno permita que la unidad reciba una circulación de aire adecuada No coloque la unidad sobre superficies mantas alfombras etc ni cerca de materiales cortinas tapices que puedan bloquear las ranuras de ventilación No instale la unidad cerca de fuentes de calor como rad...

Page 55: ...28 Control del TV o del receptor de AV con el control remoto suministrado 30 Ajustes Uso de la pantalla de ajustes 32 Ajuste del idioma de las indicaciones y el sonido AJUSTE DE IDIOMA 33 Ajustes de las indicaciones AJUSTE INICIAL 1 34 Ajustes del sonido AJUSTE INICIAL 2 35 Dolby Digital Surround Descripción del sistema Dolby Digital Surround 36 Conexiones del sistema de altavoces 36 Ajustes de lo...

Page 56: ... marca comercial Este reproductor está conforme con el sistema de color NTSC No es posible reproducir discos grabados en otros sistemas de color como PAL o SECAM Código de región de los discos DVD que pueden reproducirse en esta unidad El reproductor DVD tiene un código de región impreso en la parte trasera de la unidad y sólo reproducirá discos DVD etiquetados con códigos de región idénticos Los ...

Page 57: ...O CD Este reproductor cumple con las versiones 1 1 y 2 0 de las normas sobre discos VIDEO CD Es posible disfrutar de dos tipos de reproducción en función del tipo de disco Tipo de disco Discos VIDEO CD sin funciones PBC discos de versión 1 1 Discos VIDEO CD con funciones PBC discos de versión 2 0 Discos que el reproductor no puede reproducir El reproductor no puede reproducir los discos que no apa...

Page 58: ...de señales A una toma de CA A una toma de CA Amplificador receptor Desembalaje Compruebe que ha recibido los siguientes artículos Cable de conexión de audio vídeo 1 Cable de vídeo S 1 Control remoto RMT D102A 1 Pilas tamaño AA R6 2 Inserción de las pilas en el control remoto Es posible controlar el reproductor con el control remoto suministrado Inserte dos pilas R6 tamaño AA de forma que coincidan...

Page 59: ...ectores COMPONENT VIDEO OUT con los tres cables de conexión de vídeo no suministrados del mismo tipo Obtendrá una imagen de mayor calidad Nota Consulte las instrucciones suministradas con el componente que vaya a conectar Continúa Reproductor de CD DVD TV Cables necesarios Cable de conexión de audio vídeo suministrado 1 Conexiones Al conectar los cables asegúrese de hacer coincidir los cables codi...

Page 60: ...e vaya a conectar No es posible realizar grabaciones de audio digitales de discos grabados en el formato Dolby Digital AC 3 directamente mediante una platina de MD o DAT Si realiza las conexiones anteriores no ajuste SALIDA DIGITAL de AJUSTE INICIAL 2 en DOLBY DIGITAL PCM Si lo hace los altavoces emitirán repentinamente un ruido intenso afectando a sus oídos o causando daños a dichos altavoces Cab...

Page 61: ...ica Consulte la página 36 para conectar el sistema de altavoces y la página 38 para ajustar la posición o distancia de cada altavoz etc pPara conectar el reproductor a un componente de audio con decodificador Dolby Digital incorporado En la pantalla de ajustes defina SALIDA DIGITAL de AJUSTE INICIAL 2 en DOLBY DIGITAL PCM Emplee la pantalla de ajustes para cambiar los distintos ajustes de la image...

Page 62: ... CD o VIDEO CD es diferente al de los discos DVD Para más información consulte las páginas 14 a 17 z Es posible encender el reproductor con el control remoto Presione POWER si el indicador situado sobre el botón POWER del panel frontal está iluminado en rojo El indicador DOLBY DIGITAL se ilumina excepto en los siguientes casos al insertar un CD o un VIDEO CD si el formato de audio actual es PCM o ...

Page 63: ...ueda realizar la reanudación de reproducción en función del disco DVD p P Presione p P P o 1 SEARCH MODE varias veces hasta que BUSQUEDA CAPITULO aparezca en la pantalla del TV 2 Los botones numéricos para seleccionar el número del capítulo y a continuación presione ENTER o 1 SEARCH MODE varias veces hasta que BUSQUEDA POR TITULO aparezca en la pantalla del TV 2 Los botones numéricos para seleccio...

Page 64: ...a durante el modo de avance Al presionar JOG en el reproductor se interrumpe la reproducción 2 Gire el conmutador lanzadera En función de la velocidad del giro la reproducción pasa a ser fotograma a fotograma según el sentido del giro del conmutador lanzadera Si gira éste con velocidad constante durante unos instantes la velocidad de reproducción será a cámara lenta o normal pPara volver a la repr...

Page 65: ...ioma de los subtítulos el del sonido etc mediante el menú DVD Presione DVD MENU El menú DVD aparece en la pantalla del TV El contenido del menú varía según el disco Presione para seleccionar el elemento que desee cambiar En función del disco podrá utilizar los botones numéricos para seleccionar el elemento Para cambiar otros elementos repita el paso 2 Presione ENTER 1 2 3 TITLE ENTER ENTER TITLE N...

Page 66: ...s posible encender el reproductor con el control remoto Presione POWER si el indicador situado sobre el botón POWER del panel frontal está iluminado en rojo z Una vez realizado el paso 4 Es posible que la pantalla de menú aparezca en la del TV en función del VIDEO CD Es posible reproducir el disco interactivamente para ello siga las instrucciones de la pantalla de menú Reproducción PBC consulte la...

Page 67: ...e la página 5 z Qué es una escena Consulte la página 5 z Si desea cambiar el modo de búsqueda Presione SEARCH MODE Cada vez que lo presione en el caso de un VIDEO CD la pantalla del TV mostrará BUSQUEDA ESCENA BUSQUEDA PISTA y BUSQUEDA INDICE VIDEO En el caso de un CD sólo aparecerá BUSQUEDA PISTA Nota Determinados discos no permiten iniciar la reproducción desde ciertas escenas En este caso si re...

Page 68: ... la velocidad de reproducción modo de lanzadera Gire el conmutador lanzadera La velocidad de reproducción cambiará según el sentido del giro y del ángulo de la siguiente forma FF2 Más rápido que FF1 FF1 2 Aproximadamente dos veces la velocidad normal REPRODUCIR Velocidad normal LENTO1 sentido de reproducción Sólo VIDEO CD LENTO2 sentido de reproducción Más lento que LENTO1 Sólo VIDEO CD PAUSAP FR1...

Page 69: ...nteractivas Consulte las instrucciones suministradas con el disco ya que el procedimiento de funcionamiento puede ser diferente según el VIDEO CD Recuperación de la pantalla de menú Presione ˆ o z Si reproduce discos VIDEO CD con funciones PBC La reproducción PBC se inicia automáticamente z Para cancelar la reproducción PBC de un VIDEO CD con funciones PBC y reproducir el disco en el modo de repro...

Page 70: ... idiomas de los subtítulos Idioma actual del sonido número total de idiomas del sonido Número del capítulo actual número total de capítulos del título actual Estado de reproducción Modo de reproducción actual Tiempo de reproducción del capítulo actual Número del título actual Número del capítulo actual Angulo seleccionado número total de ángulos Indice de bits de la imagen de reproducción Formato ...

Page 71: ...PBC sólo VIDEO CD En el modo de indicación 1 o 2 cada vez que presione TIME la información cambia como se muestra a continuación Tiempo de reproducción de la pista actual Tiempo restante de la pista actual Tiempo de reproducción del disco Tiempo restante del disco Durante los modos de reproducción aleatoria de programa o PBC el tiempo de reproducción y el restante del disco no aparecen pInformació...

Page 72: ...iará tal como se muestra a continuación La información de tiempo en el modo de indicación en pantalla 1 o 2 también cambia cada vez que presione TIME TIME Tiempo restante del título actual Presione TIME Presione TIME Tiempo de reproducción y número del título actual Presione TIME Presione TIME Tiempo restante del capítulo actual Tiempo de reproducción y número del capítulo actual Tiempo de reprodu...

Page 73: ... La información de tiempo en el modo de indicación en pantalla 1 y 2 también cambia cada vez que presione TIME Nota Durante la reproducción aleatoria de programa o PBC el tiempo de reproducción y el restante del disco no aparecen Tiempo de reproducción y número de la pista actual Tiempo restante de la pista actual Tiempo restante del disco Presione TIME Presione TIME Presione TIME Tiempo de reprod...

Page 74: ...n de la pista actual Presione CLEAR Nota La reproducción repetida se cancela al apagar la unidad CLEAR 7 8 9 0 Aparece CAPITULO cuando seleccione el capítulo actual Reproducción repetida Es posible reproducir de forma repetida todos los títulos pistas de un disco un solo título capítulo pista o una parte específica Repetición de todos los títulos o de todas las pistas de un disco En el modo de rep...

Page 75: ...parte específica REPEAT A B aparece en el visor del panel frontal durante la reproducción de la repetición A B Para cancelar la repetición A B Presione CLEAR Para cancelar el ajuste durante el proceso Presione CLEAR Notas La repetición A B se cancelará si abre o cierra la bandeja de discos desactiva la alimentación Si ajusta la repetición A B los ajustes para la reproducción aleatoria y de program...

Page 76: ...6 T TULO I 7 T TULO I 8 T TULO I 9 T TULO I PROGRAM T 0 1 0 2 0 3 0 4 0 5 0 6 0 7 PROGRAMA BORRAR TODO PROGRAMA BORRAR TODO 0 PLAY ENTER 1 I 2 I 3 I 4 I 5 I 6 I 7 I 8 I 9 I PROGRAM C T 0 1 0 1 0 2 0 2 0 3 0 3 0 4 0 4 0 5 0 5 0 6 0 7 PROGRAMA BORRAR TODO T T U L O T T U L O T T U L O T T U L O T T U L O T T U L O T T U L O T T U L O T T U L O Título Capítulo Tiempo total de las pistas programadas P...

Page 77: ... I 5 T T U L O 0 7 1 4 I 6 T T U L O I 7 T T U L O I 8 T T U L O I 9 T T U L O I PROGRAM T 0 1 0 2 0 3 0 4 0 5 0 6 0 7 PROGRAMA BORRAR TODO Reanudación de la reproducción desde el punto donde detuvo el disco reanudación de reproducción El reproductor almacenará el punto donde detuvo el disco si RESUME aparece en el visor del panel frontal En este caso podrá reanudar la reproducción desde ese punto...

Page 78: ... título Si el idioma aparece como un número de 4 dígitos consulte la lista de códigos de idioma de la página 52 SUBTITLE CHANGE SUBTITLE ON OFF Visualización de los subtítulos Z Con discos DVD en los que haya subtítulos grabados podrá activar y desactivar dichos subtítulos cuando desee mientras se reproduce el disco Con discos DVD en los que haya grabados subtítulos multilingües podrá cambiar el i...

Page 79: ... desee mientras se reproduce el disco Cuando ANGLE aparezca en el visor del panel frontal mientras se reproduce un disco DVD presione ANGLE CHANGE varias veces hasta que obtenga el ángulo deseado ANGULO 1 n ANGULO 2 n z Es posible especificar el ángulo previamente Especifique el ángulo si ANGLE no aparece en el visor del panel frontal Al llegar a una escena en la que haya múltiples ángulos grabado...

Page 80: ...de control de limitación permite establecer el nivel de limitación de reproducción 1 Presione SET UP para que la pantalla de ajustes aparezca en la del TV antes de la reproducción ENTER SET UP 1 2 3 4 5 6 7 8 9 0 2 AJUSTE INICIAL 1 TIPO TV NO REPRODUCCION AUTO ATENUADOR FONDO BRILLO AZUL ENTER 1 2 LETTER BOX 4 3 PROTECTOR PANTALLA SI CONTROL DE BLOQUEO 1 SALIR SETUP SALIR 2 ENTER 1 2 1 AJUSTE INIC...

Page 81: ...one 4 Introduzca una contraseña compuesta por 4 cifras con los botones numéricos y a continuación presione ENTER Las cifras cambian a asteriscos y aparece la pantalla de confirmación de la contraseña 5 Para confirmar la contraseña introdúzcala con los botones numéricos y a continuación presione ENTER Aparece la pantalla de ajustes del nivel de limitación de reproducción y de cambio de la contraseñ...

Page 82: ...to suministrado Z Si ajusta la señal remota podrá controlar el TV con el control remoto suministrado El ajuste de fábrica es para controlar televisores Sony con la marca g Si conecta el reproductor a un receptor de AV Sony también podrá ajustar la entrada de dicho receptor a este reproductor con el control remoto suministrado Control de televisores con el control remoto 1 Deslice el interruptor TV...

Page 83: ...2 03 12 12 03 04 14 11 06 10 03 04 17 02 03 04 12 09 03 03 08 12 04 13 04 12 13 17 04 12 Código 06 19 03 04 08 16 03 06 18 05 14 04 10 12 11 12 07 10 11 03 05 18 08 12 03 08 14 07 03 04 12 12 15 Control de un receptor de AV Sony con el control remoto 1 Deslice el interruptor TV DVD hasta DVD 2 Mantenga POWER presionado e introduzca el código del conector de entrada del receptor de AV consulte la s...

Page 84: ...DOR FONDO AZUL NO SETUP BRILLO LETTER BOX 4 3 PROTECTOR PANTALLA CONTROL DE BLOQUEO ENTER 1 2 1 2 SALIR AJUSTE INICIAL 1 TIPO TV NO REPRODUCCION AUTO ATENUADOR FONDO AZUL SI SETUP BRILLO LETTER BOX 4 3 PROTECTOR PANTALLA CONTROL DE BLOQUEO Elemento principal Uso de la pantalla de ajustes Z Mediante esta pantalla es posible realizar el ajuste inicial ajustes de la calidad de imagen y sonido ajustes...

Page 85: ...ES FRANCES ITALIANO ALEMAN HOLANDES PORTUGUES CHINO JAPONES OTROS Si selecciona OTROS elija e introduzca el código del idioma de la lista mediante los botones numéricos página 52 pAUDIO Cambia el idioma de los sonidos ORIGINAL idioma de prioridad en el disco ESPAÑOL INGLES FRANCES ITALIANO ALEMAN HOLANDES PORTUGUES CHINO JAPONES OTROS Si selecciona OTROS elija e introduzca el código del idioma de ...

Page 86: ...ción de CA a la toma de corriente Si conecta un temporizador no suministrado podrá iniciar la reproducción a la hora que desee DEMO1 la demostración 1 comienza a reproducirse automáticamente DEMO2 la demostración 2 comienza a reproducirse automáticamente pATENUADOR Ajusta la iluminación del visor del panel frontal BRILLO el visor del panel frontal se muestra con brillo OSCURO el visor del panel fr...

Page 87: ...odificador Dolby Digital AC 3 incorporado D PCM Downmix PCM al reproducir las pistas de sonido Dolby Digital AC 3 las señales de salida de audio se mezclan en 2 canales Con los ajustes del elemento SURROUND puede especificar si las señales deben contener o no el componente de sonido envolvente Las señales de salida de audio de los conectores 5 1 OUTPUT también se mezclan de la misma manera Para di...

Page 88: ...entral y el de potenciación de graves Dolby Digital Surround Descripción del sistema Dolby Digital Surround Determinados discos DVD disponen de pistas de sonido de canal 5 1 grabadas en formato Dolby Digital AC 3 Mediante el uso de un amplificador con entradas de canal 5 1 y los 5 1 altavoces podrá disfrutar de una presencia de audio más real en su propia casa Incluso si dispone de menos de 5 1 al...

Page 89: ...R L R AUDIO OUT AUDIO IN AUDIO OUT AUDIO IN y PHONO TAPE MD MONITOR VIDEO 1 VIDEO 2 TV LD L L CENTER TUNER CD COMPONENT VIDEO OUT Y B Y FRONT REAR R WOOFER CENTER R AUDIO 2 L VIDEO 2 R AUDIO 1 L VIDEO 1 1 2 OPTICAL COAXIAL DOLBY DIGITAL AC 3 PCM L INPUT 5 1 INPUT MONITOR OUTPUT 5 1 OUTPUT LINE OUT S VIDEO OUT DIGITAL OUT R Y S VIDEO IN TV Reproductor de CD DVD Amplificador de AV con entradas de ca...

Page 90: ... selecciones de altavoces por separado podrían cambiarse para reflejar los efectos de sonido óptimos de canales múltiples Si los altavoces son demasiado pequeños para reproducir las frecuencias bajas de graves defina todos los ajustes de altavoz en pequeño y utilice un altavoz potenciador de graves para el sonido de frecuencias bajas Ubicación de los altavoces Para obtener el mejor sonido envolven...

Page 91: ...an a la misma distancia con respecto a la posición de escucha ajuste la distancia del altavoz más próximo Nota No coloque el altavoz posterior más alejado de la posición de escucha que los altavoces frontales Ajuste del volumen de los altavoces 1 Interrumpa la reproducción presione SET UP seleccione 2 y presione ENTER 2 Ajuste TONO PRUEBA en SI Escuchará el tono de prueba de cada altavoz secuencia...

Page 92: ... 0 0dB TONO PRUEBA FRONTAL POSTERIOR NIVEL CENTRAL SUBWOOFER MODO NO NO POSTERIOR AJUSTE SALIDA 5 1CH 2 SALIR SETUP Ajustes del sistema Dolby Digital Surround Para disfrutar del sonido Dolby Digital Surround ajuste la señal de salida de los conectores de salida del canal 5 1 Nota Para disfrutar del sonido Dolby Digital AC 3 original mediante los conectores 5 1 OUTPUT no ajuste SALIDA DIGITAL en D ...

Page 93: ...antalla los canales en reproducción En el formato Dolby Digital AC 3 las señales de sonido monofónico en el canal 5 1 pueden estar grabadas en los discos DVD El número de canales grabados variará en función del disco DVD Presione DISPLAY varias veces hasta que aparezca la indicación del canal Aparecerá PCM MPEG o DOLBY DIGITAL En el caso de DOLBY DIGITAL los canales de la pista en reproducción apa...

Page 94: ...e de alimentación de CA cable de corriente hágalo únicamente en un centro de servicio técnico especializado Ubicación Coloque el reproductor en un lugar donde reciba una ventilación adecuada con el fin de evitar su recalentamiento interno No coloque el reproductor sobre superficies mullidas como una alfombra que puedan bloquear los orificios de ventilación de la base No coloque el reproductor en l...

Page 95: ...o y el reproductor Emplee el control remoto cerca del reproductor Oriente el control remoto hacia el sensor remoto g del reproductor Sustituya todas las pilas del control remoto por otras nuevas si disponen de poca energía Aparece ruido de imagen Limpie el disco Si las señales de vídeo procedentes del reproductor de DVD tienen que pasar por la videograbadora para llegar al televisor la protección ...

Page 96: ...aspecto de la pantalla aunque ajuste TIPO TV de AJUSTE INICIAL 1 en la pantalla de ajustes al reproducir una imagen panorámica La relación de aspecto es fija en el disco DVD Si conecta el reproductor con el cable de vídeo S conéctelo directamente al televisor En caso contrario es posible que no pueda cambiar la relación de aspecto Según el televisor es posible que no pueda cambiar la relación de a...

Page 97: ...a Primeros tres dígitos C13 C31 Exx xx corresponde a cualquier número Causa y o acción correctiva El disco está sucio Límpielo con un paño de limpieza página 42 El disco no está insertado correctamente Abra la bandeja de discos e inserte el disco correctamente Para evitar fallos de funcionamiento del reproductor se ha activado la función de autodiagnóstico Cuando se ponga en contacto con el provee...

Page 98: ... frecuencia de muestreo de 96 kHz las señales de salida de los conectores DIGITAL OUT OPTICAL COAXIAL y 5 1 OUTPUT se convierten a 48 kHz frecuencia de muestreo 16 bits bits de cuantización Diseño y especificaciones sujetos a cambios sin previo aviso Glosario Indice de bits página 18 Valor que indica la cantidad de datos de vídeo comprimidos en un disco DVD por segundo La unidad es Mbps megabits p...

Page 99: ... Si la señal de entrada dispone del componente de sonido envolvente el proceso Pro Logic envía las señales frontales centrales y posteriores El canal posterior es monofónico DVD página 4 Disco que contiene hasta 8 horas de imágenes en movimiento aunque su diámetro es el mismo que el de un CD La capacidad de datos de un disco DVD de una sola capa y una sola cara a 4 7 GB Giga Byte es 7 veces la de ...

Page 100: ...la velocidad de reproducción 0 Botón ENTER Selecciona y ejecuta los elementos o los ajustes Botón indicador JOG 12 16 Presiónelo para reproducir un disco fotograma a fotograma Conector PHONES 10 14 Conecte aquí los auriculares Control PHONE LEVEL 10 14 Ajusta el volumen de los auriculares Botón PROGRAM 24 Presiónelo para realizar la reproducción de programa Botón CLEAR 22 23 24 Presiónelo para rec...

Page 101: ...de entrada de canal 5 1 3 Conectores LINE OUT AUDIO 1 2 7 Se conectan al conector de entrada de audio del TV o del amplificador 4 Conectores LINE OUT VIDEO 1 2 7 Se conectan al conector de entrada de vídeo del TV o del monitor 5 Conectores S VIDEO OUT 1 2 7 Se conectan al conector de entrada de vídeo S del TV o de la videograbadora 6 Conector DIGITAL OUT OPTICAL 8 Se conecta a un componente de aud...

Page 102: ...n el visor del panel frontal Botón SET UP 32 Muestra la pantalla de ajustes en la pantalla del TV para ajustar los elementos Botón TITLE 13 Muestra el menú de títulos en la pantalla del TV Botón DVD MENU 13 Muestra el menú DVD en la pantalla del TV Conmutador lanzadera 12 16 Cambia la velocidad de reproducción Botón ENTER Selecciona y ejecuta los elementos o los ajustes ª Botón DISPLAY 18 41 Muest...

Page 103: ... MENU DVD AJUSTE INICIAL 1 página 34 TIPO TV 4 3 LETTER BOX 4 3 PAN SCAN 16 9 REPRODUCCION AUTO NO TEMPORIZADOR DEMO1 DEMO2 ATENUADOR BRILLO OSCURO NO FONDO AZUL NEGRO PROTECTOR PANTALLA SI NO CONTROL DE BLOQUEO página 28 1 SELECCION POR PISTA NO AUTO SURROUND SI NO SALIDA DIGITAL PCM AUDIO DRC NO SI ATENUACION AUDIO NO SI FILTRO DE AUDIO ABRUPTO SUAVE INGLES FRANCES ITALIANO ALEMAN HOLANDES PORTU...

Page 104: ...261 Japanese 1269 Yiddish 1283 Javanese 1287 Georgian 1297 Kazakh 1298 Greenlandic 1299 Cambodian 1300 Kannada 1301 Korean 1305 Kashmiri 1307 Kurdish 1311 Kirghiz 1313 Latin 1326 Lingala 1327 Laothian 1332 Lithuanian 1334 Latvian Lettish 1345 Malagasy 1347 Maori 1349 Macedonian 1350 Malayalam 1352 Mongolian 1353 Moldavian 1356 Marathi 1357 Malay 1358 Maltese 1363 Burmese 1365 Nauru 1369 Nepali 137...

Page 105: ...cífico 11 15 M N O Manejo de discos 42 Menú de títulos 13 Menú DVD idioma 33 empleo 13 P Q Pantalla indicación en pantalla 18 visor del panel frontal 20 pantalla de ajustes 32 Pantalla de ajustes AJUSTE DE IDIOMA 33 AJUSTE INICIAL 1 34 AJUSTE INICIAL 2 35 AJUSTE SALIDA 5 1CH 1 38 AJUSTE SALIDA 5 1CH 2 39 40 empleo 32 Pausa automática 20 Pilas 6 Pista 5 47 PRO LOGIC 40 Reproducción de programa 24 P...

Page 106: ...54ES Información complementaria ...

Page 107: ...55ES Additional Information Additional Information ...

Page 108: ...Sony Corporation Printed in Japan ...

Reviews: