4-12
Chapter 4
Basic Operations for Image Creation
Using the Mix/Effects Banks
3
Prepare the new video.
• Select a new background on the background B bus, using the cross-
point buttons.
• When inserting a key, select the key signals and make any other
required settings in the key control section.
For more details of key signal selection and other settings, see the
section “Basic Key Setting Operations” (page 4-37).
For a cut, skip to step
6
. For all other transitions, continue with step
4
.
4
Select the transition type with the buttons in the transition type selection
section.
• For a dissolve: press one of the MIX, NAM, and SUPER MIX buttons,
turning it on.
• For a wipe or DME wipe: press one of the WIPE, DME 1, and DME 2
buttons, turning it on. For a dual DME wipe, press both of the DME 1
and DME 2 buttons simultaneously, turning them on.
For more details of transition types, see the section “Selecting the
Transition Type” (page 4-16).
5
Make the necessary settings, depending on the selected transition type.
For details of the settings, see the sections on the pages indicated in the
following table.
6
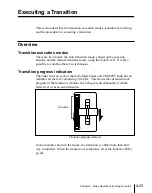
Use the transition control section to execute the transition.
• For a gradual transition such as a wipe or dissolve: press the AUTO
TRANS button, or use the fader lever.
• For an instantaneous transition: press the CUT button.
For more details, see the section “Executing a Transition” (page 4-23).
Super Mix
“Super Mix Settings” (4-18)
Wipe
“Basic Operation for Wipe Settings” (4-69)
DME wipe
“DME Wipe Settings” (4-91)
Dual DME wipe
“DME Wipe Settings” (4-91)
Transition limit
“Setting a Transition Limit” (4-17)
Summary of Contents for DVS-7250
Page 10: ......
Page 30: ......
Page 66: ......
Page 67: ...Menu Organization 3 2 Basic Menu Operations 3 6 Chapter 3 Basic Menu Operations ...
Page 274: ......
Page 328: ......
Page 364: ......
Page 488: ......
Page 495: ...Appendixes A 3 Enhanced Wipes 21 23 24 26 27 29 49 300 301 302 303 304 POLYGON ...
Page 534: ......
Page 542: ...Sony Corporation B P Company BZS 7061A WW A AE0 600 01 1 1999 ...


