5-2
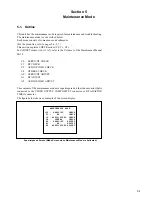
The buttons etc. related to the maintenance mode are as follows:
1
1
1
1
1
Time counter (Lower control panel)
The menu number is displayed in the blinking/lighting state during menu assignment.
For the manual adjustment, data is displayed in the blinking state.
Be sure to use a video monitor because the information that can be displayed on the time counter is
restricted in the maintenance mode.
2
2
2
2
2
MENU button (Lower control panel)
In the maintenance mode, the MENU button has the same function as switch
9
S301 on the SS board.
3
3
3
3
3
SET button (Lower control panel)
In the maintenance mode, the SET button has the same function as switch
8
S300 on the SS board.
With DIP switch
!/
S100-7 on the SS board set to ON (upper position), the maintenance mode is
entered when this button is pressed while pressing the
4
CTL button in the setup menu mode.
4
4
4
4
4
CTL button (Lower control panel)
With DIP switch
!/
S100-7 on the SS board set to ON (upper position), the maintenance mode is
entered when the
3
SET button is pressed while pressing this button in the setup menu mode.
5
5
5
5
5
SHUTTLE button (Lower control panel)
When the
7
search dial is turned while pressing this button during manual adjustment, the adjustment
data can be changed.
6
6
6
6
6
JOG button (Lower control panel)
The JOG lamp lights when this button is pressed once. The
7
search dial is then set to the JOG mode.
When the
7
search dial is turned while pressing this button during manual adjustment, the adjustment
data can be changed.
7
7
7
7
7
Search dial (Lower control panel)
The search dial selects each menu in the JOG mode.
To change the adjustment data during manual adjustment, turn this search dial while pressing the
6
JOG button or
5
SHUTTLE button.
The SHUTTLE and JOG modes are alternately selected every time this dial is pressed. The lamp
(SHUTTLE or JOG) indicating the corresponding mode then lights.
8
8
8
8
8
S300 (SS board): DIAG/ADJUST 1 switch (ADJ +)
Press this switch to activate the maintenance mode.
In the maintenance mode, press this switch to execute the menu or submenu selected by the
7
search
dial.
In the maintenance mode, the
3
SET button is also the same in function as this switch.
9
9
9
9
9
S301 (SS board): DIAG/ADJUST 2 switch (ADJ –)
In the maintenance mode, press this switch to return to the preceding screen.
To exit the maintenance mode, press this switch when the mode screen is displayed.
In the maintenance mode, the
2
MENU button is also the same in function as this switch.
!/
!/
!/
!/
!/
S100-7 (SS board): MAINTENANCE MODE ACCESS ENABLE switch
To enter the maintenance mode by the button operation on the front panel, set this switch to ON (upper
position) in advance.
5-1. Outline
Summary of Contents for DVW-522
Page 6: ......
Page 40: ......
Page 49: ...2 9 2 4 1 Printed Circuit Board Locations Rear view Front view ...
Page 50: ...2 10 Top view of casssette compartment 2 4 1 Printed Circuit Board Locations Top view ...
Page 64: ......
Page 68: ......
Page 82: ......
Page 134: ......
Page 136: ...7 2 7 2 OVERALL 1 4 OVERALL 1 4 7 2 Overall Signal Processing System OVERALL 1 4 DVW 522 522P ...
Page 137: ...7 3 7 3 OVERALL 2 4 OVERALL 2 4 Signal Processing System OVERALL 2 4 DVW 522 522P ...
Page 140: ......


