Chapter 3 Connections and Settings
89
Chapter 3 Connections and Settings
Setting the Date and Time
Whenever you save data with this unit, the current date
and time are saved together with the data. The correct
date and time are not set when the unit is shipped from
the factory, so be sure to carry out the following
procedure to set the date and time before saving your
data.
1
In the desktop, double click the My Computer icon
to open the My Computer folder, and double click
the Control Panel icon.
The Control Panel window opens.
2
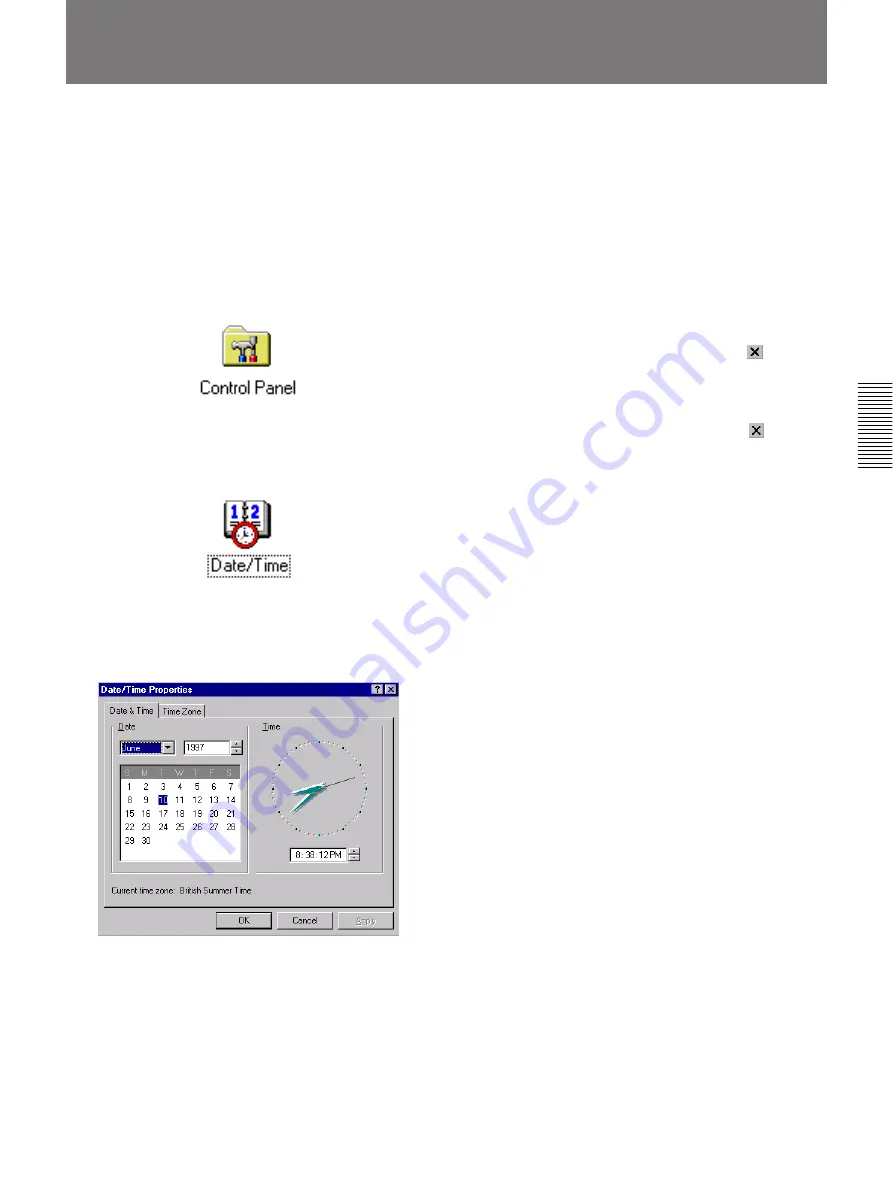
In the Control Panel window, double click the
Date/Time icon.
The Date/Time Properties dialog box opens.
3
Use the following procedure to set the date and
time.
1)
Click Time Zone and set the time zone.
If you do not change the time zone setting, click
the Date & Time tab.
If you do change the time zone setting, click the
Apply button and then click the Date & Time
tab.
2)
Under the Date & Time tab, set the year, month,
day, hour, minute, second, and AM/PM. You
can select the year and month from the drop-
down list or enter them from the keyboard. Set
the day by clicking on the calendar.
Set the hour, minute, second, and AM/PM by
clicking on the item to change and then clicking
the up or down arrow button. You can also enter
the hour, minute, and second from the keyboard.
3)
Click the OK button.
4
In the Control Panel window, click the
button in
the upper right corner to close the Control Panel
window.
5
In the My Computer window, click the
button to
close the My Computer folder window.

