25
Intr
oduction
1
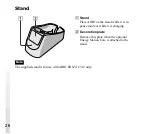
Charging terminal
Connect the supplied AC adapter here
with the supplied AC adapter
conversion plug. When AIBO is
placed on the supplied stand with an
optional Energy Station Core
installed, this terminal directly
touches AIBO’s internal battery pack
to charge it.
2
VOLUME switch
Used to adjust the volume of the
speaker in four levels including mute.
3
“Memory Stick” access
indicator
Lights up while AIBO is accessing
the “Memory Stick.” During this
time, the
Z
button and the BATT
Z
latch are deactivated. When this
indicator is lit, do not attempt to
remove the “Memory Stick.”
4
RESERVED switch
This switch is reserved for functions
to be added in the future.
5
BATT
Z
latch
Flip this latch towards AIBO’s tail to
remove the battery pack.
6
“Memory Stick” insertion slot
Insert the AIBO-ware “Memory
Stick” (not supplied) into this slot.
7
Battery pack insertion slot
Insert the supplied or an optional
lithium ion battery pack into this slot.
8
Z
button
Press this button to remove the
“Memory Stick.”
*
Emergency release hole
When the “Memory Stick” or battery
pack cannot be removed because of a
mechanical problem, etc., insert a
pointed object into this hole and
push. Do not use anything that
breaks easily such as a toothpick.
Do not use this hole under normal
circumstances.
Summary of Contents for ERS-311 AIBO Life
Page 9: ...9 ...
Page 10: ...10 ...
Page 11: ...11 ...
Page 12: ...12 ...
Page 13: ...13 ...
Page 16: ...16 ...
Page 34: ...34 ...
Page 74: ...8 ...
Page 75: ...9 Introduction Introduction Ce chapitre vous présente le robot de compagnie AIBO ERS 311 312 ...
Page 92: ...26 ...
Page 128: ...8 ...
Page 146: ...26 ...
Page 176: ......
Page 177: ......
Page 178: ......


