6
Locations of Controls
IMAGE FLIP switch
Flips the image upside down. Normally set this to OFF when
you use the camera. When the camera is attached to the
ceiling, set this to ON. Before you set the IMAGE FLIP
switch, turn off the unit (or set to standby mode) and then,
turn the power on by connecting the power adaptor, by
VISCA control or the remote commander. When you switch
this, the preset setting is returned to the initial setting. It
takes about 7 to 14 seconds for the image displayed to
respond to the setting change.
IR SELECT switch
VISCA RS-422 connector
VIDEO(output) connector
S VIDEO(output) connector
VISCA IN connector
VISCA OUT connector
DC 12V connector
Tripod screw hole
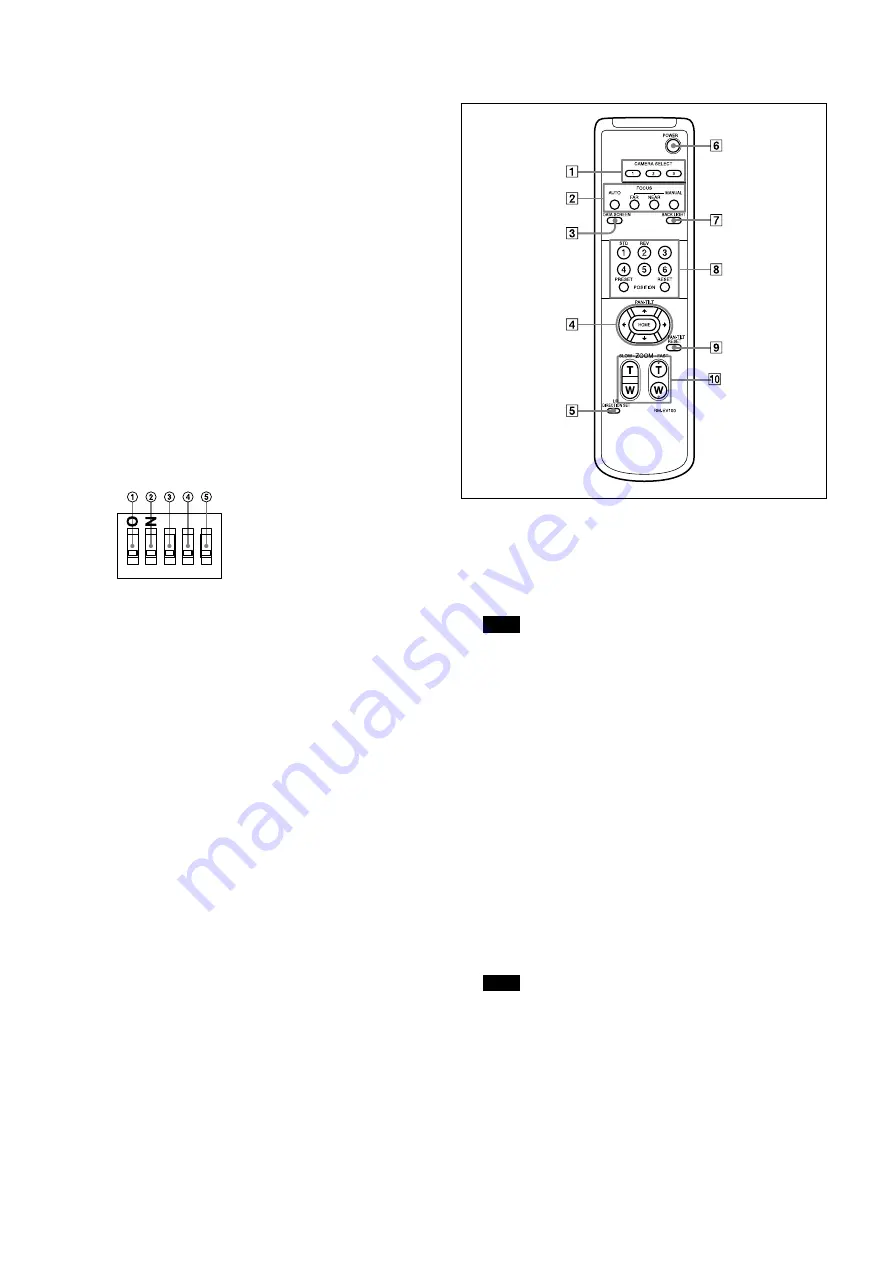
BOTTOM switches
1
2
3
4
5
D70 mode switch
Set to ON to use the VISCA command for EVI-D70/
D70P.
IR OUT switch
Set to ON to enable output of the receiver signals, which
are transmitted from the infrared remote commander
via the VISCA IN connector (page 25), or set it to OFF
to disable the output.
RS-232C/RS-422 select switch
Set to ON to operate colour video camera using the
VISCA command via the RS-422 interface. To change
the mode, turn off the camera (not including standby
mode) first, set the switch and then turn on the camera
again. Mode switching is not possible while the camera
is turned on.
Baud rate select switch
Set to ON for 38,400 bps or OFF for 9,600 bps. To
change the mode, turn off the camera (not including
standby mode) first, set the switch and then turn
on the camera again. The mode cannot be switched
while the camera is turned on.
Switch 5 (Not used)
Be sure to set this switch to OFF.
Ceiling bracket mounting screw holes
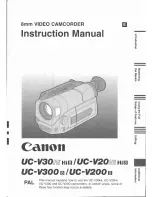
Remote Commander
CAMERA SELECT buttons
Press the button corresponding to the camera you want to
operate with the Remote Commander.
The camera number can be set using the IR SELECT switch
on the rear of the camera.
Note
If two or more cameras are adjacent and have the same
camera number, they are operated simultaneously with the
same Remote Commander. When you install the cameras
close to each other, set different camera numbers.
For the camera number setting, see “Operating Multiple
Cameras with the Remote Commander” described in the
Operating Instructions supplied with the camera.
FOCUS buttons
Used for focus adjustment.
Press the AUTO button to adjust the focus automatically. To
adjust the focus manually, press the MANUAL button, and
adjust it with the FAR and NEAR buttons.
DATA SCREEN button
Press this button to display the main menu. Press it again to
turn off the menu. If you press the button when a lower-level
menu is selected, the display goes back to a higher-level
menu.
Note
Pan/tilt operations are disabled when the menu is displayed.


