background image

Introduction

Features

The external CD-RW has the following features:

General

Transportable external drive with Universal Serial Bus (USB) interface

Hot Plug-n-Play compatible

Integrated buffer memory

Power tray loading and ejection of disc (manual eject too)

Housed in an airtight frame casing

Formats and modes supported

CD-ROM (Mode 1), CD-ROM XA (Mode 2 form 1 & 2 data) 

PHOTO-CD (reads only) & Video-CD, CD-I (Mode 2, form 1 and 2)

CD-Digital Audio, CD-EXTRA and CD-I Ready (reads only)

CD-TEXT, CD-Recordable (CD-R), & CD-ReWritable (CD-RW)

Audio

Audio output and headphone jack for audio CD playback

Note:
This manual provides step-by-step instructions for drive installation.
Please read carefully and thoroughly before attempting installation and
save it for future reference.

System requirements

Windows PC

IBM-compatible PC, Pentium 233 MHz or higher

Windows 98 

32MB of RAM or more

Available USB port

3.5” floppy disk drive & a mouse (Microsoft compatible)

Installation requires 125MB of free hard disk drive space

MacOS

Apple iMac or USB equipped G3

Available USB port

32 MB of RAM or more

MacOS 8.5 (USB manager 1.1) or higher

IMPORTANT NOTE:
For best results, Sony CD-R and CD-RW media should be used. 
Problem free operation cannot be guaranteed with other media.

Introduction      5

Contents

Introduction

5

Features..........................................................................................................5
System requirements ......................................................................................5

Location of controls

6

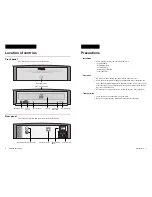
Front panel......................................................................................................6
Rear panel ......................................................................................................6

Precautions

7

Hardware Installation

8

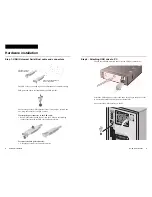
Step 1: USB (Universal Serial Bus) cable and connectors ............................8
Step 2: Attaching USB drive to PC .................................................................9
Step 3: Attaching USB drive to Mac .............................................................16

Software Installation

18

Operating the drive

18

Starting the drive...........................................................................................18
Opening the drawer manually in an emergency...........................................19

Troubleshooting

20

A few words about the USB interface...........................................................20
Troubleshooting table ...................................................................................20
Service contact in Europe.............................................................................21

Specifications

21

4      Contents

Summary of Contents for External USB

Page 1: ...de d emploi Bedienungsanleitung Manual de instrucciones Manuale d istruzione 1999 by Sony Corporation Rev 1 1 BKC 98 0017 17 CD RW Drive External USB User s Guide Mode d emploi Bedienungsanleitung Manual de instrucciones Manuale d istruzione ...

Page 2: ...ation IBM PC PC XT and PC AT are registered trademarks of International Business Machines Corporation Apple iMac MacOS and Macintosh are registered trademarks of Apple Computer Inc PHOTO CD is a registered trademark of Eastman Kodak Company 2 Owner s Record The model and serial numbers are located on the botton of the drive Record these numbers in the spaces provided below Refer to them whenever y...

Page 3: ...ompatible PC Pentium 233 MHz or higher Windows 98 32MB of RAM or more Available USB port 3 5 floppy disk drive a mouse Microsoft compatible Installation requires 125MB of free hard disk drive space MacOS Apple iMac or USB equipped G3 Available USB port 32 MB of RAM or more MacOS 8 5 USB manager 1 1 or higher IMPORTANT NOTE For best results Sony CD R and CD RW media should be used Problem free oper...

Page 4: ...temperature change may cause a malfunction Do not place beverages near drive extending the tray may spill them Transportation Close the disc drawer before moving the drive Keep the original packing materials for future drive transport 6 Location of controls Location of controls Front panel The front panel controls are described below Rear panel The rear panel controls and connectors are described ...

Page 5: ... is easy to use and requires no adjustment of computer settings USB ports and cables are identified by the USB symbol One advantage of the USB connector is that it may only be inserted one way Atop the connector is a USB symbol To attach the port connector of the USB cable Keep USB symbol up and insert it into the USB port Interlocking tongue elements hold the USB cable and port together To remove...

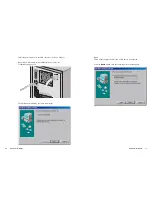
Page 6: ...ton then the following screen should appear Hardware installation 11 Insert the port connector of the USB cable into the PC s USB port Note If no USB connector s available already in use see Troubleshooting page 20 Then Windows will display the following message 10 Hardware installation ...

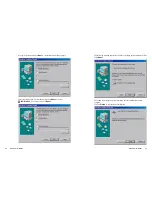
Page 7: ...pears indicating that the installation almost complete Click on Finish to complete the installation Hardware installation 13 Accept the default and click Next the following message appears Insert the floppy USB driver diskette and click Next or select CD ROM drive see below and click Next 12 Hardware installation ...

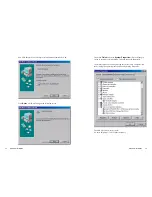
Page 8: ... by moving the cursor to My Computer icon then clicking the opposite mouse button and selecting Properties The USB drive is now ready to use PC users skip Step 3 it is for Mac customers Hardware installation 15 Now USB adapter driver will begin its installation automatically with Click Next which will bring up the following screen 14 Hardware installation ...

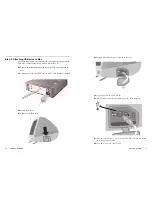
Page 9: ...ns The USB drive is now ready to use Hardware installation 17 1 2 1 2 Step 3 Attaching USB drive to Mac The following example will be for an iMac G3 computers equipped with USB have a visible connector on the back much like a PC Unpack the included materials and locate the USB port symbol on the drive Attach power cable then USB cable to drive s USB interface connector Switch the drive on Open cov...

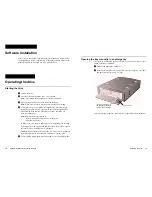
Page 10: ...or eject button to close the tray Drive may begin reading Lead in Data as it accepts disc Busy indicator lights amber while reading Lead in Data For subsequent drive operation see software instructions Note Busy indicator stays lighted if the disc is not properly placed on loading tray a malfunction occurs In either case eject the disc and replace it in the loading tray assuring it sits properly i...

Page 11: ...information and more can be downloaded at http www sony cp com cd rw Specifications 21 20 Troubleshooting Specifications Troubleshooting Problems installing or operating the CD RW drive Please review Has the prescribed installation procedure been followed Please verify the power supply cable is attached to drive and that the tray responds to the eject button See the Troubleshooting Table section b...

Reviews: