background image

5-1

DXC-190

5-1. Notes on Repair Parts

1. Safety Related Components Warning

w

Components marked 

!

 are critical to safe operation.

Therefore, specified parts should be used in the case of

replacement.

2. Standardization of Parts

Some repair parts supplied by Sony differ from those

used for the unit. These are because of parts common-
ality and improvement.

Parts list has the present standardized repair parts.

3. Stock of Parts

Parts marked with “o”  at SP (Supply Code) column of

the spare parts list may not be stocked. Therefore, the
delivery date will be delayed.

4. Harness

Harnesses with no part number are not registered as
spare parts.

In need of repair, get components shown in the list and
repair using them.

Section 5

Spare Parts

Summary of Contents for ExwaveHAD DXC-190

Page 1: ...COLOR VIDEO CAMERA DXC 190 SERVICE MANUAL 1st Edition ...

Page 2: ...den Um die Gefahr eines elektrischen Schlages Feuergefahr und Verletzungen zu vermeiden sind bei Wartungsarbeiten strikt die Angaben in der Anleitung zu befolgen Andere als die angegeben Wartungsarbeiten dürfen nur von Personen ausgeführt werden die eine spezielle Befähigung dazu besitzen AVERTISSEMENT Ce manual est destiné uniquement aux personnes compétentes en charge de l entretien Afin de rédu...

Page 3: ...477 Board 3 1 3 4 FC 75 Board 3 2 3 5 IR 29 Board 3 2 3 6 CT 194 Board 3 2 4 Electrical Alignment 4 1 Preparations 4 1 4 1 1 Equipment Required 4 1 4 1 2 Connection for Adjustment 4 2 4 1 3 Adjustment Commander 4 2 4 1 4 Terminals to Determine Signals for Adjustment 4 3 4 1 5 Chart to Select Items Requiring Adjustment 4 3 4 2 Adjustment Method 4 4 4 2 1 Preparations for Adjustment 4 4 4 2 2 Writin...

Page 4: ... 4 7 4 5 Checking after Adjustment 4 8 4 5 1 Checking SYNC Level Adjustment 4 8 4 5 2 Checking Burst Level Adjustment 4 8 4 5 3 Checking SET UP Adjustment 4 8 4 5 4 Checking 0 db Adjustment 4 8 4 5 5 Checking Auto Iris VS Level 4 8 4 5 6 Checking AGC Adjustment 4 8 4 5 7 Checking WB adjustment 3200K preset and data take in 4 9 4 5 8 Checking Color Reproduction Adjustment 4 9 5 Spare Parts 5 1 Note...

Page 5: ...3 DXC 190 8 Schematic Diagrams Frame Wiring 8 2 BI 135 8 2 CT 194 8 2 FC 75 8 2 IR 29 8 2 PR 229 8 4 PS 477 8 8 9 Board Layouts BI 135 9 1 CT 194 9 1 FC 75 9 1 IR 29 9 1 PR 229 9 2 PS 477 9 2 ...

Page 6: ......

Page 7: ...the proper operation and application of this unit Part of the Operating Instructions is included also in this Service Manual in Section 1 Operating Instructions Part number 3 205 662 11 Semiconductor Pin Assignments CD ROM Available on request This Semiconductor Pin Assignments CD ROM allows you to search for semiconductors used in Communication System Solutions Network Company equipment Semicondu...

Page 8: ......

Page 9: ...C Rules These limits are designed to provide reasonable protection against harmful interference in a residential installation This equipment generates uses and can radiate radio frequency energy and if not installed and used in accordance with the instructions may cause harmful interference to radio communications However there is no guarantee that interference will not occur in a particular insta...

Page 10: ...UNC 20 length 4 5 0 2 mm 3 AGC automatic gain control ON OFF switch The automatic gain function automatically adjusts picture gain in accordance with the brightness of the subject 4 Gain up switch Switching the Gain up switch to the TURBO mode while the AGC switch 3 is on increases gain by up to 6 dB over the NORM normal mode 5 BLC backlight compensation ON OFF switch When switched on this functio...

Page 11: ...BNC type w MONITOR OUT monitor output or VBS IN VS IN external synchronization signal input connector BNC type wa DC 12 V power input terminal DC 12 V 10 ws S VIDEO OUT connector Y C output connector wd Mode power mode change switch Power source changes as follows MODE wd Connector ql Connector w Power source A DC IN VS IN MONITOR OUT YS W170 W270 VIDEO OUT B VIDEO OUT VBS VS IN DC 12 V or CMA D2 ...

Page 12: ...UNC 20 screw to mount the camera on a tripod Fitting the camera tripod adaptor G 1 Loosen screws 1 4 that secure the tripod adaptor Remove the adaptor carefully and do not pull at the screws 2 Remove screws 5 and 6 3 Attach the tripod adaptor on the opposite side and insert screws 5 and 6 on the surface from which the adaptor was removed F D E Connections Using a DC 12 V power supply Set the MODE ...

Page 13: ...S mount adjustable Signal system NTSC color system Synchronization system internal external switched automatically External synchronization signal VBS VS sync level 0 3 5 0 Vp p 75 ohm Horizontal resolution 470 TV lines Minimum illumination 0 8 lux F 1 2 with AGC set to ON in TURBO mode Video output 1 Vp p 75 ohm negative sync Video S N 50 dB or more with AGC set to OFF Weight ON Electronic shutte...

Page 14: ......

Page 15: ...d SW501 DC12V OFF ON SW502 MODE A B Side panel FC 75 Board SW401 AUTO IRIS VIDEO DC SW403 SHUTTER 0 SW404 AE SPOT 0 1 Four Screws B2 x 4 BI 135 Board 2 Remove the solder Point 3 Filter Block ASSY SW405 AGC OFF AGC TURBO NORM TURBO BLC OFF BLC SHUTTER OFF SHUTTER WHT BAL A 0 1 B 0 1 SHARP NORM SHARP SC PHASE 0 180 C CS adjusting ring C CS ...

Page 16: ...s of coordi nate lower 2 digits 8 Press the FOCUS key to confirm that the point is compensated 9 If not compensated press the FOCUS key and repeat steps 6 and 7 10 In case that there are two points to be compensated press the FOCUS key first and then the REC REVIEW key to switch the marker And repeat steps 6 and 7 11 After completion of compensation turn on the camera and confirm that the desired ...

Page 17: ...signal entered from CN203 14 pin to detect whether a burst is present or not VBS or VS If a burst signal is detected It is entered to the IC212 61 pin The output of phase comparison with internal subcarrier IC212 47 pin is reflected to the internal subcarrier VCXO near X203 through LPF at the IC219 periphery Also sync source signal is entered to the IC212 60 pin to comprise VReset H PLL Sync detec...

Page 18: ...servo and DC servo 2 Various function select switches DIP switch SW405 rotary switches SW403 404 slide switch SW401 and tactile switch SW402 are arranged 3 5 IR 29 Board A noise filter and auto iris lens connector are arranged on this board 3 6 CT 194 Board Input output pins control switches and variable resistors for adjustment are arranged on this board ...

Page 19: ...ight source for test chart J 6431 100 A Vectorscope Scale For color adjustment J 6430 530 A Board for Interface Tool J 6020 250 A Color Bar Chart For color adjustment J 6082 053 B Remote Commander RM 95 RM 95 partly converted J 6080 053 A Color Temperature Correction Filter C14 For the confirmation after the adjustment Copy the last page on a transparent sheet R YL G WB B CB CY MG R Y B Y 5600K J ...

Page 20: ... 6082 053 B Slide switch INITIAL DATA write button STEP FORWARD button STEP REVERSE button DATA write button DISPLAY MODE UP button RM 95 DATA UP button DATA DOWN button DISPLAY MODE DOWN button MODE DISPLAY CHANGE button CHANGE DATA button External sync source When the VCO fsc adjustment Pattern box PTB 500 CAMERA Waveform monitor Vectorscope Color monitor Remote commander RM 95 J 6082 053 B Inte...

Page 21: ...ms Requiring Adjustment Begin selection Is required writing in initial data Note Has the PRE ADJUSTMENT be performed Perform the CAMERA ADJUTMENT End of Adjustment Write in initial data Refer to 4 4 2 Perform the PRE ADJUSTMENT Yes No Yes No Note The writing in initial data should be performed when replacing IC215 and or IC217 on PR 229 board Board for Interface Tool TP5 E1 TP4 TP3 TP2 TP1 PR 229 ...

Page 22: ...ta 01 4 Press the DATA write button of the commander 5 The numerals indicated on the LCD of the commander will go out for a few seconds and then will reappear OFF NORM OFF OFF 0 0 NORM 0 AGC TURBO BLC SHUTTER 1 A 1 B SHARP 180 WHT BAL 4 3 PRE ADJUSTMENT 4 3 1 28MHz Adjustment Subject Free Measurement point PR Board TP201 Equipment Frequency Counter Adjustment point PR Board CT201 Adjustment value ...

Page 23: ...r once As a result the displayed mode will change to 5A 2 Shoot the all white pattern and adjust the lens iris so that the CCD LEVEL TP1 is 250 20 mV p p 3 Press the data change button to ensure the measured voltage is within the specified value range Subject Measurement point Equipment Display Mode Specification Lens opening Free SYNC level of VIDEO OUT Waveform Monitor 2B 40 4 IRE Close Subject ...

Page 24: ...tch the mode between 50 and 51 by pressing the MODE DISPLAY CHANGE button and while doing so press the data change button so that the white bright spot is placed over the origin of the vector scope IRIS OUT Image Level The white bright spot moves in this direction when the mode indication is 50 The white bright spot moves in this direction when the mode indication is 51 All white pattern Image lev...

Page 25: ...rection of the bright spot when mode is 04 c Moving direction of the bright spot when mode is 05 d Moving direction of the bright spot when mode is 06 4 Press the data up button of the commander so that the data indicator displays 03 5 Make sure that the data indicator of the commander automatically displays FF If the data indicator does not display FF there may be a defective part in the circuit ...

Page 26: ...3 Check to see if the measured voltage is within the Specified range If there is a point where the specified value for step 3 is satisfied while varying the lens iris within the specified value range for step 2 the adjustment is correct 4 5 6 Checking AGC Adjustment 1 Turn OFF the AGC and CCD IRIS switches on the side panel of the camera 2 Shoot the all white pattern and adjust the lens iris so th...

Page 27: ...of the camera 2 Shoot the color bar chart 3 Adjust the iris diaphragm so that the VIDEO OUT white image level is set within the specified value range 4 Check to see if the center of the bright spot of each of the colors is within the color reproduction range If there is a point where the specified value for step 4 is satisfied while varying the lens iris within the specified value range for step 3...

Page 28: ......

Page 29: ...fer from those used for the unit These are because of parts common ality and improvement Parts list has the present standardized repair parts 3 Stock of Parts Parts marked with o at SP Supply Code column of the spare parts list may not be stocked Therefore the delivery date will be delayed 4 Harness Harnesses with no part number are not registered as spare parts In need of repair get components sh...

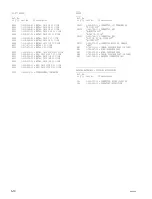
Page 30: ...1 s CONNECTOR S TERMINAL 4P 12 1 580 172 11 s CONNECTOR MICRO RECEPTACLE 4P 13 1 793 002 11 s CONNECTOR BNC 14 1 766 287 11 s WIRE FLEXIBLE CARD 15 1 769 275 11 s WIRE FLEXIBLE CARD No Part No SP Description 16 1 782 538 11 s CABLE FLEXIBLE FLAT 28 CORE 17 1 790 157 11 o CABLE FLEXIBLE FLAT 14 CORE 18 1 957 799 11 o HARNESS CONNECTOR CB1 19 2 042 385 00 s CAP C MOUNT 20 3 608 575 12 o PANEL DC REA...

Page 31: ...11 s TANTALUM CHIP 10uF 20 16V C406 1 164 156 11 s CERAMIC CHIP 0 1uF 25V C407 1 164 156 11 s CERAMIC CHIP 0 1uF 25V C408 1 164 156 11 s CERAMIC CHIP 0 1uF 25V C409 1 104 914 11 s TANTALUM 22uF 20 16V C410 1 163 021 91 s CERAMIC 0 01uF 10 50V C411 1 163 021 91 s CERAMIC 0 01uF 10 50V C412 1 135 259 11 s TANTALUM CHIP 10uF 20 6 3V CN401 1 573 768 21 o CONNECTOR 1 5MM SMD 5P MALE CN402 1 573 368 11 ...

Page 32: ... 25V C221 1 162 970 11 s CERAMIC CHIP 0 01uF 10 25V C222 1 162 970 11 s CERAMIC CHIP 0 01uF 10 25V C223 1 104 851 11 s TANTALUM CHIP 10uF 20 10V C224 1 104 851 11 s TANTALUM CHIP 10uF 20 10V C225 1 162 911 11 s CERAMIC CHIP 6PF 50V C226 1 216 864 11 s METAL CHIP 0 5 1 16W C227 1 162 970 11 s CERAMIC CHIP 0 01uF 10 25V C228 1 162 970 11 s CERAMIC CHIP 0 01uF 10 25V C229 1 135 259 11 s TANTALUM CHIP...

Page 33: ... s TANTALUM CHIP 10uF 20 6 3V C319 1 162 970 11 s CERAMIC CHIP 0 01uF 10 25V C320 1 162 919 11 s CERAMIC CHIP 22PF 5 50V PR 229ND BOARD Ref No or Q ty Part No SP Description C321 1 104 852 11 s TANTALUM CHIP 22uF 20 10V C322 1 104 852 11 s TANTALUM CHIP 22uF 20 10V C323 1 162 970 11 s CERAMIC CHIP 0 01uF 10 25V C324 1 135 091 00 s TANTALUM CHIP 1uF 20 16V C325 1 164 315 11 s CERAMIC 470PF 5 50V C3...

Page 34: ... IC TC75W51FU TE12R IC220 8 759 523 02 s IC TC74HC4053AFT EL IC221 8 759 058 54 s IC TC7S00FU TE85R PR 229ND BOARD Ref No or Q ty Part No SP Description IC222 8 759 058 54 s IC TC7S00FU TE85R IC223 8 759 523 78 s IC TC74VHC00FT EL IC225 8 759 262 03 s IC MC14577CF IC226 8 759 262 03 s IC MC14577CF IC227 8 759 271 88 s IC TC7SHU04FU TE85R IC229 8 759 058 54 s IC TC7S00FU TE85R IC230 8 759 277 63 s ...

Page 35: ...245 1 216 813 11 s METAL CHIP 220 5 1 16W R246 1 216 817 11 s METAL CHIP 470 5 1 16W PR 229ND BOARD Ref No or Q ty Part No SP Description R247 1 216 833 11 s METAL CHIP 10K 5 1 16W R248 1 216 797 11 s METAL CHIP 10 5 1 16W R249 1 216 827 11 s METAL CHIP 3 3K 5 1 16W R250 1 216 825 11 s METAL CHIP 2 2K 5 1 16W R251 1 216 833 11 s METAL CHIP 10K 5 1 16W R254 1 216 833 11 s METAL CHIP 10K 5 1 16W R25...

Page 36: ...819 11 s METAL CHIP 680 5 1 16W R352 1 218 881 91 s METAL CHIP 27K 0 5 1 16W R353 1 216 821 11 s METAL CHIP 1K 5 1 16W R355 1 216 847 11 s METAL CHIP 150K 5 1 16W R356 1 216 825 11 s METAL CHIP 2 2K 5 1 16W R357 1 216 829 11 s METAL CHIP 4 7K 5 1 16W R358 1 218 855 11 s RES CHIP 2 2K 0 5 1 16W R359 1 216 815 11 s METAL CHIP 330 5 1 16W R360 1 216 823 11 s METAL CHIP 1 5K 5 1 16W R361 1 216 821 11 ...

Page 37: ...TOR CHIP 22uH L804 1 411 227 21 s INDUCTOR 100uH PS 477 BOARD Ref No or Q ty Part No SP Description L805 1 414 265 21 s INDUCTOR 4 7uH L806 1 414 275 11 s INDUCTOR 220uH L807 1 414 275 11 s INDUCTOR 220uH L808 1 412 027 11 s INDUCTOR CHIP 2 2uH L809 1 412 030 11 s INDUCTOR CHIP 22uH L810 1 412 030 11 s INDUCTOR CHIP 22uH Q801 8 729 230 60 s TRANSISTOR 2SA1586YG Q802 8 729 231 74 s TRANSISTOR 2SC41...

Page 38: ...K 5 1 10W R853 1 216 073 00 s METAL CHIP 10K 5 1 10W R854 1 208 830 11 s RES CHIP 100K 0 5 1 10W R855 1 208 830 11 s RES CHIP 100K 0 5 1 10W T801 1 450 976 11 s TRANSFORMER CONVERTER FRAME Ref No or Q ty Part No SP Description CN502 1 566 850 11 s CONNECTOR S TERMINAL 4P S VIDEO OUT CN504 1 580 724 11 s CONNECTOR BNC A MONITOR OUT B VBS IN VS IN CN505 1 580 724 11 s CONNECTOR BNC A DC IN VS IN VID...

Page 39: ... Page or ID No 2SA1162 YG TE85L TC001 01 2SA1586 YG TC001 01 2SA1586YG TE85L TC001 01 2SB1122 TC002 01 2SB1122 S TD TC002 01 2SC2712 YG TC001 02 2SC2712 YG TE85L TC001 02 2SC3617 TC002 02 2SC3617 T1TL TC002 02 2SC4116 GL TC001 02 2SC4116 YG TC001 02 2SC4116GL TE85L TC001 02 2SC4116YG TE85L TC001 02 2SC4178 F14 TC001 02 2SC4178 T1F14 TC001 02 2SD669A C TM006 02 2SD669AVC TM006 02 2SK1875 TC001 05 2...

Page 40: ...NJM2230M NJM2230M TE2 NJM2230M NJM3414AMP TE2 RC4558 NJM431U TE1 NJM431U PQ09RA1 PQ05RF1 PQ09RF11 PQ05RF1 S 80827ALUP EAQ T2 S 8054ALR LN TA75W393FU TA75W393FU TA75W393FU TE12R TA75W393FU TC4W53FU TC4W53FU TC4W53FU TE12R TC4W53FU TC74HC4053AFT EL MC74HC4053F TC74VHC00FT EL TC74HC00P TC74VHC123AFT EL TC74HC123P TC75W51FU TE12R TC75W51FU TE12R TC7S00FU TE85R TC7S00F TC7SH00FU TE85R TC7S00F TC7SH04FU...

Page 41: ...7 1 DXC 190 7 1 PR 229 Board CT 194 Board FC 75 Board IR 29 Board PS 477 Board BI 135 Board Section 7 Block Diagrams 7 1 Board Location DXC 190 ...

Page 42: ...220 LPF SC_CMP X201 IC204 236 OSC IC208 205 OSC IC227 228 240 LPF H V_CMP Q202 IC207 OSC SEL IC214 RESET LAN ON OFF LAN SI LAN SO LAN TG_RST TG_CS XTAL EXTAL XRDT VD_DET INT LL EXT SC_OUT CAM_SCK CAM_SO CAM_SI XCORE_CS XCORE_RST EVR1_LD ROM_BUSY XROM_CS SYNC IN T DETECT_IN V_LOCK_IN EXSTAT AGC TURBO_AGC BLC SHUTTER APC WB1 WB2 0 PI ONE_AWB SHT1 SHT2 SHT3 SHT4 WIND1 WIND2 WIND3 REFHL PHASE SC PHASE...

Page 43: ... Q809 810 812 DRIVER T801 TRANSFORMER PS 477 CT 194 IR 29 FC 75 IC802 EXT_VS SEL IC804 SERIES REG Q803 804 POWER SEL Q805 806 808 MPX Q801 802 LPF IC401 Q401 DC SERVO CONTROL SW401 AUTO IRIS SW402 AWB LOCK SHUTTER PHASE SC PHASE AE SPOT SW403 ROTARY SW404 ROTARY RV402 RV401 CN401 CN802 CN701 CN702 LENS Q701 F501 CN801 CN501 CN503 CN803 CN402 SW405 SW501 SW502 DC12V MODE DC12V A MONITOR OUT B VBS I...

Page 44: ......

Page 45: ...8 1 DXC 190 8 1 Section 8 Schematic Diagrams ...

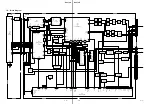
Page 46: ...H 4P 10 16V NJM3414AMP TE2 10k RN C 1k 10k RN C 10k 2 2k 15K 0 1 F 22k 0 1 16V B 150k 15k 1k 0 1 25V B 150k 0 0022 50V B XP4601 TXE NJM3414AMP TE2P 33k 33k 33k 33k 33k 33k 33k 33k 33k 33k 33k 33k 33k 33k 33k 33k 0 01 10 6 3V TA 22 0 01 22 22µH 50k 50k 0 1 F 0 1 F 33k 22µH 2SD669A C DC NM ICX248AK 1 N ICX249AK 1 P 5 6 7 2 1 6 5 4 3 1 2 3 4 8 5 1 3 2 4 5 1 3 2 4 1 3 5 7 9 111315 16 14 12 10 8 6 4 2 ...

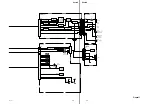
Page 47: ...MG DC12V RD36ES T1B2 75 MODE RD5 6ES T1B2 RD5 6ES T1B2 RD5 6ES T1B2 RD5 6ES T1B2 4P 3 1 2 6 4 5 12V 12V 5V NC INT_OVL PW_CONT VIDEO GND VIDEO_DC Y_OUT GND C_OUT GND EXT_VS 15V 5V 3 3V Y_OUT GND C_OUT 9V 8 5V GND VIDEO2 GND VIDEO1 INT LL EXT_VS INT OVL NC 5V NC GND 12V 12V PW CONT MONITOR OUT VIDEO DCIN INT OVL EXT VS GND Y OUT GND C OUT PS 477 CT 194 D D IN SW CONT PW IN GND GND 12V Y GND Y OUT C ...

Page 48: ...12 L211 C301 D209 R239 C289 R232 R233 C273 C272 L214 C315 R259 L218 R229 R230 C283 IC213 IC218 C232 C309 C312 C278 R209 R210 C212 C217 R207 IC201 C210 C205 Q201 R206 C206 C207 C263 C265 C262 C264 C251 C252 C293 C295 C276 C277 C275 C274 C223 C221 L205 IC216 C399 C398 R354 L203 C229 D205 R226 IC239 IC237 IC238 C401 C402 C268 IC209 IC212 C303 CXA2006Q T4 0 1 F 0 01 B 0 1 F 3 3k 0 1 F 0 01 B 3 3k 22p ...

Page 49: ...85L 10p CH MC14577CFEL 22 10V 0 01 B 10k 4 7k 2SA1586YG TE85L 680 1M 51p N 39P P 22µH 1M 15k 4 7k 1 5k 330 2 2k 150k 1 8k 15k 680 2SC4116YG TE85L 2SC4116YG TE85L 0 01 B 10 10V 2SA1586YG TE85L 1 5k 2 2k 10k TC74HC4053AFT EL 24k RN C 33k RN C 1k 3 3k 2 2k 10k 6 8k 33k 10k 0 01 B 0 01 B 0 01 B 10 6 3V 22 10V 22 10V 1 16V 10 6 3V 2SA1586YG TE85L 2 2k 33k 47k MC14577CFEL 1 16V 100k 100 6 3V 1 2k 1k 75 ...

Page 50: ...4 R225 C234 C235 X202 C287 C291 CT201 IC205 C244 IC208 C228 Q202 R216 D206 C260 L202 R254 R255 C215 C255 R247 R228 R231 C279 R377 R380 R385 IC202 IC236 R215 C407 IC217 R251 C256 30p DC 40p AC R381 100k HVU359TRF 0 01 B 3p CJ 1M 2 7µH 22p CH 1M 1M 6p CH 22µH 100µH 0 0 N 10k P 0 01 B 47 6 3V 10 6 3V 0 01 B MA111 TX 10 6 3V 10k MB88346BPFV EF 0 01 B 10 10V 22µH 22µH 0 1M 0 01 B MA111 TX 0 1 F 22 6 3V...

Page 51: ... 3V 2SA1586YG TE85L 0 1 TA75W393FU TE12R 1k 10 10V 0 01 0 DTC114EUA T106 MA111 TX 28P 10k 2 1 6 5 4 3 1 4 2 3 8 5 6 7 H9 K27 K26 K22 K7 K29 K20 K19 K2 K1 K23 K21 K25 K3 K8 K9 K5 K24 K6 G6 K30 G20 G4 PHASE SC PH 3 3V GND AGC TURBO BLC SHUTTER WB1 WB2 0 PI SHT1 SHT2 SHT3 SHT4 WIND1 WIND2 WIND3 5V GND DRV EVR LOCK WB IRIS OUT APCN 9V SYNCIN2 SYNCOUT SYNCIN1 RCEX VCC CEX DETOUT GND 5V REFHL 9V GND 1 2...

Page 52: ...0 022 B 0 1 390p CH 120p CH 100p 47 6 3V 470p 22 6 3V 10 10V 4 7 20V 22 6 3V 4 7 20V 2 2 50V 33 25V 0 1 F 0 1 22 6 3V 47 16V 3 3 50V 0 0022 47 16V 22 6 3V 22 6 3V 14P 4P 16P D1FS4 TB MA3J142E0LSO D1FS4 TB RD2 0SB T1 MA8030 TX MA796 TX TL1451ACPW E05 TC4W53FU TE12R NJM431U TE1 PQ09RF11 22µH 4 7µH 220µH 220µH 2 2µH 22µH 22µH 2SA1586YG TE85L 2SC4116GL TE85L DTA114EUA T106 DTA114EUA T106 XN1501 TX 2SC...

Page 53: ...UFFIX 11 CT 194 A SIDE SUFFIX 11 CT 194 B SIDE SUFFIX 11 IR 29 A SIDE SUFFIX 11 IR 29 B SIDE SUFFIX 11 BI 135 A SIDE SUFFIX 11 BI 135 B SIDE SUFFIX 11 FC 75 1 666 048 11 CN401 A2 CN402 D2 IC401 C2 L401 B3 L402 A2 L403 B2 L404 B2 L405 B2 L406 A2 L407 D2 Q401 C2 RV401 D3 RV402 C3 SW401 B3 SW402 C2 SW403 C2 SW404 D2 SW405 A1 B SIDE ...

Page 54: ...B3 IC202 A1 IC203 A3 IC204 A1 IC205 A1 IC206 B2 IC207 A1 IC208 A1 IC209 B2 IC210 C1 IC211 B2 IC212 C2 IC213 C2 IC214 E2 IC215 C1 IC216 C2 IC217 D1 IC218 C2 IC219 C2 IC220 C2 IC221 C1 IC222 C1 IC223 C1 IC224 E3 IC225 D2 IC226 D3 IC227 B2 IC228 B1 IC229 C1 IC230 C1 IC231 D2 IC232 E3 IC233 D2 IC234 E3 IC235 D2 IC236 A1 IC237 B1 IC238 C2 IC239 C2 IC240 B1 IC241 B1 IC242 B1 L201 A1 L202 A1 L203 B2 L204...

Page 55: ...DXC 190 Diameter 80mm Diameter 106mm R YL G B WB CB CY MG R Y B Y 5600K J 6431 100 A R YL G B WB CB CY MG R Y B Y 5600K J 6431 100 A VECTORSCOPE SCALE ...

Page 56: ...Printed in Japan Sony Corporation 2001 3 26 Communication System Solutions Network Company 2001 DXC 190 UC E 9 955 284 01 ...

Reviews: