99
M
e
nus
SETU
P
M
e
nus
SETU
P
M
e
nus
SETU
P
Using the Screen Menu
Selecting Screen
Mode Options
The Screen Menu includes the following options:
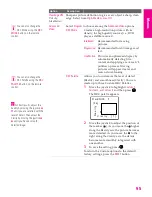
To access the Screen Menu, follow these steps:
To change settings, move the joystick
V
v B b
.
Press
to confirm the selection.
To exit the Menu, press
MENU
.
1.
Display Menu
2.
Highlight
3.
Press to select
MENU
v
Option
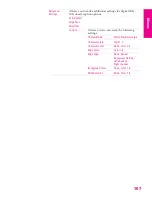
Description
Screen Mode
Enables you to change the picture size for both standard-
definition (480i/480p) and high-definition (720p/1080i)
sources.
For 480i/480p
sources
Select from:
Wide Zoom
,
Normal
,
Full
,
Zoom
.
For details, see page 58.
For 720p/1080i
sources
Select from:
Full
,
Zoom
,
Horizontal Expand
,
Vertical Expand
. For details, see page 59.
Screen Mode is unavailable while in Twin View.
✍
In some cases, wide-screen programs will be shown in
aspect ratios that require the display of bars at the top
and bottom of your 16:9 screen. For more details, see
page 118.
4:3 Default
Select the default Screen Mode to use for 4:3 sources.
To select a Screen Mode to use when channels or inputs are
changed, select from:
Wide Zoom
,
Normal
,
Full
,
Zoom
. For
details, see page 58.
To continue using the current Screen Mode setting when
the channel or input is changed, select
Off
.
Vertical Center
Allows you to move the position of the picture up and
down in the window. (Available only in Wide Zoom and
Zoom modes.)
Move the joystick
V
or
v
and press
to choose a
correction b15 and -15 (Zoom mode), and +5 and
-5 (Wide Zoom mode).
Vertical Size
Allows you to adjust the vertical size of the picture.
(Available only in Wide Zoom and Zoom modes.)
Move the joystick
V
or
v
and press
to choose a
correction b7 and -7.
You can also change the
Screen Mode using the
SCREEN MODE
button on the
remote control.
34XBR.book Page 99 Thursday, May 20, 2004 7:09 AM
Summary of Contents for FD Trinitron WEGA Hi-Scan KD-34XS955
Page 215: ......
Page 219: ......
Page 222: ...15 SETUP Setup SETUP SETUP SETUP SETUP Rear Panel 3 4 1 2 5 6 7 8 9 q qa qs ...
Page 253: ......
Page 299: ......
Page 317: ......
Page 329: ......
Page 333: ......
Page 342: ......
Page 347: ...13 SETUP Setup SETUP SETUP SETUP SETUP Rear Panel 3 4 1 2 5 6 7 8 9 q qa ...
Page 378: ......
Page 428: ......


