24
SETU
P
SETU
P
S
E
TU
P
SETU
P
Set
up
SETU
P
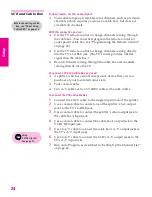
VCR and Cable Box
For best results, use this connection if:
❑
Your cable company scrambles some channels, such as premium
channels (which requires you to use a cable box), but does not
scramble all channels.
With this connection you can:
❑
Use the TV remote control to change channels coming through
the cable box. (You must first program the remote control for
your specific cable box; see “Programming the Remote Control”
on page 49.)
❑
Use the TV remote control to change channels coming directly
into the TV’s CABLE jack. (The TV’s tuner provides a better
signal than the cable box.)
❑
Record channels coming through the cable box and channels
coming directly into the TV.
To connect a VCR and cable box, you need:
❑
A splitter, which is a small, inexpensive device that you can
purchase at your local electronics store.
❑
Four coaxial cables.
❑
Two A/V cables or two S VIDEO cable with audio cables.
To connect the VCR and cable box
1
Connect the CATV cable to the single (input) jack of the splitter.
2
Use a coaxial cable to connect one of the splitter’s two output
jacks to the TV’s CABLE jack.
3
Use a coaxial cable to connect the splitter’s other output jack to
the cable box’s input jack.
4
Use a coaxial cable to connect the cable box’s output jack to the
VCR’s RF input jack.
5
Use an A/V cable to connect the cable box’s A/V output jacks to
the TV’s A/V input jacks.
6
Use an A/V cable to connect the VCR’s A/V output jacks to the
TV’s A/V input jacks.
7
Run Auto Program, as described in “Setting Up the Channel List”
on page 43.
Before connecting a cable
box, see “About Using
CableCARD” on page 15.
Using
S VIDEO jacks?
See page 21.
XS.book Page 24 Friday, May 21, 2004 9:38 AM
Summary of Contents for FD Trinitron WEGA Hi-Scan KD-34XS955
Page 215: ......
Page 219: ......
Page 222: ...15 SETUP Setup SETUP SETUP SETUP SETUP Rear Panel 3 4 1 2 5 6 7 8 9 q qa qs ...
Page 253: ......
Page 299: ......
Page 317: ......
Page 329: ......
Page 333: ......
Page 342: ......
Page 347: ...13 SETUP Setup SETUP SETUP SETUP SETUP Rear Panel 3 4 1 2 5 6 7 8 9 q qa ...
Page 378: ......
Page 428: ......


