44
KD-30XS955/34XBR960/34XS955/36XS955
KD-30XS955/34XBR960/34XS955/36XS955
SECTION 3: SAFETY RELATED ADJUSTMENTS
3-1. PREPARATION BEFORE
CONFIRMATION
Standard ....................................................................................................
135.3 ± 1 VAC
Check Condition:
AC input voltage: 120 (± 2) VAC
Note: If using a stabilized power supply, make sure that the distortion
factor is 3% or less.
Setting Mode: ............................................................................................
Full mode
Signal Input: ..............................................................................................
Cross-hatch of NTSC
Initial Setting: .............................................................................................
Standard Reset condition
Confi rm Point:............................................................................................
Across CN5509 PIN 9 for B+ of DZ Board
3-1.1 HOLD-DOWN
OPERATION
CONFIRMATION
1. Using an external DC power supply, apply 5.3 ± 0.5 Vdc between
Pin 2 of CN507 (jig connector) and ground (Pin 8); confi rm set goes
to hold-down (main power relay click).
2. Remove the external DC power supply.
3-2. B+ MAX CONFIRMATION
Standard
135.3 ± 1 VAC
Check Condition:
AC input voltage: 120 (± 2) VAC
Note: If using a stabilized power supply, make sure that the distortion
factor is 3% or less.
Setting Mode: ............................................................................................
Full mode
Signal Input: ..............................................................................................
Cross-hatch of NTSC
Initial Setting: .............................................................................................
Standard Reset condition
Confi rm Point:............................................................................................
Across CN5509 PIN 9 for B+ of DZ Board
3-3. B+ VOLTAGE CHECK
Standard:..........................................................................135.3 ± 1 VDC
Measurement point:
CN5509 pin (9) for B+ of [DZ] board
Input Video Signal:............................................................All Black Signal
Picture level:..................................................Picture/Brightness
Minimum
HV Probe: Service can use Fluke 80K-40 or equivalent.
3-4. HIGH VOLTAGE (HV) CHECK
Standard:............................................................................32.5 ± 0.5 kV
Measurement point:............................................................Anode of CRT
Input Video Signal:............................................................All Black Signal
Picture level:..................................................Picture/Brightness Minimum
3-5. PREPARATION FOR HV AND IK
PROTECTOR CHECK
1. Remove DZ board screws and carefully lift board as necessary to
gain access to the bottom of the board.
2. Unsolder CN5001 pin 1 to open ABL connection to AZ board.
(Alternately, open AZ - DZ connector (CN509-CN5001) and carefully
push pin 1 metal tab (ABL) up from the bottom and pull up from the
top using long nose pliers and release it from the connector, then
close the connector with pin 1 connection now open.)
3. Install jumper wire from MZ board connection CN2304 pin 1 to CN509
pin 1 to inject 5V to ABL line. (Alternately, use STBY 5V, IC501 Pin O
on AZ board)
4. Unsolder CN5009 pin 8 (H-prot).
5. Open ABL pin 1 of T8001 (RHT) on DZ board and connect analog
current meter.
3-6. HV PROTECTOR CHECK
3-6-1. CUT OFF CONDITION
Input Video Signal:............................................................All Black Signal
Picture level:..................................................Picture/Brightness Minimum
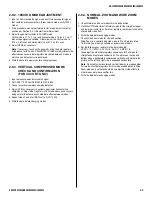
1. Confi rm ABL current which should be approximately 0.160mA.
2. Short across C8002, C8021, and C8052.
3. Turn off the set and install precision VR1 jig (a multi turn pot initially
set to 100K) to IC8005 pin 1 (It’s the unmarked IC8005 pin on PWB A
side, neither K nor A.) and GND (C8076 -).
4. Restore power and adjust HV to obtain 36.4 ± 0.15kV by precision
VR1 jig.
Note:
If the picture turns bright red or other color and the set shuts
down, place a 10 M resistor on the CX board between G2 and E2
pins on the socket. Confi rm G2 adjustment before returning set to
production.
5. Remove short from C8002 and confi rm that hold down activates.
6. Short C8002 again and confi rm that HV recovers.
7. Re-adjust HV to obtain 33.5 ± 0.2 kV by precision VR1 jig.
8. Remove short from C8002 and C8021 and C8052.
9. Confi rm that hold down does not activate.
Note:
Remove the 10 M resistor , if installed in step D above
Summary of Contents for FD Trinitron WEGA Hi-Scan KD-34XS955
Page 215: ......
Page 219: ......
Page 222: ...15 SETUP Setup SETUP SETUP SETUP SETUP Rear Panel 3 4 1 2 5 6 7 8 9 q qa qs ...
Page 253: ......
Page 299: ......
Page 317: ......
Page 329: ......
Page 333: ......
Page 342: ......
Page 347: ...13 SETUP Setup SETUP SETUP SETUP SETUP Rear Panel 3 4 1 2 5 6 7 8 9 q qa ...
Page 378: ......
Page 428: ......

