11
Power ON/Degaussing
Overview
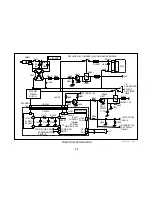
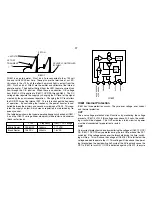
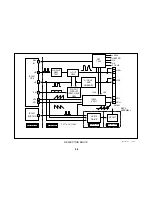
The Power ON/Degaussing circuit shown also includes the AC input and
Reset circuits. When the unit is first plugged in, power is applied to the
line filter to the Standby Supply. The Standby Supply powers the System
Control IC, EEPROM, remote sensor and reset circuits. After reset, if a
Power ON command is received, the System control IC outputs voltages
to turn ON the Power and Degauss relays. When operating correctly, the
following can be observed in sequence: the power relay clicks, one sec-
ond later the degauss relay clicks, the hum of the DGC is heard for about
two seconds, the degauss relay clicks again two seconds later and then
finally a picture is displayed. This entire sequence occurs within the first
5-10 seconds the unit is powered ON.
AC Input
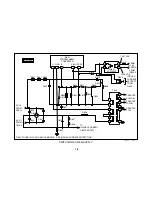
The AC is input to the A board through CN602. The Hi side of the AC line
passes through T602/1 and 2, and R605 and R606. These resistors are
inrush current limiters. They will be replaced with jumpers in all 24” and
above models. The Lo side of the line passes through T602/4 and 3.
After this occurs, AC is applied to the following three circuits. They are
the Standby Power Supply, the Main Switching Supply and the Degauss-
ing Circuit.
Standby Supply
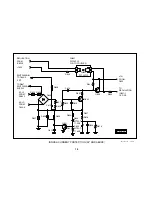
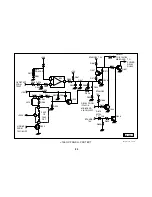
The Standby Supply is similar to the one used in the AA2W chassis. There
is an excerpt from CTV-26 included in the Appendix
. Keep in mind that
the circuit is the same functionally, but the component identities will
be different
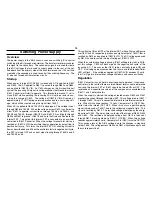
. When AC is applied to the Standby Power Supply circuit, it
begins to operate and outputs 7.5 VDC. This Standby 7.5 volts is applied
to the MB board via pin 3 of CN2002 and CN1004. This voltage is input to
IC1305/4. IC1305 is a 5V Regulator that also outputs the 5 volts to be
used for reset. The Standby 5 voltage is output IC1305/5 to IC1001/27
Vcc. The reset 5 volts is output IC1305/2 to IC1001/30 Reset through a
RC network. This RC network provides the delay necessary for Reset to
occur. After Reset occurs, IC1001 Control Tuning System begins execut-
ing instructions. One of its first tasks is to read and load the contents of
the external NVM into the registers of IC1001 via the I²C bus. The data in
the NVM contains the service data as well as any data relating to cus-
tomer control settings such as volume level.
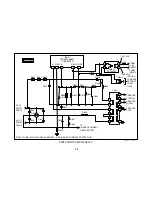
Power ON
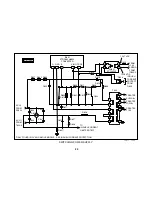
When the Power On command is received from the Power Switch or the
remote control, IC1001/8 Relay goes LOW. This LOW is sent to the A
board via pin 7 of CN1004 and CN2002. It is then applied to Q604/B,
turning Q604 OFF. When Q604 is OFF, the Standby 7.5 volts is applied
to the base of Q607 through R661 and R630. This turns Q607 ON and
allows current to flow through RY602, which causes the contacts in RY602
to close. When the contacts close, AC is applied to D605 Bridge Recti-
fier. This allows the Switching Supply to begin to operate. When the
switching supply is operating, the set should be ON.
Degaussing
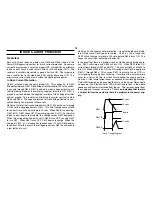
About one second after the Power Relay is closed, the Degauss Relay is
closed. This occurs because IC1001/13 outputs a HIGH, which is sent to
the A board via pin 6 of CN1004 and CN2002. It is then applied to Q609/
B. This turns Q609 ON, allowing current to flow through RY601 Degauss
Relay. This closes the contacts of RY601 and allows current to flow through
THP601 and the DGC. This action is accompanied by the sound of the
DGC humming. Current flows through the DGC until THP601 becomes
warm. THP601 is a thermistor and its resistance increases rapidly as its
temperature increases. Its resistance will increase so much that after
about two-three seconds, current flowing through the DGC will be greatly
reduced. After about five seconds, IC1001/13 DGC goes LOW and the
Degauss Relay is turned OFF.
Shutdown
The outputs from the Latch and the Standby 7.5 volt over voltage protec-
tion circuit are connected to either side of R630. If either circuit goes low,
the power relay will turn OFF. The LOW from the latch circuit will also be
applied to the HLDWN line, which is input to IC1001/35 for use by Self-
Diagnostics.
Summary of Contents for FD TRINITRON WEGA KV-13FM12
Page 27: ...22 NOTES ...
Page 48: ...APPENDIX ...

