background image

22

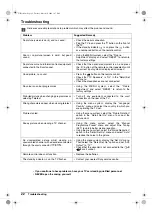
Troubleshooting

Troubleshooting

Here are some simple solutions to problems which may affect the picture and sound.

Problem

Suggested Remedy

No picture (screen is dark), and no sound.

• Check the aerial connection.
• Plug the TV in and press the 

 button on the front of

the TV.

• If the standby indicator 

 is on press the 

 button

or a numbered button on the remote control.

Poor or no picture (screen is dark), but good
sound.

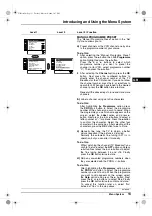
• Using the MENU system, select the “Picture

Adjustment“ display and select “RESET“ to return to
the factory settings.

No picture or menu information from equipment
connected to the Scart socket.

• Check that the optional equipment is on, and press

the 

 button of the remote control repeatedly until

the correct input symbol is displayed on screen.

Good picture, no sound.

• Press the 

 button on the remote control.

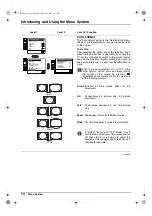
• Check that “TV Speakers” is “On” in the “Detail Set

Up” menu.

• Check the Headphones are not connected.

No colour on colour programmes.

• Using the MENU system, select the “Picture

Adjustment“ and select “RESET“ to return to the
factory settings. 

Distorted picture when changing programmes or
selecting Teletext.

• Turn off any equipment connected to the scart

connectors on the rear of the TV.

Wrong characters appear when viewing teletext.

• Using the menu system, display the “Language/

Country” menu and select the country in which you
are operating the TV set.  

Picture slanted.

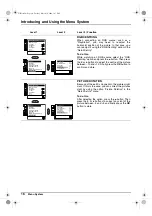
• Using the menu system, select the “Picture Rotation”

option in the “Detail Set Up” menu to correct the
picture slant.

Snowy picture when viewing a TV channel.

• Using the menu system, select the “Manual

Programme Preset” menu and adjust Fine Tuning
(AFT) to obtain better picture reception.

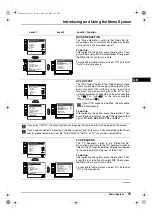
• Using the menu system, select the “Noise Reduction”

option in the “Detail Set Up” menu and select “Auto”
to reduce the noise in the picture.

No unscrambled picture whilst viewing un
unscrambled channel with a decoder connected
through the scart connector 

3

/

3

.

• Using the menu system, display the “Set Up” menu.

Then select the “Detail Set Up” option and set “AV3
Output” to “TV”.

• Check that the decoder is not connected to the 

2

/

2

 scart socket.

Remote control does not function.

• Replace the batteries.

The standby indicator 

 on the TV flashes.

• Contact your nearest Sony service centre.

S

• If you continue to have problems, have your TV serviced by qualified personnel.
• NEVER open the casing yourself.

GB text.fm  Page 22  Tuesday, March 30, 2004  3:47 PM

Summary of Contents for FD Trinitron WEGA KV-28CS70

Page 1: ...28CS70U KV 32CS70U 2004 by Sony Corporation Operating Instructions GB Before operating the TV please read the Safety Information section of this manual Retain this manual for future reference Cover U fm Page 1 Wednesday June 9 2004 12 13 PM ...

Page 2: ...ith the following instructions The wires in this mains lead are coloured in accordance with the following code Blue Neutral Brown Live As the colours of the wires in the mains lead of this apparatus may not correspond with the coloured markings identifying the terminals in your plug proceed as follows The wire which is coloured blue must be connected to the terminal which is marked with the letter...

Page 3: ...uttons 5 Overview of TV Buttons 6 Installation Inserting Batteries into the Remote Control 6 Connecting the Aerial and VCR 6 First Time Operation Switching On the TV and Automatically Tuning 7 Menu system Introducing and Using the Menu System 9 Menu Guide Picture Adjustment 9 Sound Adjustment 10 Sleep Timer 11 Language Country 11 Auto Tuning 11 Programme Sorting 12 Programme Labels 12 AV Preset 12...

Page 4: ...et as this could result in a fire or electric shock Never spill liquid of any kind on the set If any liquid or solid object does fall into the cabinet do not operate the TV Have it checked immediately by qualified personnel Take care not to place heavy objects on the power lead as this could result in damage We recommend you wind any excess lead around the holders provided on the rear of the TV Un...

Page 5: ... again to watch the selected channel b If Media Selector is set to VCR or DVD Use these buttons to control the main functions of your VCR or DVD 1 2 qk qj qg qf qd qs 4 6 7 8 q 5 9 3 qa qh ql 9 Recording button When Media Selector qd is set to VCR press this button if you wish to record a programme q Selecting channels Press this button to select the next or previous broadcast channel qa Muting th...

Page 6: ...you insert the supplied batteries observing the correct polarities Always remember to dispose of used batteries in an environmental friendly way Connecting the Aerial and VCR Connecting cables are not supplied SO NY CO RP OR AT IO N JA PA N 4 SO NY CO RP OR AT IO N JA PA N 4 For more details of VCR connection please refer to the section Connecting Optional Equipment of this instruction manual MANU...

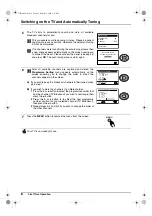
Page 7: ... a Language menu appears automatically on the TV screen 2 Press the v or V button on the remote control to select the language then press the OK button to confirm your selection From now on all the menus will appear in the selected language 3 Because of the earth s magnetism the picture might slant The Picture Rotation menu allows you to correct the picture slant if it is necessary a If it is not ...

Page 8: ...ep the broadcast channels in their tuned order go to step 7 b If you wish to store the channels in a different order 1 Press the v or V button to select the programme number that has the channel TV Broadcast you wish to rearrange then press the b button 2 Press the v or V button to to select the new programme number position for your selected channel TV Broadcast then press the B button 3 Repeat s...

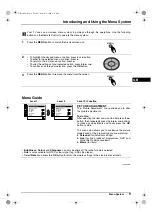
Page 9: ...he picture adjustments To do this After selecting the item you want to alter press the b button then repeatedly press the v V B or b buttons to make any adjustments and finally press the OK button to store This menu also allows you to customise the picture mode based on the programme you are watching v Personal for individual settings v Live for live broadcast programmes DVD and Digital Set Top Bo...

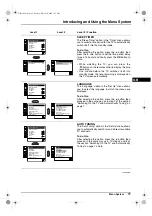
Page 10: ... the broadcast signal e g in the case of advertisements If you are listening to the TV through headphones the Effect option is automatically switched to Off If you select Dolby Virtual in the Effect option the Auto Volume option is automatically switched to Off and vice versa The BBE High Definition Sound system is manufactured by Sony Corporation under license from BBE Sound Inc It is covered by ...

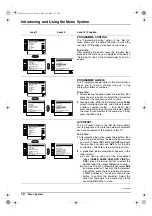
Page 11: ...TO TUNING The Auto Tuning option in the Set Up menu allows you to automatically search for and store all available TV channels To do this After selecting the option press the b button then proceed in the same way as in TV steps 4 and 5 of the section Switching On the TV and Automatically Tuning on page 7 and 8 Picture Adjustment Mode Personal Contrast Brightness Colour Sharpness Hue Reset OK Timer...

Page 12: ...ess the b button to confirm 2 A predefined label automatically appears in the label column a If you want to use one of the 6 predefined labels CABLE GAME CAM DVD VIDEO or SAT press the v or V buttons to select the desired label then press OK button to store b If you want to set a different label select Edit and press b button Then with the first element highlighted press the v or V buttons to sele...

Page 13: ... a letter number or for a blank Press the b button to confirm the character Select the other four characters in the same way After selecting all the characters press the OK button twice to store c Manually fine tune the TV to obtain a better picture reception if the picture is distorted Normally the automatic fine tuning AFT is in operation but you can alter it manually To do this Whilst watching ...

Page 14: ... following formats Smart Imitation of wide screen effect for 4 3 broadcasts 4 3 Conventional 4 3 picture size full picture information 14 9 Compromise between 4 3 and 16 9 picture size Zoom Widescreen format for letterbox movies Wide For 16 9 broadcast Full picture information In Smart Zoom and 14 9 modes a part of of the top and bottom of the screen are cut off Press the v or V buttons to adjust ...

Page 15: ...unscrambling TV SPEAKERS The TV Speakers option in the Detail Set Up menu allows you to mute the TV speakers in order to listen to the TV from an external amplifier connected to the audio outputs on the rear of the TV set To do this After selecting the option press the b button Then press the v or V buttons to select Off Finally press the OK button to confirm and store To cancel this function late...

Page 16: ...otation in the Detail Set Up menu To do this After selecting the option press the b button Then press the v or V buttons to correct any slant of the picture between 5 and 5 and finally press the OK button to store Picture Adjustment Mode Personal Contrast Brightness Colour Sharpness Hue Reset OK Set Up Language Auto Tuning Programme Sorting Progamme Labels AV Preset Manual Programme Preset Detail ...

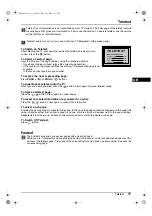
Page 17: ...ade a mistake retype the correct page number If the counter on the screen continues searching it is because the page is not available In that case input another page number To access the next or preceding page Press PROG or PROG buttons To superimpose teletext onto the TV Whilst you are viewing teletext press the button Press again to cancel teletext mode To freeze a teletext page Press the button...

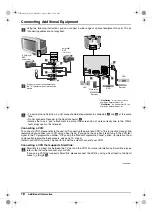
Page 18: ...his instruction manual We recommend you connect your VCR using a Scart lead If you do not have a Scart lead tune in the VCR test signal to the TV programme number 0 by using the Manual Programme Preset option for details of how to manually programme these presets see page 13 step a Refer to your VCR instruction manual to find out the output channel of your VCR Connecting a VCR that supports Smartl...

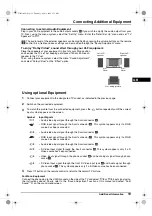
Page 19: ...rect input symbol appears on the screen Symbol 1 1 2 2 3 3 4 4 Input Signals Audio video input signal through the Scart connector E RGB input signal through the Scart connector E This symbol appears only if a RGB source has been connected Audio video input signal through the Scart connector F RGB input signal through the Scart connector F This symbol appears only if a RGB source has been connected...

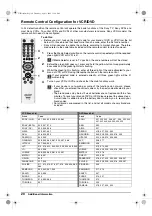
Page 20: ...unctions work If your device is not working or some of the functions do not work please check that you entered the correct code or try the next code allocated to your brand The brand codes may be lost if weak batteries are not replaced within a few minutes To reset your brand of DVD or VCR please repeat the above steps A small label is added inside the battery door to allow you to record your bran...

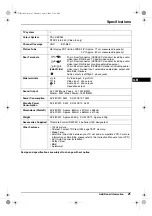
Page 21: ... input 4 pin DIN 4 Video input phono jack 4 Audio input phono jacks i Headphones jack Sound Output 2 x 20W Music Power 2 x 10W RMS Woofer 30W Music Power 15W RMS Power Consumption KV 28CS70 94W KV 32CS70 102W Standby Power Consumption KV 28CS70 0 4W KV 32CS70 0 4W Dimensions WxHxD KV 28CS70 Approx 844mm x 517mm x 548mm KV 32CS70 Approx 933mm x 562mm x 572mm Weight KV 28CS70 Approx 43 5Kg KV 32CS70...

Page 22: ... or selecting Teletext Turn off any equipment connected to the scart connectors on the rear of the TV Wrong characters appear when viewing teletext Using the menu system display the Language Country menu and select the country in which you are operating the TV set Picture slanted Using the menu system select the Picture Rotation option in the Detail Set Up menu to correct the picture slant Snowy p...

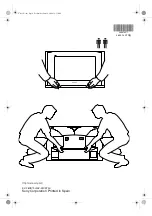
Page 23: ...Cover U fm Page 3 Tuesday March 23 2004 8 32 AM ...

Page 24: ...Sony Corporation Printed in Spain KV 28CS70U KV 32CS70U 2 055 142 71 1 205514271 Cover U fm Page 4 Wednesday June 9 2004 12 13 PM ...

Reviews: