

Digital 4K Video Camera Recorder/Digital HD Video Camera Recorder
FDR-X1000V/HDR-AS200V
How to use
Read This First
Identifying the parts
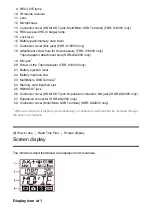
Screen display
Getting Started
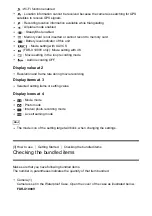
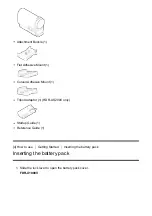
Checking the bundled items
Checking the bundled items [3]
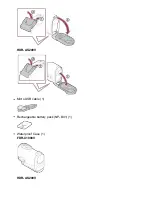
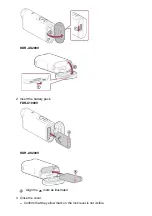
Inserting the battery pack
Inserting the battery pack [4]
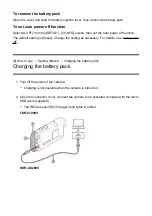
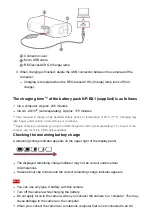
Charging the battery pack
Inserting a memory card


